How to make a weather app using React Native
React Native is a dynamic cross-platform app development framework. If you are one of the developers who want to build a highly interactive app with less coding, React Native is the only solution. I have been using React Native for a while now and have fallen in love with the scalability and usability of this framework. In this article, I will show you how to make a fully running weather app using React Native app development services.
Here, I will use Expo CLI to create the weather app. This tool allows you to easily create a React Native app in minutes. If you want to learn more about Expo CLI and understand its differences from the bare React Native workflow, you should check out this article.
Creating a live weather forecasting app sounds interesting. Right? For this let us first check what prerequisites you should have.
Prerequisites
- Firstly you should set up the React Native environment in your system. If you are unaware of the steps, check out the blog to get a detailed understanding.
- Create a minimalist React Native app with the Expo tool. For this, check out my blog on how to create and run React Native apps.
- Here, I will use the API Calling method to fetch live weather forecasting data. To understand how API calling and GET requests work, visit my blog on ‘How to make a GET request to an API from a React Native app’.
Getting started
Note that I will be building the weather app for Android OS. If you want to build the app on iOS, you need to install Xcode. Since it requires a different approach, I will cover this topic in a different article.
So, let’s get started.
First I will create a minimalist React Native app using Expo. I will give it the name ‘weather-app’. Using the command npx create-expo-app weather-app, I will create the app. Refer to image 1 for the app created on my local C drive.
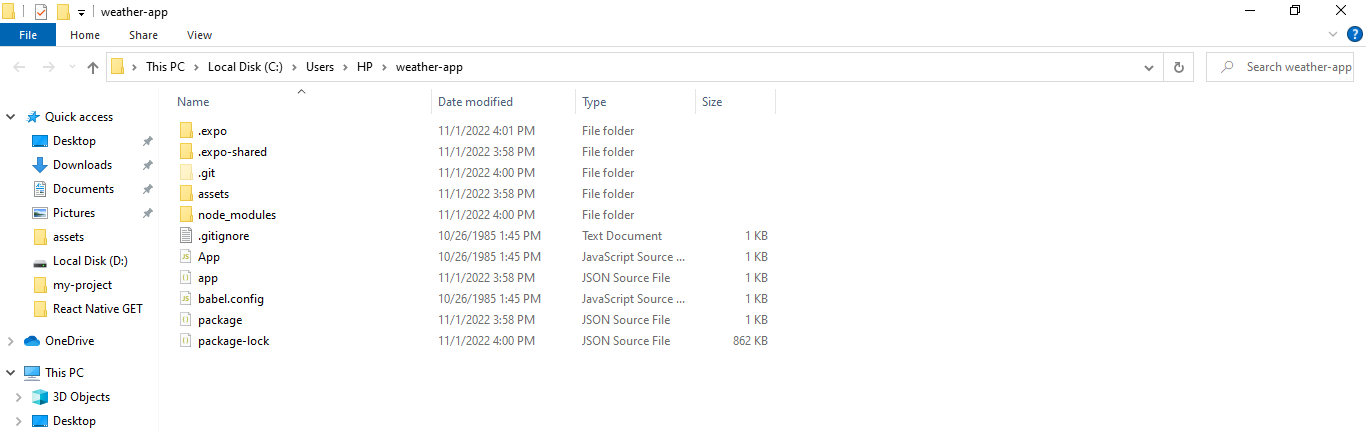
Image 1
Now I will start changing the loading screen and add different images and elements to the root directory of the app.
Building the loading screen
In this step, I will change the loading screen from ‘Open up App.js to start working on your app!’ to ‘Welcome to the Weather forecasting app.’.
For this, go to the app.js file of the app and change the <Text>Open up App.js to start working on your app!</Text>to <Text>Welcome to the Weather forecasting app</Text> Refer to image 2.
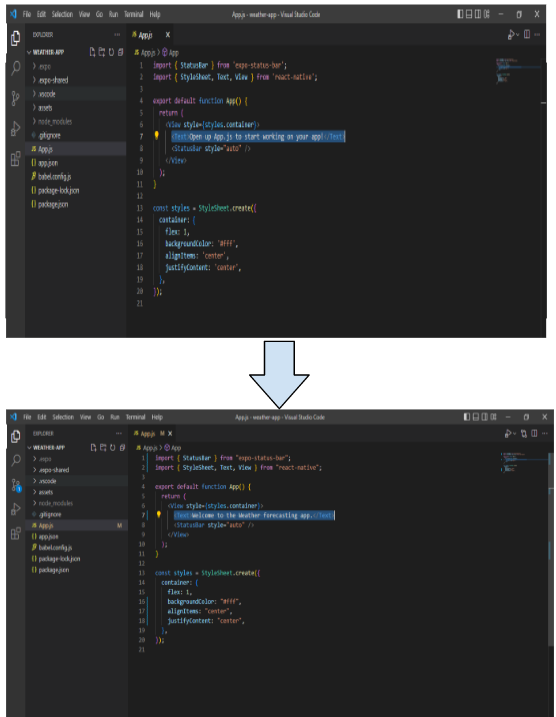
Image 2
Refer to image 3 for the change in the output.
Image 3
Using the isLoading state
- In this step, I will use the isLoading boolean state to define the local state as either true or false. With the practice of using isLoading, you can show whether the data that the app is trying to fetch is loading. You can set it as ‘true’ if it is loading data or else set it as ‘false’ if it is not.
- Here, in this project, I will show the text ‘Welcome to the Weather forecasting app.’ on the app screen when isLoading state is false. For this, consider the following code snippet. Refer to image 4 for the output.
1
2
3
4
5
6
7
8
9
10
11
12
13
14
15
16
export default class App extends React.Component {
  state = {
    isLoading: false
  };

  render() {
    const { isLoading } = this.state;
    return (
      <View style={styles.container}>
        {isLoading ? null : (
          <View>
            <Text>Welcome to the Weather forecasting app.</Text>
          </View>
        )}
      </View>
    );
Image 4
- The main reason to use the isLoading state is to display the weather-based data in the place of the text ‘Welcome to the Weather forecasting app.’ after the API call is established successfully.
- As of now, I will design the code in a manner that the app will display the text ‘Please wait, while it is collecting the weather-based data.’ when the state isLoading is ‘true’. Considering the following code snippet. Refer to image 5 for the output.
1
2
3
4
5
6
7
8
9
10
11
12
13
export default class App extends React.Component {
  state = {
    isLoading: true
  };

  render() {
    const { isLoading } = this.state;
    return (
      <View style={styles.container}>
        {isLoading ? (
          <Text>Please wait, while it is collecting the weather-based data.</Text>
        ) : (
          <View>
Image 5
- After the API fetched the data, you need to change the state of
isLoadingto false.
Incorporating weather component
- In this part, I will show how you can design the body and the title of the first screen of your weather app.
- The title will comprise a small icon and the temperature. A weather-related text will be displayed on the remaining part of the screen.
- For this, you have to create a ‘Component’ folder in the root directory of your app. Then create a new file named ‘Weather.js’ in the Component folder. Here, you will design the code base of your first screen and add different weather components.
- After incorporating the main container, I will specify two containers namely titleContainer and bodyContainer in the main ‘Weather’ container.
- I will also use Feather from @expo/vector-icons directory to display an icon of snowflakes on the first screen of the app. This is one of the benefits that the Expo tool provides. It lets you add different libraries in the root directory of your project with zero hassle. Here, I have used the library named as vector-icons.
- Refer to the following code snippet and image 6 for the output.
1
2
3
4
5
6
7
8
9
10
11
12
13
14
15
16
17
18
19
20
21
22
23
24
25
26
27
28
29
30
31
32
33
34
35
36
37
38
39
40
41
42
43
44
45
46
47
48
49
50
51
import React from "react";
import { View, Text, StyleSheet } from "react-native";
import { Feather } from "@expo/vector-icons";

const Weather = () => {
  return (
    <View style={styles.weatherContainer}>
      <View style={styles.titleContainer}>
        <Feather name="cloud-snow" size={58} color="#00ffff" />
        <Text style={styles.tempText}>Live temperature </Text>
      </View>
      <View style={styles.bodyContainer}>
        <Text style={styles.title}>So Chilled outside!!</Text>
        <Text style={styles.subtitle}>My hands are getting cold.</Text>
      </View>
    </View>
  );
};

const styles = StyleSheet.create({
  weatherContainer: {
    flex: 1,
    backgroundColor: "#f8f8ff",
  },
  titleContainer: {
    flex: 2,
    alignItems: "center",
    justifyContent: "center",
  },
  tempText: {
    fontSize: 40,
    color: "#00ffff",
  },
  bodyContainer: {
    flex: 1,
    alignItems: "flex-start",
    justifyContent: "flex-end",
    paddingLeft: 25,
    marginBottom: 40,
  },
  title: {
    fontSize: 40,
    color: "#00ffff",
  },
  subtitle: {
    fontSize: 26,
    color: "#00ffff",
  },
});

export default Weather;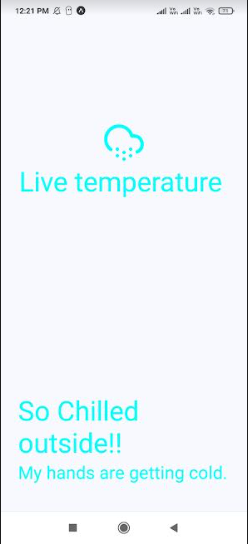
Image 6
API Calling- weather-based data
For fetching data from the web server, you can use the link https://openweathermap.org/. Also, you require a definite API key to call the data from a definite API URL. So, for this, you have to sign in on this website and go to the API section to get the ‘default’ key.
Below is the given code snippet of a weather app that you can use to build your understanding. Refer to image 7 for the output.
Code snippet for the weather app
1
2
3
4
5
6
7
8
9
10
11
12
13
14
15
16
17
18
19
20
21
22
23
24
25
26
27
28
29
30
31
32
33
34
35
36
37
38
39
40
41
42
43
44
45
46
47
48
49
50
51
52
53
54
55
56
57
58
59
60
61
62
63
64
65
66
67
68
69
70
71
72
73
74
75
76
77
78
79
80
81
82
83
84
85
86
import React, { useState, useEffect } from "react";
import { Platform, Text, View, StyleSheet } from "react-native";
import * as Location from "expo-location";
const API_KEY = "5bd2e0405c5b05e7f1dcda04a58619b5";
export default function App() {
  const [location, setLocation] = useState(null);
  const [weatherData, setWeatherData] = useState(null);
  const [loaded, setLoaded] = useState(true);
  useEffect(() => {
    const DataLocation = async () => {
      let { status } = await Location.requestForegroundPermissionsAsync();
      if (status !== "granted") {
        setErrorMsg("Permission to access location was denied");
        return;
      }
      let location = await Location.getCurrentPositionAsync({});
      setLocation(location);
      console.log(location, "tanusree");
    };
    DataLocation();
  }, []);
  async function fectWeatherData(location) {
    let lat = location.coords.latitude;
    let long = location.coords.longitude;
    console.log(lat, long);
    setLoaded(false);
    const API = `https://api.openweathermap.org/data/2.5/weather?lat=${lat}&lon=${long}&appid=${API_KEY}&units=metric`;
    console.log(API);
    try {
      const response = await fetch(API);
      if (response.status == 200) {
        const data = await response.json();
        console.log(data, "12");
        setWeatherData(data);
      } else {
        setWeatherData(null);
      }
      setLoaded(true);
    } catch (error) {
      console.log(error);
    }
  }
  useEffect(() => {
    fectWeatherData(location);
    console.log(weatherData, "345");
  }, [location]);
  return (
    <View style={styles.weatherContainer}>
      <View style={styles.headerContainer}>
        <Text style={styles.tempText}>
          {weatherData && weatherData.main.temp}˚
        </Text>
      </View>
      <View
        style={{
          flex: 1,
          justifyContent: "flex-end",
          marginLeft: 30,
          marginBottom: 40,
        }}
      >
        <Text style={{ fontSize: 40, color: "#FFFFFF" }}>
          {weatherData && weatherData.weather[0].main}
        </Text>
        <Text style={{ fontSize: 20, color: "#FFFFFF" }}>
          {weatherData && weatherData.weather[0].description}
        </Text>
      </View>
    </View>
  );
}
const styles = StyleSheet.create({
  weatherContainer: {
    flex: 1,
    backgroundColor: "orange",
  },
  headerContainer: {
    flexDirection: "row",
    marginTop: 100,
    justifyContent: "space-around",
  },
  tempText: {
    fontSize: 72,
    color: "#FFFFFF",
  },
});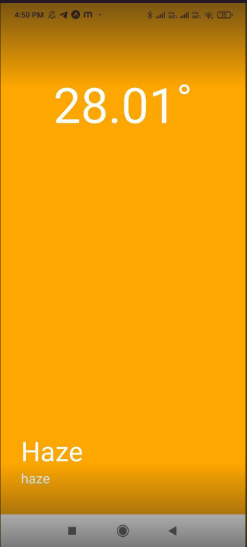
Image 7
Final words
Since I have used Expo, I ran the app on a real Android device using Expo Go. Open the Command prompt from your project and run the npm start. Try the codebase provided and modify the latitude and longitude of the location you want to display the temperature. You can also use this code snippet to add small icons per the weather conditions. Play around with the codebase and run it to see how a real-time weather app works.

A science graduate who has a keen interest to lean about new technologies and research area. With an experience in the field of data analytics and content writing, she aims to share her knowledge among passionate tech readers.

