How to create and run react native app on android phone

The market for mobile apps is growing. The development of React native framework has made it easier to create cross platform mobile applications. Are you looking to be a developer or atleast curious to know how developers create and run apps on real smartphones? Follow this blog tutorial to build a react native app from scratch.
The use case of react native framework is vast. As per a survey of Stack Overflow, React Native technology is in the top 3 positions in terms of the “wanted” framework. 14% of developers have shown interest in building applications with React Native.
What’s new in the newest version of React Native?
Supported by the Meta community, the performance of React Native is improving with the days. To get the most out of the framework, you need to stay updated with the latest 0.70 version of React Native. You will get the “Hermes” as the default engine.
Are you clueless about the benefits of the Hermes engine? With the default engine as Hermes, you can improve the start-up time of your react native app. You can also reduce your app size by decreasing memory usage.
React Native 0.7 has also brought in a unified approach to configure Codegen specs for Android and iOS. Now react native development services can directly use Codegen configuration in the package.json.
Different ways to start building react native apps
Developers of react native create react native apps in two ways. One is by using expo CLI, which is the managed workflow. The other process is by employing the bare workflow or react native CLI.
Expo CLI
Expo CLI is defined as the framework or bundle of tools that act as the wrapper around react native. This has been developed to veil different complexities faced during the app development process. This set of tools pace up the app building process and makes it much easier compared to creating an app with react native CLI. This method is mostly used by users that are completely new to the journey of the app-building process. You can also use Expo CLI if you are familiar with React native, Javascript language, and its syntax.
React Native CLI
React Native is more like a barebone development setup. To develop an app with react native CLI, it will require writing your own natve code. Although using React Native CLI makes the process of app building more complicated, it provides you with enough flexibility to customize your preferred components in your applications. This also allows you to reduce the app size.
Done with the difference between Expo CLI and react native CLI. Now, let us jump into a practical example of building a react native app and running the same on your android phone.
Here, in this article, we will cover both processes. Firstly, let’s start with the bare workflow or react native CLI.
Create and run react native apps with React native CLI or bare workflow
Prerequisites for building react native app
For building a react native app using React native CLI, you have to install the following dependencies in your system.
- Node.js
- React native CLI
- JDK
- Android Studio
- Virtual device or Emulator.
Note that you need to modify the BIOS setup to enable virtualization. If the Virtualization in the Task manager is disabled, it will not allow you to install the emulator or virtual device in Android studio.
Steps to follow for building react native app using React Native CLI
Setting up the environment
Firstly, you have to set up the environment for creating your first react native app. Please check the tutorial blog for setting up your React Native Development Environment.
Search for “setting up the development environment react native” in your browser and click on the link “Setting up the development environment - React Native”.
Here, you need to click on the React native CLI Quickstart and scroll down the page to copy the command npx react-native init AwesomeProject given under Creating a new application. Here, in this command, you can substitute AwesomeProject with any other name you like to give to your app. Here, we have used the npx react-native init ProjectName to consider the app name as ProjectName.
Passing the command
Open the command prompt in your system and hit enter after typing ‘Desktop’. This will allow you to create the app on your Desktop.
Pass the command npx react-native init ProjectName and hit enter.
However, I have come across some errors like the screen showing below.
Stop worrying. This error is due to some compatibility issues with the latest React Native 0.70 version.

If you are facing the same error, then you have to use the previous version of react native by passing the command npx react-native init ProjectName --version 0.68.2 in the command prompt. Here, the specification of version 0.68.2 in the command indicates that we have used the 0.68.2 version of React Naive to deal with the error. Wait for some minutes until your screen shows like the below given image.
Congratulations!!! You have created your first react native app using the bare workflow of react native CLI.
Running react native app in emulators
You want to make sure whether the app you built is operating properly. Right? Then, you need to run the newly built app before publishing it in the app store or Google play store.
Let’s see how you can run your default app which is the ProjectName on your android phone.
- Create a virtual device or android emulator in the android studio. You can also connect your real android phone using a data cable to run the built application.
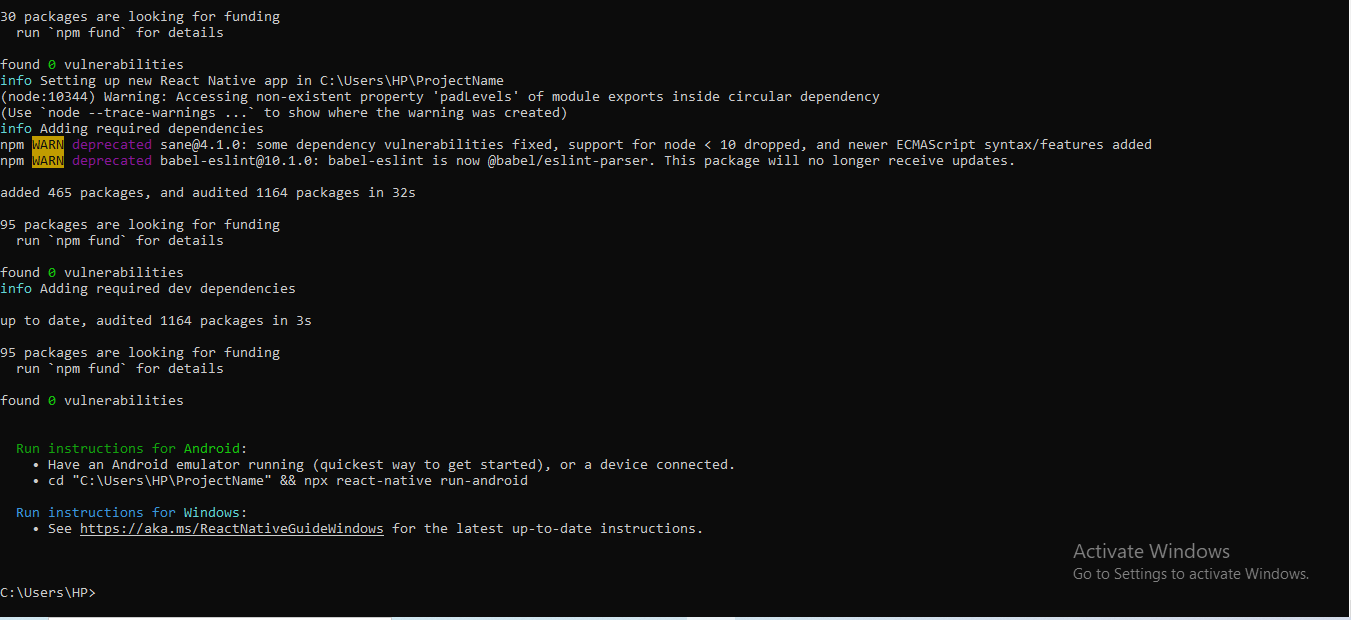
- Copy the command cd
"C:\Users\HP\ProjectName" && npx react-native run-android. You can also find the commandunder the heading‘Run instructions for Android’of your command prompt. - Pass the command in the command prompt and hit enter. Wait for some time and scroll down the common prompt until you see BUILD SUCCESSFUL
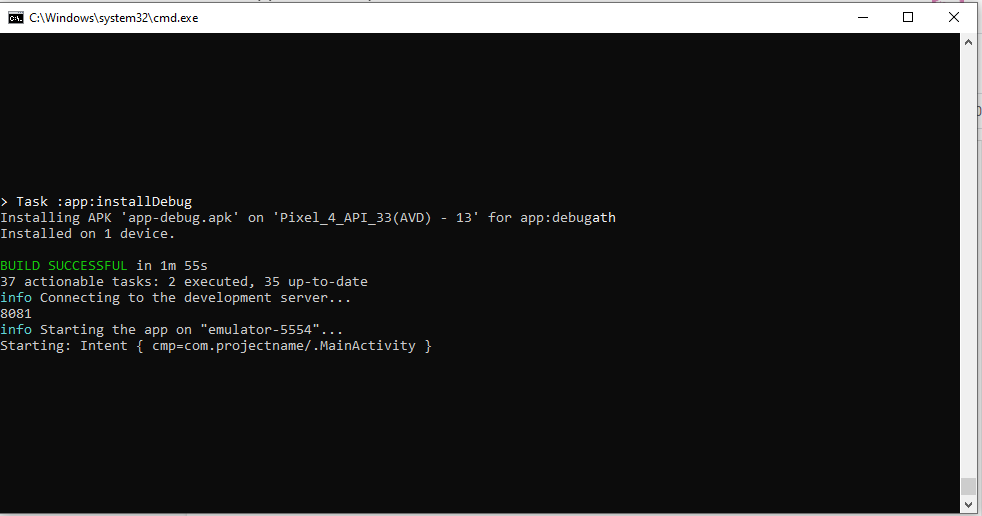
- Check the emulator and your app will start running on the virtual device as shown in the image.

Congratulations!! You have successfully created your first react-native basic app or the first ‘Hello World’ app.
Create and run react native apps with Expo CLI or managed workflow
Prerequisites for building react native app
Before starting with the app creation process, you have to ensure that the following dependencies are installed on your device and android phone, as mentioned.
- Expo CLI on your development system
- Expo Go app on your android phone or emulator on your system.
- Visual Studio Code.
Please refer to the blog tutorial, if you have not set up the environment or installed these dependencies.
Steps to follow for building react native app using Expo CLI
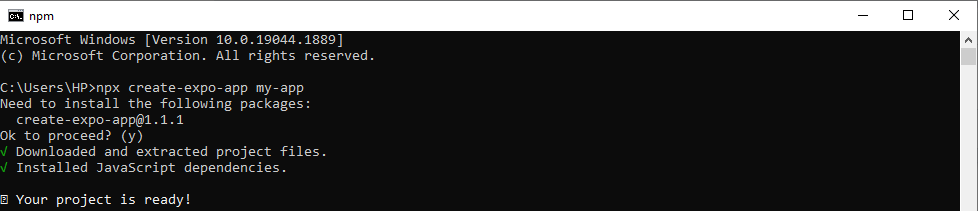
- Initialising the app: You have to pass the command
npx create-expo-app my-appin the Command prompt and hit enter. Here, I have named the project as my-app. You can name it as your preference. In that case, you have to substitute it in the command as well. You have to again hit enter after the following command shows up.
create-expo-app@1.1.1
Ok to proceed? (y)
This step will download the dependencies and packages in the folder. Here, in the following image, it shows that we have installed JavaScript dependencies for ‘my-app’.
Congratulations, your project or app is ready.
- Navigating to project directory: For this step, you have to pass the command
cd my-appand hit enter. This step will allow you to create all the folders and files of the built app (my-app) in your developing system.
Running react native app on your android phone.
Starting the development server
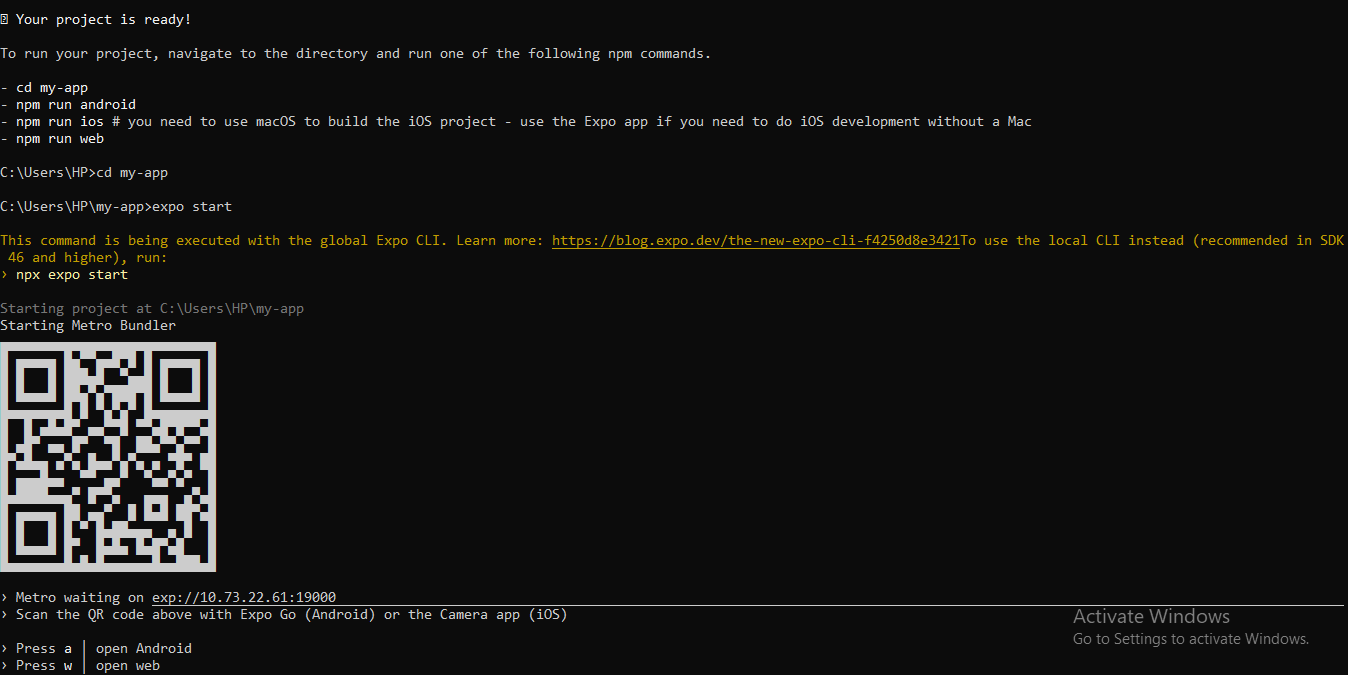
You have to run the command expo startin the command prompt as shown in the given image and hit enter. It will command Expo CLI to start Metro Bundler and your QR scanning code will be generated on the screen.
What is Bundler? Blunder is the HTTP server. The server uses Babel to compile the JavaScript code of your built app. It is further directed to the Expo app for an uninterrupted app running process.
Running app on your android phone:
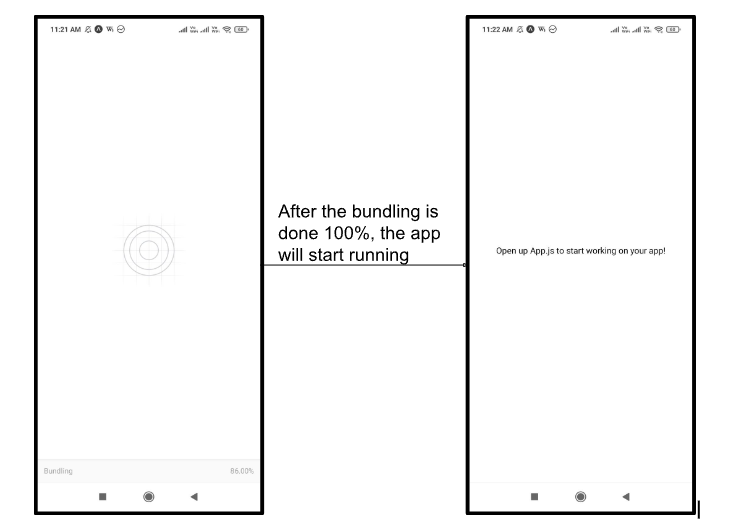
Open the Expo Go app on your phone and scan the code shown on your command prompt screen. You will be directed to a page where you have to wait till it is completely bundled. Next, your phone screen will show the text “Open up App.js to start working on your app!”. This is the default text that you can modify as per your wish to change the welcome message of your app.
Note that you have to connect your system and your phone to the same Wi-Fi network. Missing out on this step will not allow you to run your app on the phone.
Modification in the Visual Studio Code:
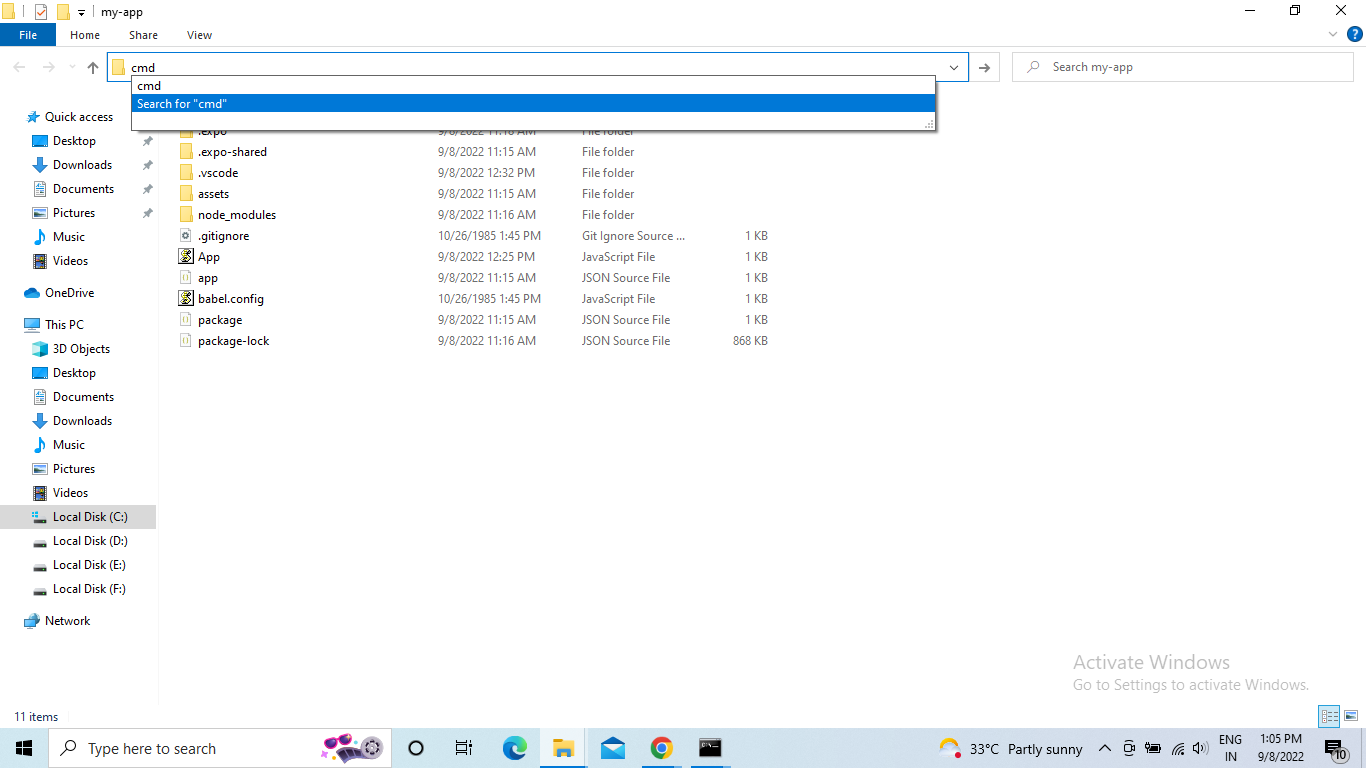
Go to your local Disk which contains your app and hit enter after typing cmd on the panel.
It will open up the command prompt. You have to type code . and hit enter, which will direct you to the Visual Studio Code. Here, you can see the welcome message showing on your phone. You can change the text as per your need.
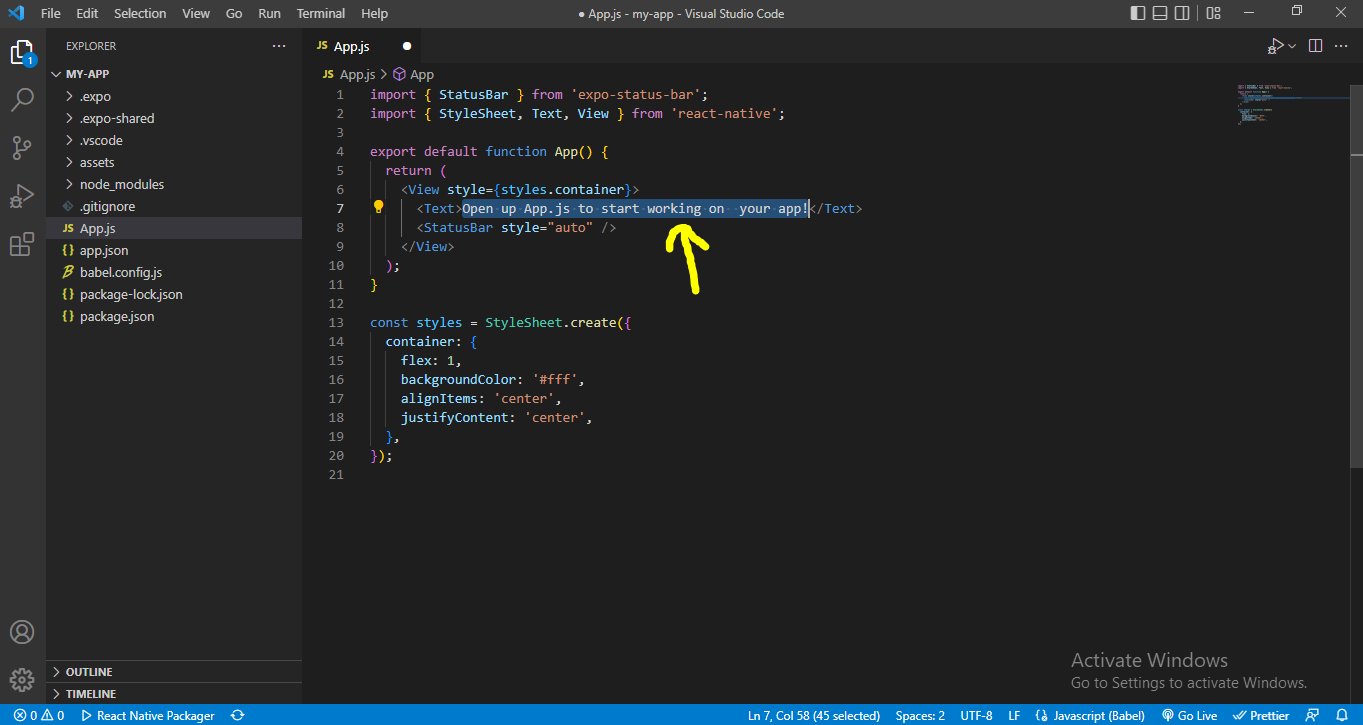
Here, we have written ‘Welcome to 4 Way Technologies’ as the welcome note. Don't forget to save the changes after editing the welcome message. After saving, your made changes will immediately show up on your phone on running your application.

Congratulations!!! you have successfully built and run the app using Expo CLI.
Conclusion
We hope that you have enjoyed creating your first react native application using both the process of React Native CLI and Expo CLI. With Expo CLI, you will find it easier to create an app as you don't need to install the complex Android Studio, JDK, and React Native CLI. Now you can customize your app by using different components. Get interactive with your app!!!

A science graduate who has a keen interest to lean about new technologies and research area. With an experience in the field of data analytics and content writing, she aims to share her knowledge among passionate tech readers.

