How to get Camera access in react native app?

This is a continuation of the React Native tutorial blog where I would introduce you to how to get camera access and click pictures from your react native app.
Now every smartphone has an advanced camera app inbuilt in the device. You can also find camera apps of varied utility in the Android and iOS app store. Hire React Native developers to start with, I will build a basic camera app with a clickable button “camera”. Also, I will build an app for android devices. If you are looking for an iOS-based camera app, this tutorial blog may not help you.
Prerequisite concepts and criteria to be met
Even though you don’t need any prior knowledge to follow the steps, knowing certain concepts beforehand will motivate you to learn more about the utility of the React Native framework.
- You should have the React Native environment set up in your development system. This comprises installing Node.js, React Native CLI, android Studio, JDK (Java SE Development Kit) and VS Code. You also need to set up the Android emulator to run the app and get the output. Here, I will use React Native CLI and not Expo to build the app. So, setting up the environment particularly for the React Native CLI would suffice.
- You should also know how to build and run a basic React Native app. This will help you to navigate through the VS Code and the emulator. Check out the tutorial blog to build your first react native app.
React Native package, components and hooks used
- StyleSheet- Stylesheet in React Native is useful to structure and style different components used in an app. Everytime you want to render a design to an object, you don't have to create a new style.
- Text- Text is one of React Native components which is used to render a text element to a container, navigation bar, container and title. For this, you have to import Text from ‘react-native’.
- View- Without the <View></View> component, you cannot design the UI of an app or a web page. In React Native, you can use the View component to hold the button container. You also have to style and structure the Text components under the View component.
- Button- As the name suggests, Button component is required to render a Pressable element on the app screen. You need to import it from ‘React-Native’ and use it as a reusable component throughout the code.
- Image- Another component of React Native, Image allows you to display images whenever needed. The images can be static resources, network images and local images.
- useState- It is a React Native hook using which you can set the state of the variables. It is used in functional components. With usestate, you can enclose the local state of the defined variable.
- React-native-image-crop-picker- React Native is also preferred by most developers since it allows them to access third-party libraries or packages. For the current project, I have used the package from npm registry. It has enabled the Camera option in my app.
Find the complete codebase for this project in the App.js folder of this Github repository.
Explanation of code snippets
import {StyleSheet, Text, View, Button, Image} from 'react-native';
import React, {useState} from 'react';
import ImagePicker from 'react-native-image-crop-picker';
- The code starts with importing StyleSheet, Text, View, Button and Image from ‘react-native’.
- It imports the hook useState from ‘react’.
- Lastly, import ImagePicker from ‘React-native-image-crop-picker’.
1
2
3
4
5
6
7
8
9
10
11
12
export default function Camera() {
  const [pick, setPick] = useState();
  const cam = () => {
    ImagePicker.openCamera({
      width: 300,
      height: 400,
      cropping: true,
    }).then(image => {
      console.log(image);
      setPick(image);
    });
};- The code opens up an ImagePicker with certain parameters of width, height and cropping.
- Using the console.log() function, it logs the image to the console and sets pick as that image.
- Here, the code attempts to open the camera and click pictures.
1
2
3
4
5
return (
    <View>
      <Text style={{textAlign: 'center', marginVertical: 10}}>
        camera access
      </Text>
Under the return() function, I used the <View> and <Text> component. This is to style the text alignment and vertical margin of the displayed text ‘Camera access’. Refer to image 1
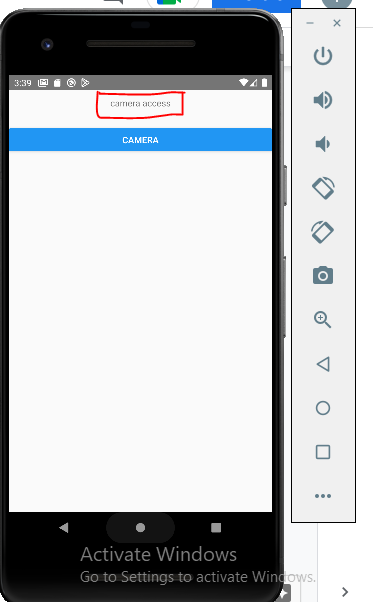
Image 1
1
2
3
4
5
6
7
<View style={{marginVertical: 20}}>
        <Button
          title="camera"
          onPress={() => {
            cam();
          }}
        />
Here, <Button> component is used to get a pressable button on the app display screen with a title “camera”. It also has an onPress() which on pressing calls the cam() function.
1
2
3
4
5
6
7
8
9
10
11
12
13
14
15
16
{pick && (
          <Image
            source={{uri: pick.path}}
            style={{
              width: 200,
              height: 200,
              borderRadius: 50,
              marginHorizontal: 30,
              marginTop: 30,
            }}
          />
        )}
      </View>
    </View>
  );
}
const styles = StyleSheet.create({});
- With this code snippet, you can see how the clicked image source will be styled. The width and height of the clicked image will be 200 pixels each. It will have a horizontal and top margin of 30 pixels each.
Opening camera on the emulator
- Open cmd from your app folder and run npm install. One of the major advantages of using React Native is that you don’t have to install packages separately. By running command npm install, you can manage all the needed dependencies.
- After it is done, run the command:
npx react-native run-android. It will enable the emulator. Wait until the bundling is completed. - You will be directed to a screen showing a blue pressable button with a text ‘CAMERA’. Click on the button. It will take you to a screen similar to the right screen of image 2. Click on ‘GOT IT’ and it will start the camera.
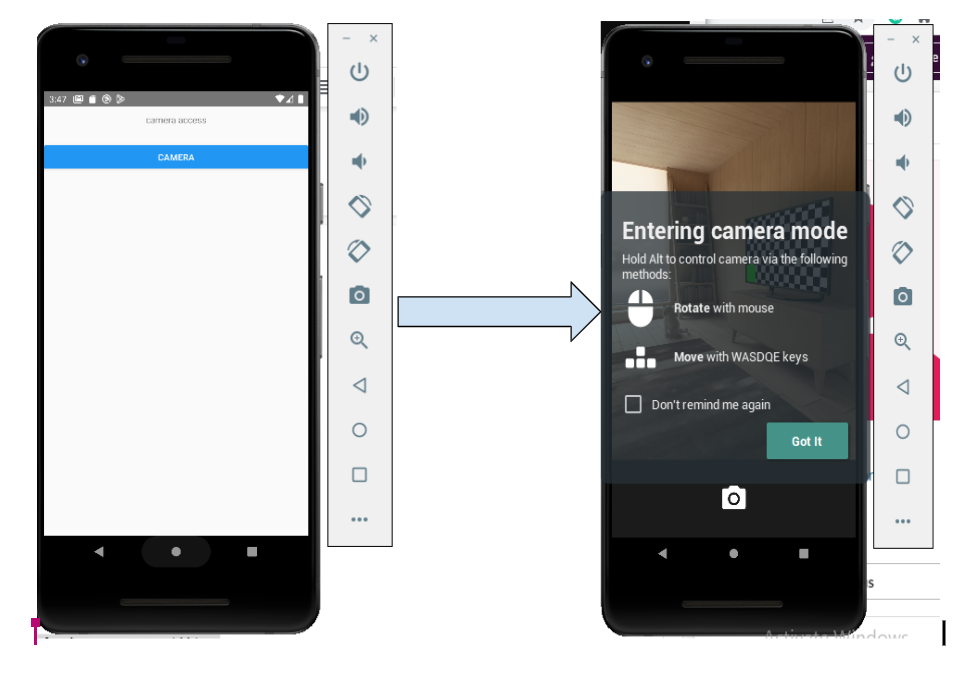
Image 2
For navigating the camera, press Alt and move the mouse + WASDQE to navigate the camera. You can click as many images you want by clicking on the camera icon. Refer to image 3.
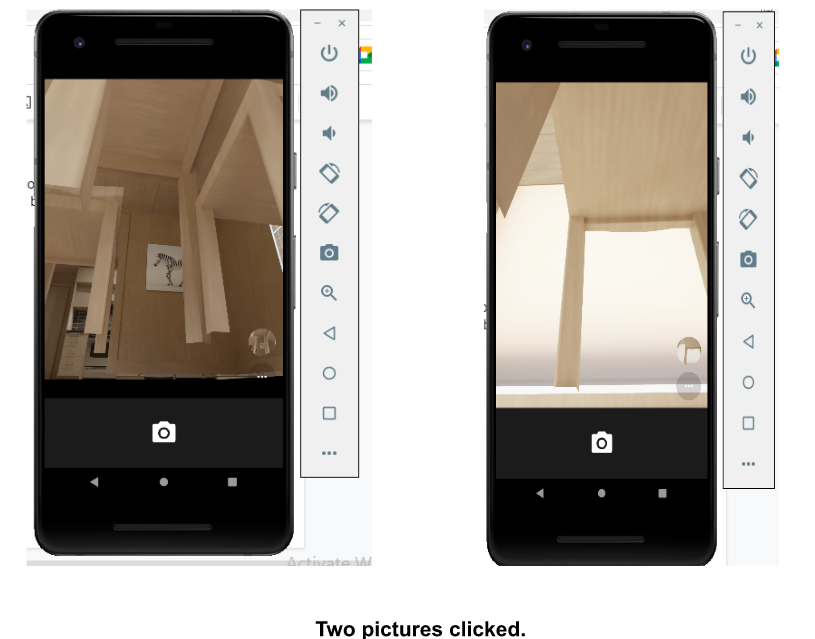
Image 3
On pressing the three dots as shown in image 4, you can also try other options such as set time and get grid while clicking pictures.
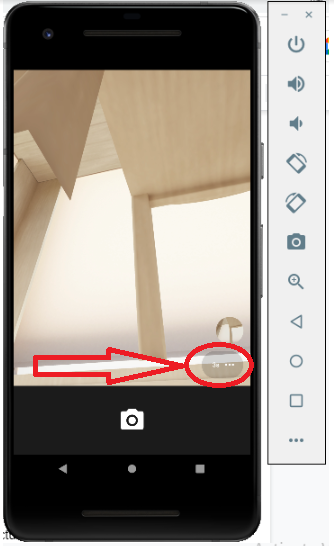
Image 4
Summary
The utility of React Native has simplified the process of building a camera app. I have used the third-party plugin React-native-image-crop-picker from npm registry to access the camera option. It has shortened the codelines of the project. I was only required to import different components and style the elements using StyleSheet. If you have not yet tried the building camera, try the entire code in the VS Code editor to see how fun it can be.

A science graduate who has a keen interest to lean about new technologies and research area. With an experience in the field of data analytics and content writing, she aims to share her knowledge among passionate tech readers.

