How to create a ‘Send Notification’ screen in react native apps?
While making apps for business purposes, it becomes necessary to send timely notifications and alerts to interact with users. For this, the manual effort may not work. Creating push notification features have come into play. React Native app development services brings you a wider possibility where you only need to integrate third-party plugin support to get the necessary components and functionalities.
Here, in this tutorial, I will explain how to get the push notification features in your React Native app.
Prerequisite learning
- Set up your react native development environment. Here, you need to install Android Studio, JDK, Emulator, and VS code. Check this article to get guided support.
- You need to learn about the application of core components of React Native in the codebase. Visit the article to get a basic idea of customizing React Native components.
These are like the foundation of starting with the React Native framework.
Third-party React Native plugin support
The option to integrate third-party native React Native libraries is a blessing for React Native developers. This not only simplifies the coding but makes the app user-friendly in terms of app size.
Here, the important third-party packages that I have used for the current project are @react-navigation/stack, react-native-push-notification, and @react-navigation/native.
- Stack Navigator will allow your react native app to transit between different screens. Every new screen will be located on the top of the built stack. To get the Stack Navigator, you have to run the command
npm install @react-navigation/stackin the command prompt. However, to use this package, you need to make sure that you have all the dependencies associated with @react-navigation/native. For more details regarding its installation, check its documentation page. - The package @react-navigation/native will let you build the navigation structure within the app. It is the most important functionality in terms of rendering a suitable app background that you want to integrate into your app. To install the package, you have to run the command npm install @react-navigation/native. Also, you have to conduct an additional step which is to install react-native-safe-area-context and react-native-screens. For installing these two dependencies, run the command
npx expo install react-native-screens react-native-safe-area-contextin your app directory. - React-native-push-notification is the package that you cannot miss out on. Since I am building the project on android, the update cannot be automated. For accessing the feature of Scheduled Notifications, you have to manually make changes in the AndroidManifest.xml. For its installation, run the command
npm install --save react-native-push-notification.
Explanation of code syntax in the Notification.js folder
1
2
3
import {View, Text, Button, TextInput, StyleSheet} from 'react-native';
import React, {useState} from 'react';
import PushNotification from 'react-native-push-notification';
Get into the first step of the codebase. Firstly, you have to call all the React Native components that you want to use in your app. Here, I have used View, Text, Button, TextInput, StyleSheet, useState, and pushNotification. You need to import all these components from the respective React Native libraries.
const Notification = () => {
For adding different elements, states, and hooks for the push Notification feature, I started by introducing a function Notification. It will return a JSX element.
const [title, setTitle] = useState('None');
const [message, setMessage] = useState('No New Message');
I used the state hook to manage the state of two strings. Here, the strings are Message and Title. However, note that you can also use any strings including empty strings. By calling the setState method, you can update the state. It will change the value of the Message and Title when you change their respective states.
1
2
3
4
5
6
7
8
  const handleNotification = () => {
    PushNotification.localNotification({
      channelId: 'textMsg',
      title: title,
      message: message,
      largeIconUrl: 'https://cdn-icons-png.flaticon.com/512/194/194938.png',
    });
  };
You need to use the function handleNotification to send a notification to the user. Also, you have to use the native component PushNotification from the react-native-push-notification library. PushNotification has functions for both local and remote notifications. Local ones are sent from the app itself, while remote ones are sent by an external server ChannelID, title, message, and largeIconUrl are the strings used as the parameters for PushNotification. The value of channelId is set as ‘textMsg’ while the values of the title and Message will depend on what the user inputs.
largeIconUrl is for setting icons on the app. You can easily add an icon under this parameter by adding the image address in the .png format. Also, you have to add the image to your app’s asset folder.
1
2
3
4
5
6
 const createChannel = () => {
    PushNotification.createChannel({
      channelId: 'text Msg',
      channelName: 'Text message',
    });
  };
Createchannel is a function that I used to create a channel for push notifications. It takes an object (PushNotification) as an argument with two properties: channelId and channelName. The value of the first property is a string, while the second one is also a string.
return (
Now, you have to use the function return() to return the UI of the app. It holds <View>, <TextInput> and <Button>.
1
2
3
4
5
6
<View>
      <TextInput
        style={styles.input}
        placeholder="Title"
        onChangeText={val => setTitle(val)}
      />
Moving forward, I used the style prop, placeholder, and onChangeText props under the TextInput component.
Note that The onChangeText prop is a function prop. Here, it takes in the value of the input field as its argument.
1
2
3
4
5
 <TextInput
        style={styles.input}
        placeholder="Message"
        onChangeText={val => setMessage(val)}
      />
This is similar to the above code syntax but for a different placeholder. Here, I used TextInput to let the app users input their text. This placeholder will have the text “Message” displayed on it before the user starts typing.
You can change the value of the message by typing into the input field. The onChangeText prop calls setMessage() which updates the Message state with whatever is typed in. Here, the function setMessage() takes an argument val. It will indicate the new message as the user input in.
<Button title="Send Notification "
onPress={handleNotification} />
Here, the <Button/> component is for taking two props” title and onPress. handleNotification function is called immediately when the user presses the button. You can refer to handleNotification as a callback function.
</View>
);
};
export default Notification;
The input is the Notification component. The output is a default export of that component. Now it is a function that exports Notification components and lets users use them in other files.
1
2
3
4
5
6
7
8
const styles = StyleSheet.create({
  input: {
    fontSize: 18,
    borderBottomWidth: 2,
    marginTop: 10,
    marginBottom: 10,
  },
});
Now, this way, you can use the StyleSheet to style the input field. It sets the fontSize, marginTop, marginBottom, and borderBottomWidth.
Code snippets in the App.js folder
Open the app.js folder in the Github repository to look at the code syntax and the components used for the app. Apart from importing the native components from third-party React Native libraries, I imported the files HomeScreen, ChatRoom, and Notification as components from ./screens/HomeScreen, ./screens/ChatRoom, and ./Notfication. You can find these components in the same directory as the current file.
Consider the following code snippets from the app.js folder.
const App = () => {
const Stack = createStackNavigator();
Here, App is a function that returns the component createStackNavigator. Wherein Stack is a constant variable with a type Navigator.
With the syntax, return <Notfication />; you can return a stack navigator that contains all other components in the application.
In simpler terms, it calls the entire code stored in the Notification.js folder in the same directory.
Now that the main part of the app building is done, let’s see how you can start the virtual device and run the app.
Testing the app on the emulator
Before running the app, you have to start the emulator on your system.
- For this, run two commands on the command prompt one after the other.
- The first command is npm install and the second one is npx react-native run-android.
- Note that, you have to wait for some time after passing npm install till it installs all the required dependencies.
- Then passing the second command will start the emulator.
- As soon as the emulator starts, you will get a message ‘BUILD SUCCESSFUL’ on the terminal as shown in image 1
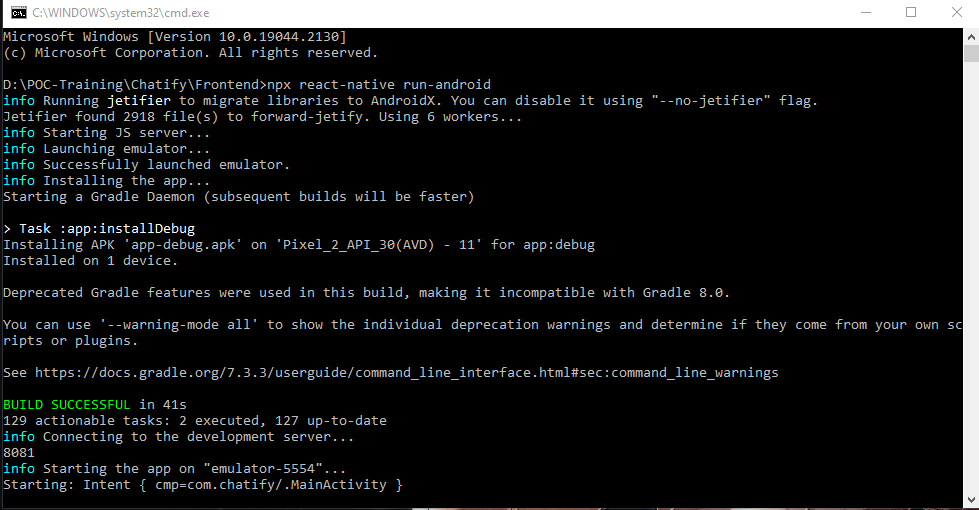
Image 1
- Refer to image 2 for the app interface on the emulator.
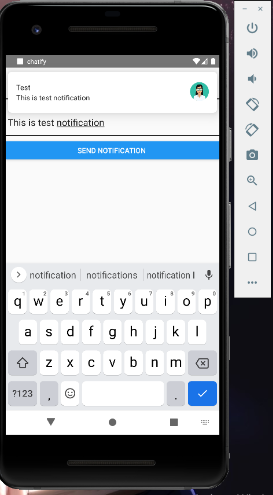
Image 2
- As I input the text “This is the test notification” on the placeholder and press the blue button. It will display a notification pop-up with the message and the icon. Refer to image 3.
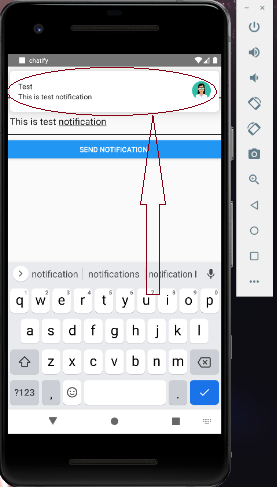
Image 3
Final words
Navigating different featured apps is easy. However, creating such apps takes the maximum effort. On this note, React Native framework and its wide range of functionalities have simplified the developer’s effort. In the making of a push notification-based app, you have to make different folders in the same directory and import those files into the app.js folder. Check the GitHub repository attached and the step-by-step guidance to build your own ‘Send Notification’ screen.

A science graduate who has a keen interest to lean about new technologies and research area. With an experience in the field of data analytics and content writing, she aims to share her knowledge among passionate tech readers.

