How Can I Add FaceBook Authentication in React Native?

Facebook or Meta provides an interactive platform where users can connect with their friends, families, and other acquaintances. They can share pictures and also can create their business pages on this platform. Surfing through this platform may seem easy and profitable. But have you wondered what it takes to create such a platform? It takes a correct choice of framework.
Here, React Native can serve the purpose. It can easily allow you to build the app interface.
Without much ado, let’s learn the adding Facebook authentication in a React Native mobile app.
Setting up the Dev Environment
This project is based on Android and it is developed on Windows. Thus, the setup is done accordingly. If you are an iOS and Mac user, the setup and the process to build this project may differ.
For the Frontend Segment- As we use the React Native framework, we have to set up its environment on the dev system. You have to install React Native CLI.
Note that you can use Expo CLI in its place. Expo CLI is a tool to build React Native apps in a few minutes. However, for the current project, we have used React Native CLI. If you want to learn the difference between React Native CLI and Expo CLI, check the linked article.
If you are also using the React Native CLI to build your project, install Node using Chocolatey. We need Android Studio as it is an Android project. Get an IDE (VS Code) to edit the codebase and lastly configure the environment variable of the ANDROID_HOME.
For further details about the React Native setup, you can check the article curated by the experts of React Native app development company.
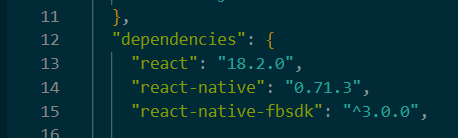
Image 1
Now, comes the main section of the project, i.e., the coding section. Let’s see how you can build the frontend section for the app.
Creating the App Interface
Configuration for the Facebook Authentication
In this step, you need to ensure that you have enabled the permissions in your project dashboard.
For running the project, make sure to update the AndroidManifest.xml and strings.xml folder. To understand the further details, follow the steps mentioned in the article.
Building Code Section
Check the entire code in the linked GitHub repository.
If you want to get a detailed explanation of the coding section, follow along.
1
2
3
import { StyleSheet, Text, View } from 'react-native'
import React from 'react'
import { LoginButton, AccessToken} from 'react-native-fbsdk';
First, import all the required components from the associated libraries. Here as you can notice, the code imports StyleSheet, View, and Text from the ‘react-native’ library; React from the ‘react’ library, and lastly Accesstoken and LoginButton from the ‘react-native-fbsdk’ library.
The LoginButton component is used to render a Fb login button. With the AccessToken custom component, the code sends requests to the FB API. It is also used for retrieving user data.
1
2
3
4
5
6
7
8
9
10
11
12
13
14
15
16
17
18
19
20
21
22
23
24
25
26
27
const App = () => {
  return (
    <View>
    <LoginButton
    publishPermissions={["publish_actions,email"]}
    onLoginFinished={
      (error, result) => {
        if (error) {
          alert("login has error: " + result.error);
        } else if (result.isCancelled) {
          alert("login is cancelled.");
          console.log("first")
        } else {

          AccessToken.getCurrentAccessToken(result).then(
            (data) => {

              console.log(data)
            }
          )
        }
      }
    }
    onLogoutFinished={() => alert("logout.")}/>
    </View>
  )
}
The code section creates a functional ‘App’ component to render the app’s UI. It returns the <View> and <LoginButton> components.
‘publishPermissions’ prop defines an array. It requests permissions from the user while they log in to their Facebook account. Another prop ‘onLoginFinished’ is used when the user login to their account. It is considered a callback function and has two parameters namely ‘result’ and ‘error’. In case, there is an error, a message showing the error will be displayed on the screen and also logged to the console. This way, the user can be sure whether they have given the correct login credentials.
‘AccessToken.getCurrentAccessToken()’ is a function used to get the access token. ‘console.log()’ function is to log the data.
As the user logs out from their account, the ‘onLogoutFinished’ prop is called.
export default App
const styles = StyleSheet.create({})
Make it a point to export the main ‘App’ component. You can also style the interface further using the StyleSheet component.
To Execute the Program
As we have built the codebase for the App interface, we have to check whether it is functional or not.
To do this, you have to run two commands on the project’s root directory or cmd.
Open the command prompt from the project folder and run the following two commands.
- npm install
- npx react-native run-android
It will show the app interface on your emulator. Refer to the given Gif of the project output.
Now, we have completed the frontend part of the project.
Final Notes
Coding for a dynamic app interface can be tricky. However, with practice, you may get hold of it. The same context is applicable to Facebook authentication. Ensure that you have set up the environment of React Native and installed the relevant software in your local system. This is the basis of starting off a project. Structuring code won’t take much time, but you need to focus on understanding the logic behind using each component and considerably make the correct choice of the app development framework.

A science graduate who has a keen interest to lean about new technologies and research area. With an experience in the field of data analytics and content writing, she aims to share her knowledge among passionate tech readers.

