Customizing the app icon and splash screen in React Native app
While making an app, it is not the codebase or its style of formation that you need to learn, but you have to know about all the resources and assets embedded in it. Some of them include the app icon and the splash screen. You can customize them as per your preference. Let’s see how?
Before starting off with the customizing steps, let’s get some more details about the app icon and splash screen.
What is an app icon?
An app icon is simply the logo with which you can differentiate between different apps. While surfing your phone device, you won't find the same icon or logo for different apps. Right? Thus every React Native development company creates a unique app icon for their product or app.
What is a splash screen?
A splash screen is a welcome screen that you see immediately when you open an app. It is not as small as the app icon but covers the entire app screen after which you can access the actual app content or log in to the app.
What are the prerequisite parameters?
There are two simple prerequisite parameters that you need to be familiar with, rather you have to learn.
The first is to learn how the React Native environment is set up in your development system. This will require you to install Node.js, Android Studio, and other software. If you are new to the framework, rely on the blog ‘How to set up the React Native environment’ to get step-by-step guidance.
The other parameter is to develop React native apps. Only after getting comfortable with the app-building process, you can customize the splash screen and add a specific app icon to your app. You can consider the article ‘How to create and run React Native app on Android phone’ as a reliable learning resource.
The next section is about code syntaxes that you need to add to your app’s App.js folder. Before the step, you must learn about additional criteria such as the way to configure plugins to your app.
Plugin Configuration that you cannot skip
This section is the most important part of the current project.
It is about installing the third-party React Native library: react-native-splash-screen. Importing SplashScreen component from the plugin react-native-splash-screen, you can display and hide the splash screen.
Skipping this step will give you several errors in your console. So follow as I guide.
Install the package
For installing this third-party package, you have to run
npm i react-native-splash-screen --save on your project terminal.
Installing plugin
Here, you have to go for manual installation. Automatic installation may not work.
- For this, go to
androidand then tosettings.gradlefile from your app. This is the app in which you want to customise the splash screen and app icon. Add the below-given lines to it.
1
2
3
4
include ':react-native-splash-screen'
project(':react-native-splash-screen').projectDir = new
File(rootProject.projectDir,
'../node_modules/react-native-splash-screen/android')- Go to
android → app→ build.gradleand add the following line under dependencies.
implementation project(':react-native-splash-screen'). It is a compile-time dependency.
- Now go to
android → app → src → main→ java\com\awesomeproject → MainApplication.javafile and add the line:import org.devio.rn.splashscreen.SplashScreenReactPackage;Refer to image 1.
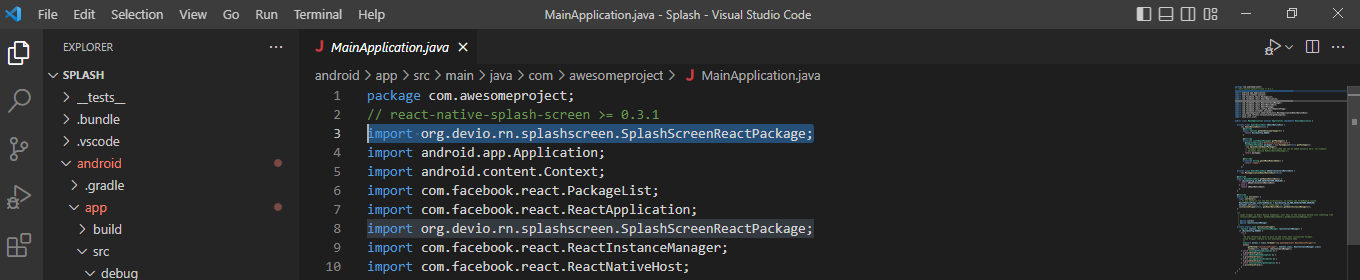
Image 1
- Open
android →app →src → main→ java\com\awesomeproject → MainActivity.javafile. Add the following line.
1
2
3
4
import android.os.Bundle; // here
import com.facebook.react.ReactActivity;
// react-native-splash-screen >= 0.3.1
import org.devio.rn.splashscreen.SplashScreen; // here- Also, add
1
2
3
4
5
@Override
protected void onCreate(Bundle savedInstanceState) {
SplashScreen.show(this); // here
super.onCreate(savedInstanceState);
}
to the MainActivity.java file of your app. Refer to image 2 for all the configurations in the MainActivity.java file.
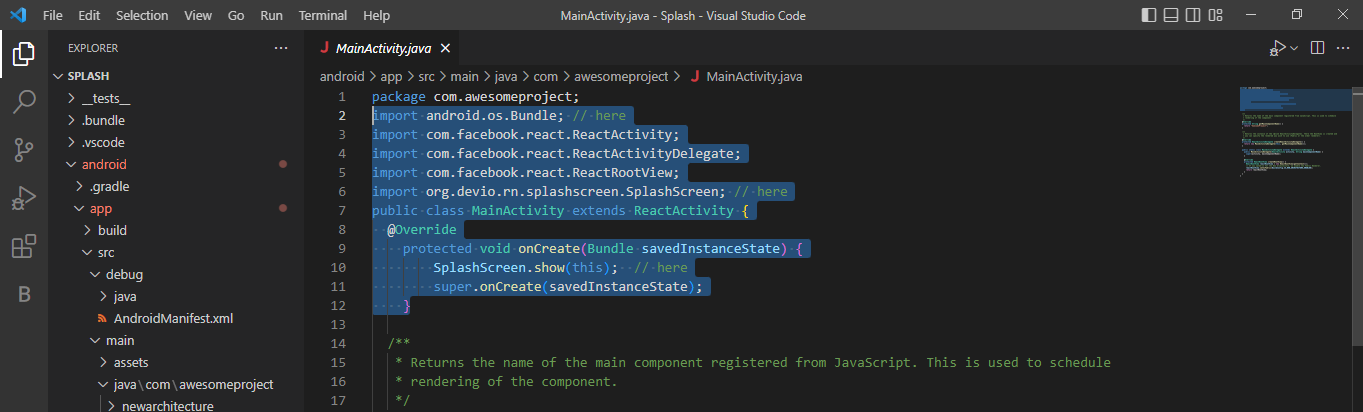
Image 2
- Lastly, you have to go to
android → app →src →main → res → layout →launch_screen.xmlto add the below-given content.
1
2
3
4
5
6
<?xml version="1.0" encoding="utf-8"?>
<RelativeLayout xmlns:android="http://schemas.android.com/apk/res/android"
    android:orientation="vertical" android:layout_width="match_parent"
    android:layout_height="match_parent">
    <ImageView android:layout_width="match_parent" android:layout_height="match_parent" android:src="@drawable/launch_screen" android:scaleType="centerCrop" />
</RelativeLayout>
Refer to image 3 for the place in which you have to add the above-given content. This is in your app’s root directory in the code editor.
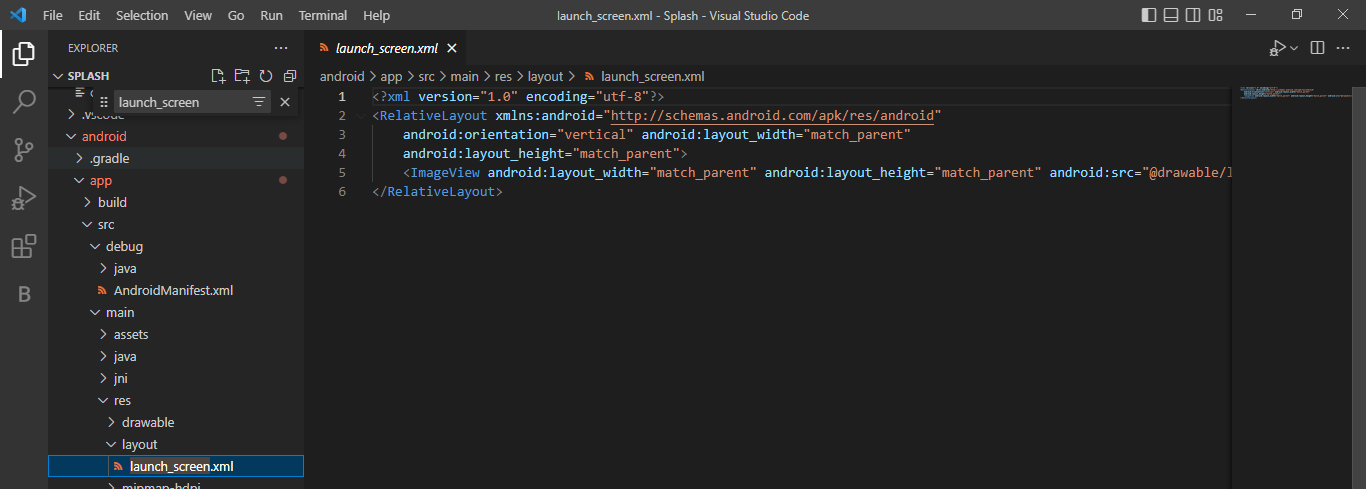
Image 3
Note that, if you do not have a layout folder and launch_screen.xml file in your app folder, you have to create one.
Adding app icon and splash screen image
For the splash screen
Now, you can add your preferred splash screen image in the form of a png file.
It is vital to note that there are certain dimensions for the app icon but not for the splash screen. Get an image for the splash screen and store it under the drawable folder. Create a folder named drawable under the res folder, if you do not have one. Consider image 4 and image 5 for the splash screen or launch screen of my project. Also, don't forget to save the entire process till now.
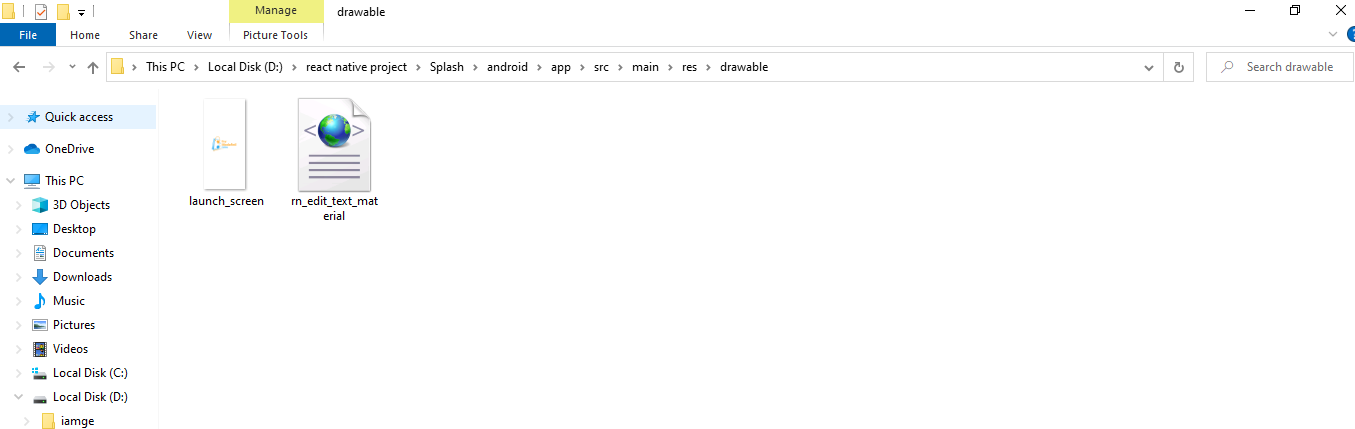
Image 4
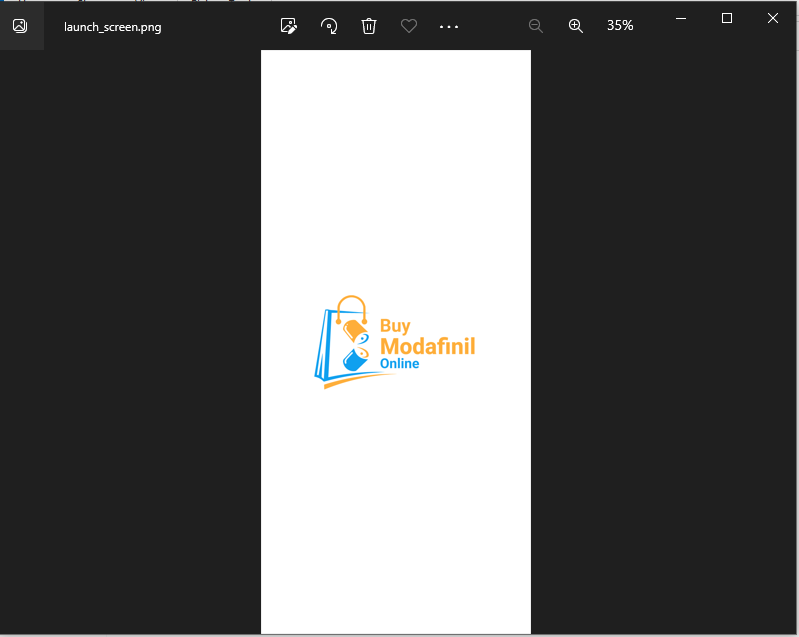
Image 5
For the app icon
Now let’s add the image for the app icon. Here, you have to take the image dimension into consideration.
Download images for your app icon but it has to be of definite dimension. Also, you have to store this image under the res folder. You will find five default folders namely mipmap-hdpi, mipmap-mdpi, mipmap-xhdpi, mipmap-xxhdpi and mipmap-xxxhdpi under the res folder.
- For mipmap-hdpi: the dimension is 72*72.
- For mipmap-mdpi: the dimension is 48*48.
- For mipmap-xhdpi: the dimension is 96*96.
- For mipmap-xxhdpi: the dimension is 144*144.
- And for mipmap-xxxhdpi: the dimension is 192*192.
Substitute all the default image icons with your chosen image. Refer to the image for the images stored in one of the folders in my project.
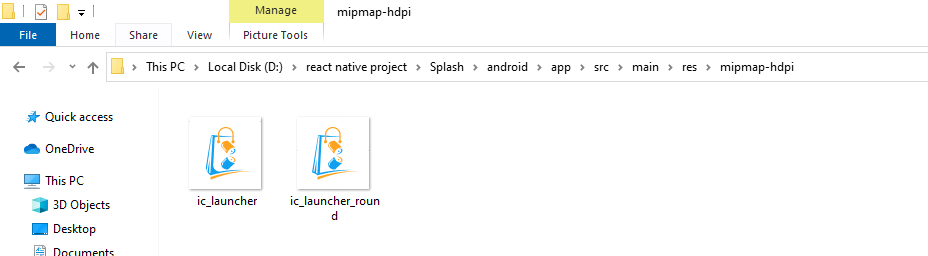
Image 6
Now the image customization is done. All you have to do is create the App.js folder.
Let’s see how you can do this.
Understanding the code syntaxes
It will be a few lines of coding. You can find the entire codebase in the GitHub repository. The main part is to import the main component SplashScreen and use it further in the codebase.
1
2
3
import { StyleSheet, Text, View } from 'react-native'
import SplashScreen from 'react-native-splash-screen';
import React,{useEffect} from 'react'
First, we have to import the components, So, here, you need to import Stylesheet, Text, View, React, useEffect, and SplashScreen from different React Native libraries.
Now add the following syntax.
useEffect(()=>{
SplashScreen.hide();
},2000)
Here, you have to use the React Native hook useEffect to hide the splash screen after 2 seconds. Note that, you can increase or decrease the holding time of the splash screen by adding different values after
SplashScreen.hide();
},
Here, useEffect has two parameters namely a function and an array.
1
2
3
4
5
6
7
const App = () => {
  return (
    <View>
      <Text>App</Text>
    </View>
  )
}
The above syntax defines the key component of your app. It has a text element App wrapped with a Text and View component.
The last line of your code will have the below-shown syntax.
export default App
const styles = StyleSheet.create({})
Steps to test the app
There are two steps to run the app and test whether it is successfully created or not.
Open the command prompt from your project folder and run the following two codes.
- npm install
- npx react-native run-android
It will eventually start the app on your emulator. Consider image 7 for the splash screen presentation on the virtual device.
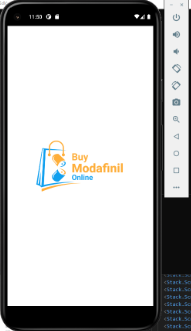
Image 7
Also, refer to image 8 for the app icon. You can see the app icon on your device along with other apps.
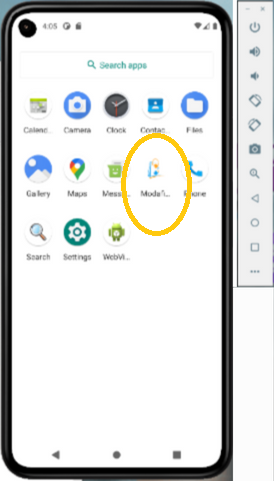
Image 8
To conclude
Customizing the splash screen and app icon is not a difficult task. However, it takes the correct approach of adding third-party packages and configuring other plugins. This blog will guide you from setting up the React Native environment to running the app on your emulator.

A science graduate who has a keen interest to lean about new technologies and research area. With an experience in the field of data analytics and content writing, she aims to share her knowledge among passionate tech readers.

