Creating the UI of a UPI app using React Native

The volume of UPI usage is growing all across the world. As a React Native developer, you can easily build the UI of a UPI app using the cross-platform app building framework, React Native. Here, in this tutorial blog, I will explain each step of the code snippets used for creating the UI of a UPI app.
Since I am more into detailing the components, props, and states of React Native, I want you to gain some fundamental ideas about the React Native framework.
Prerequisites criteria
- You should have a basic knowledge of the app-building process using React Native.
- You should have set up the React Native environment in your development system.
- You can find my series of React Native blog tutorials where I have explained how to create and run React Native apps and how to set up the react Native environment.
Package and components used
- React-native-upi-pay- This is one of the packages that I have used in my project. You can also refer to it as a plugin that is required to incorporate the UPI interface in your react native app. It activates peer-to-peer payments.
- useState- useState is a hook that you can use in the codebase to store numbers, objects, arrays, booleans, and strings. With useState, you can hold a definite value of these types. It basically allows you to ‘use state’ without changing into the class component.
- StyleSheet- StyleSheet is a styling component used in React Native. Importing this component from react-native, you can design the margins, font sizes, font, header, and the size of the app screen or page.
- Console.log- It is a useful function that you can use to print some texts on the console. For this, you simply need to put some texts in
console.log ()that you want to show to your users.
Get into the code snippets and explanation
Here, I will disintegrate the entire code into small segments for a detailed explanation.
1
2
3
4
5
import React, {useState} from 'react';
import {View, StyleSheet} from 'react-native';
import {Header, Button} from 'react-native-elements';
import {TextInput} from 'react-native-paper';
import RNUpiPayment from 'react-native-upi-pay';- Here, I have imported useState from react. This can let you set the state of the variables you will be using in your project.
- Imported View and StyleSheet from react-native.
StyleSheetis used for designing the layout of the page and View is used to hold flexbox, accessibility controls, and touch handling options. - Imported Header and Button from react-native-elements. As the name suggests, ‘Header’ is for displaying title or header on the app screen. While ‘Button’ is for importing Pressable buttons.
- Imported TextInput from react-native-paper. With
TextInput, you can allow users to input text in a defined area. With this component, you can also use a prop named onChangeText to enable the Callback event every time the text of the text input changes. - Imported
RNUpiPaymentfromreact-native-upi-pay. This is to incorporate payment options in your react native app via UPI.
1
2
3
4
5
6
7
8
9
10
11
const App = () => {
  const [vpa, setVpa] = useState('');
  const [payeeName, setPayeeName] = useState('');
  const [amount, setAmount] = useState(1);
  const [transactionRef, setTransactionRef] = useState('');
  const [transactionNote, setTransactionNote] = useState('');
  console.log('vpa>>>>>>>', vpa);
  console.log('payeeName>>>>>>>', payeeName);
  console.log('amount>>>>>>>>', amount);
  console.log('transactionRef>>>>>>>>>>>>>>>', transactionRef);
console.log('transactionNote>>>>>>>>>>', transactionNote);- Here, I have used the useState() function to create variables vpa, payeeName, amount, transactionRef and transcationNote.
- Console.log is used to print the defined value on the console. This is applicable to all five variables.
For example, console.log('vpa>>>>>>>', vpa); is used to print vpa on the console.
1
2
3
4
5
6
7
8
9
10
11
12
13
14
15
16
17
 const payMoney = () => {
    RNUpiPayment.initializePayment(
      {
        vpa, // or can be john@ybl or mobileNo@upi
        payeeName,
        amount,
        transactionRef,
        transactionNote,
      },
      () => {
        console.log('success>>>>>>>>>>>');
      },
      err => {
        console.log('err>>>>>>>', err);
      },
    );
};- The code is a function that takes in an object as its argument. The object is defined with properties: vpa, payeeName, amount, transactionRef, and transactionNote.
- Here, the
console.log()function is used to print ‘success’ if no error occurs and print ‘err’ in case any error occurs. - The codebase is structured to initialize a payment with the following parameters:
vpa: The Venmo Payment Address.
payeeName: The name of the payee.
amount: The amount to be transferred.
transactionRef: A reference used for the made transaction. This is used for tracking purposes and future reference.
transactionNote: A note regarding the transaction. It is optional.
1
2
3
4
5
6
7
8
9
10
11
 return (
    <View>
      <Header
        style={styles.header}
        leftComponent={{icon: 'menu', color: '#fff'}}
        centerComponent={{
          text: 'NC PAY',
          style: {color: '#fff', marginTop: 5},
        }}
        rightComponent={{icon: 'home', color: '#fff'}}
/>- Here, the code starts with defining a
Headercomponent under the View component. - The Header has three other components defined in it. A
leftComponentwith an icon: ‘menu’ colored with ‘#fff’, which is white colored. A rightComponent with an icon: ‘home’ colored with #fff. And a centerComponent with a text: ‘NC PAY’ colored with #fff.
1
2
3
4
5
6
7
8
9
10
11
12
13
14
15
16
17
18
19
20
21
22
23
24
25
26
27
28
29
30
31
32
33
34
35
36
37
38
39
40
41
42
43
44
 <View style={styles.container}>
        <TextInput
          mode="outlined"
          label="VPA ID"
          onChangeText={value => setVpa(value)}
          left={
            <TextInput.Icon
              name="account-cash-outline"
              size={24}
              color="blue"
            />
          }
        />
        <TextInput
          mode="outlined"
          label="Payee Name"
          onChangeText={value => setPayeeName(value)}
          left={<TextInput.Icon name="account-check" size={24} color="blue" />}
        />
        <TextInput
          mode="outlined"
          label="Amount"
          onChangeText={value => setAmount(value)}
          left={<TextInput.Icon name="currency-inr" size={24} color="white" />}
        />
        <TextInput
          mode="outlined"
          label="Transaction Reference"
          onChangeText={value => setTransactionRef(value)}
          left={
            <TextInput.Icon
              name="account-child-circle"
              size={24}
              color="blue"
            />
          }
        />
        <TextInput
          mode="outlined"
          label="Transaction Note"
          onChangeText={value => setTransactionNote(value)}
          left={<TextInput.Icon name="account-child" size={24} color="blue" />}
        />
 </View>
- The above code snippets are for styling the container.
<View></View>Component is used to hold the container. The container has four elements in the bar form.- Each bar has a definite label and a left icon. Each left icon is given a size of 24 pixels and blue color.
- onChangeText is used for each bar to let users input their credentials.
1
2
3
4
5
6
<View style={styles.btnStlye}>
        <Button title="Pay Now" onPress={payMoney} />
      </View>
    </View>
  );
};- The code has a button that is styled with the styles.btnStyle variable and has an onPress property set to payMoney .
- Here, the <View> component is used to hold the Button title bar with a text “Pay Now” displayed on it.
1
2
3
4
5
6
7
8
9
10
11
12
13
14
15
16
17
18
const styles = StyleSheet.create({
  header: {
    marginTop: 30,
  },
  container: {
    justifyContent: 'center',
    marginTop: 130,
    marginLeft: 20,
    marginRight: 20,
  },
  btnStlye: {
    marginTop: 20,
    marginLeft: 20,
    marginRight: 20,
  },
});

export default App;
How to run the app on the emulator?
- Open the command prompt from the project folder and run npm install to download the necessary dependencies.
- I have faced issues while getting the dependencies and it was showing errors. So I tried running the command npm install --legacy-peer-deps from the project’s terminal.
- Type cls on the same terminal to delete all the unnecessary commands and direct them to the app folder. Then run npx react-native run-android. It will start the emulator. It will start Bundling. Your app will start once the bundling is 100% completed. In the app terminal, you will see a green text stating ‘BUILD SUCCESSFUL’.
- Refer to image 1 for the output on the terminal and the emulator.
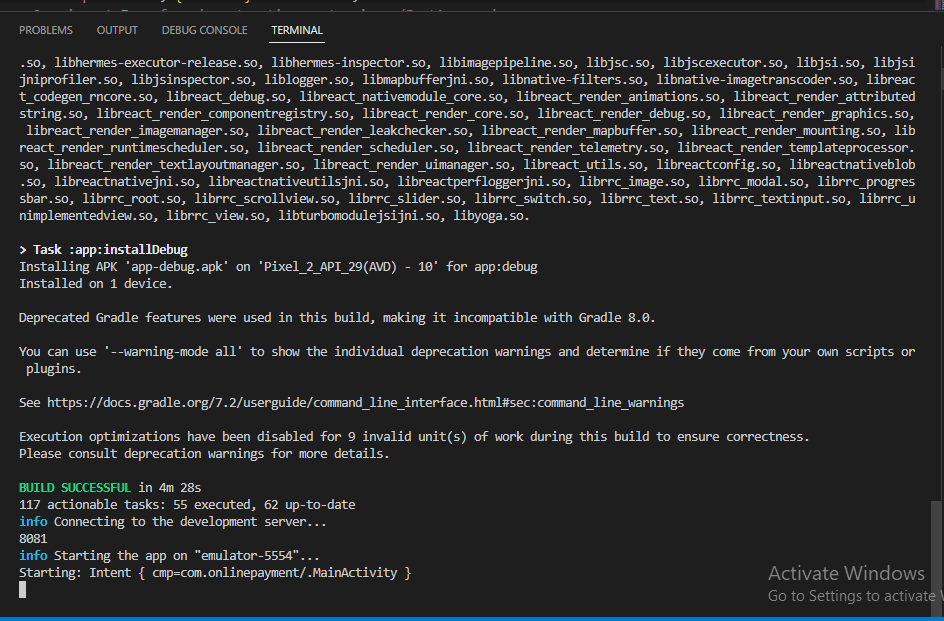
Image 1
Now as the emulator starts, it will start bundling. Wait until it is 100%. Refer to the highlighted segment in image 2.
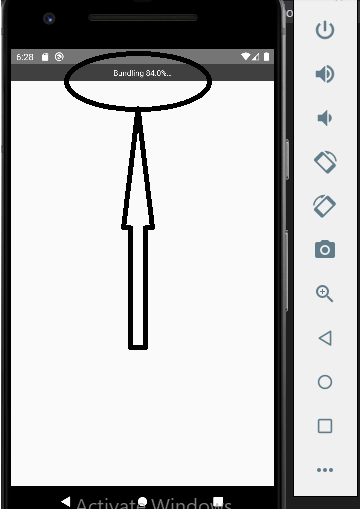
Image 2
- Now your app will start. It will show similar to the image given in image 3.
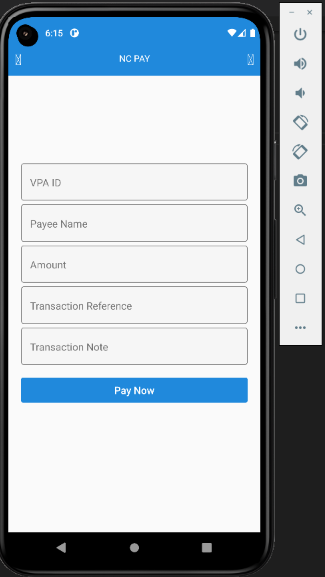
Image 3
- You can put your details under VPA ID, Payee Name, amount, Transaction Reference, and Transaction Note and then proceed to click on the ‘Pay Now’ blue button. (consider image 3).
Final thoughts
With React Native, it is easier to build the UI of a UPI app. You don't need to write long lines of coding but can reuse already written code with some alteration in styling and design of the props and containers. Following the steps explained in this tutorial, you will be able to understand the use of different components, hooks, and the package react-native-upi-pay. Finally, you will be able to create the UI of UPI apps from scratch.

A science graduate who has a keen interest to lean about new technologies and research area. With an experience in the field of data analytics and content writing, she aims to share her knowledge among passionate tech readers.

