The Comprehensive Guide to Build a React Native Track Player
Playing audio tracks on the go seems a companion for every regular traveling crowd. It is also a therapy for music lovers. Given the busy schedule of life and the increasing accessibility of internet connectivity worldwide, the demand for digital music is on the rise. With the decrease in the volume of audio downloads, the contemporary crowd prefers to listen to audio content through music streaming apps, according to Statista.
So, if you want to build your music streaming app or track player, this comprehensive guide is the perfect place. You may also outsource this task to an experienced React Native app development company for better customization.
Before structuring the codebase, get some tasks done prior.
Set up the Environment
For app development, you require the environment in your dev system. As we will be developing with React Native, we have to set up the relevant environment. Install Nodejs, Android Studio, VS Code editor, and React Native CLI. If these software are already installed in your system, move to the next step. For more details, visit the attached article.
Build a Folder for the Project
Every time you build a project make a separate folder of the project beforehand. Only then, you can create the codebase and run the program.
Consider any folder in your system and run cmd from this folder. Now pass the command: npx react-native init react-native-track-player-demo-main --version 0.70.5. This will create a simple React Native project folder for the Track App.
Get Third-Party Libraries
Here, you have to install react-native-track-player and react-native-vector-icons. Making mobile apps with React Native is quite a hassle-free process. As it is an open-source framework, you can create any libraries and post them into the community. Developers in the future can use this in their projects. They don’t have to create components from scratch.
To install these two libraries, run the command prompt from the project folder. Then run npm i react-native-track-player and it will install the react-native-track-player.
While for react-native-vector-icons, open the cmd from the project folder and type npm i react-native-vector-icons. This library is used to create buttons, tab or nav bars, and logos.
If you have completed these initial steps, then add some real-time audio or tracks for some demos.
Creating the Assets and Media Folder
Here, in the ‘assets’ folder, add all the songs in .mp3 format. I have also added a .gif file. Refer to the marked segment in image 1 representing the (1. gif) file and image 2 for the audio track file.
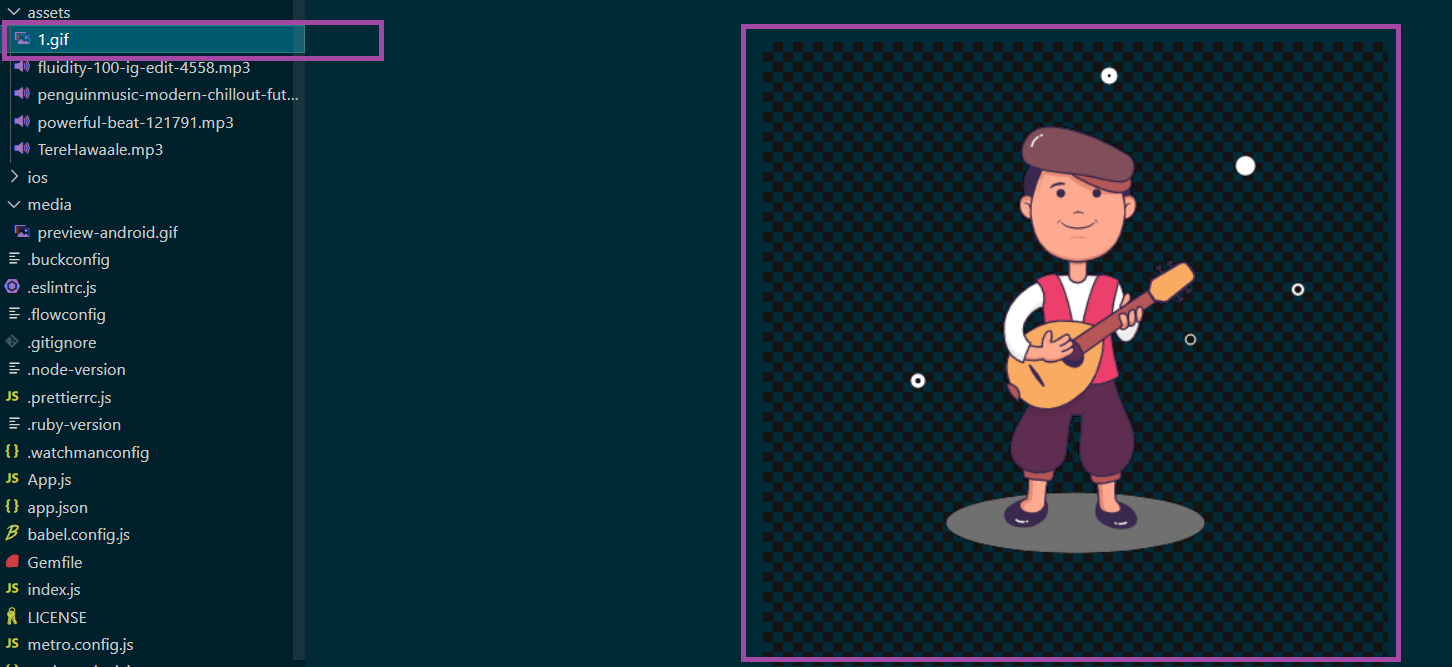
Image1
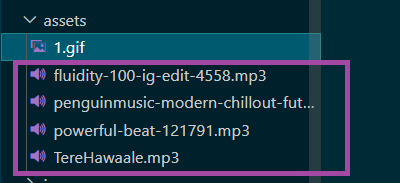
Image 2
Further, in the ‘media’ folder, I have added a gif file that shows the preview of the app interface. Refer to image 3.
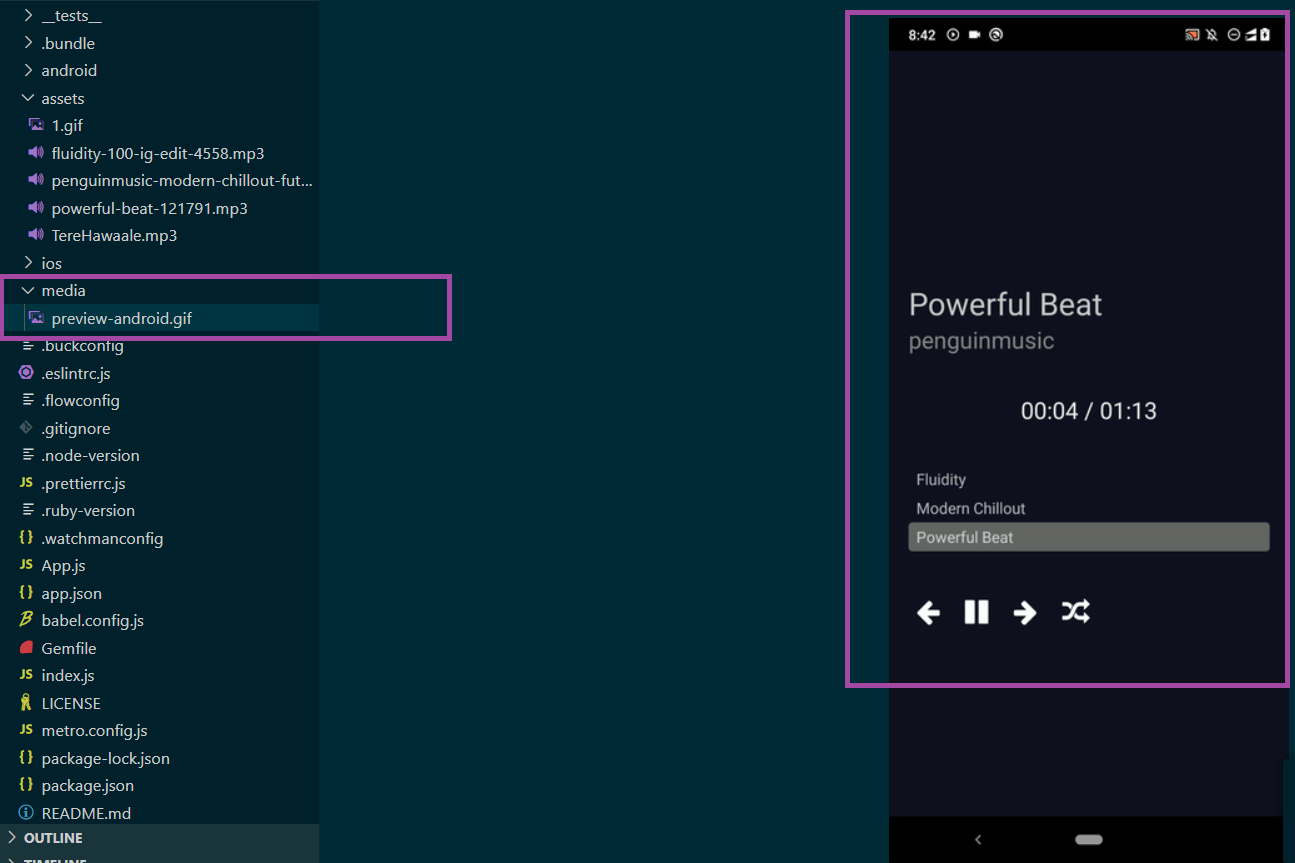
Image 3
Simply create new folders in your main project folder. I have named them ‘assets’ and ‘media’. You can give it a different naming. Then save all the gifs and track files in the respective folders.
Now, we will head toward the actual coding section. Here you have to create two .js folders. The first one is the ‘trackPlayerServices.js’ and the other one is the main ‘App.js’ file.
The Coding Segment
Find the entire codebase in the linked GitHub repository.
trackPlayerServices.js File
This is a component file that you have to add to the App.js file. Here, we will store the audio file so that we can call it later.
Let’s see how can we do this.
1
2
3
4
5
6
 import TrackPlayer, {
  AppKilledPlaybackBehavior,
  Capability,
  RepeatMode,
  Event,
} from 'react-native-track-player';
First, the code imports all the relevant components such that you can use all the functionalities of the functional audio module meant for track-playing apps. It offers the following capabilities.
- Metadata Management
- Background Playback
- Event Handling
- Playback Control
- Playlist Management
- Audio Focus Management
1
2
3
4
5
6
export async function setupPlayer() {
  let isSetup = false;
  try {
    await TrackPlayer.getCurrentTrack();
    isSetup = true;
  }
Here, the code sets a playback for audio. It uses the async function. If the audio player is enabled, the code sets the ‘isSetup’ to true. However, if it is not, it sets the ‘isSetup’ to false and updates the playback options to pause, play or stop the track.
1
2
3
4
5
6
7
8
9
10
11
12
13
14
15
16
17
18
19
20
21
catch {
    await TrackPlayer.setupPlayer();
    await TrackPlayer.updateOptions({
      android: {
        appKilledPlaybackBehavior:
          AppKilledPlaybackBehavior.StopPlaybackAndRemoveNotification,
      },
      capabilities: [
        Capability.Play,
        Capability.Pause,
        Capability.SkipToNext,
        Capability.SkipToPrevious,
        Capability.SeekTo,
      ],
      compactCapabilities: [
        Capability.Play,
        Capability.Pause,
        Capability.SkipToNext,
      ],
      progressUpdateEventInterval: 2,
    });
Here, ‘android.appKilledPlaybackBehavior’ defines the status of the playback when the app is killed. In this case, it stops the playback and removes the notification.
The ‘capabilities’ defines the availability of capabilities for the player. Here, it includes Play, Pause, SkipToNext, SeekTo, and SkipToPrevious.
The ‘compactCapabilities’ mentions capabilities in the notification view.
Lastly, the ‘progressUpdateEventInterval’ specifies the frequency of the progress update event in seconds. Here, it is set to 2 seconds.
1
2
3
4
5
6
    isSetup = true;
  }
  finally {
    return isSetup;
  }
};
It sets the ‘isSetup’ to true and also returns the same variable. If it finds any error during the setup, it still returns the variable to true as there is the finally{}.
Here, it ensures that the function finally{} always returns a value.
1
2
3
4
5
6
7
8
9
10
11
12
13
export async function addTracks() {
  await TrackPlayer.add([
    {
      id: '1',
      url: require('./assets/TereHawaale.mp3'),
      title: 'Tere Hawaale',
      artist: 'Arijit Singh',
      duration: 60,
    },
    {
   …………
  await TrackPlayer.setRepeatMode(RepeatMode.Queue);
    };
The code adds tracks to the app. Here, we have added three tracks to the audio player. Each of these has the following properties:
- ‘Id’, is a unique identifier.
- ‘url’ specifies the URL address of the audio file.
- ‘Title’ specifies the track’s title.
- ‘Artist’ denotes the singer.
- ‘Duration’ is the timing (in seconds) of each track.
Following this, the code sets the repeat mode using ‘RepeatMode.Queue’.
You can check for the other audio stored in the project from the linked repository.
Now, let’s see what holds the App.js file.
App.js File
We will start with the ‘import’ statement.
1
2
3
4
5
6
7
8
9
10
11
12
13
14
15
16
17
18
19
20
import React, { useEffect, useState } from 'react';
import {
  SafeAreaView,
  ScrollView,
  StyleSheet,
  Text,
  View,
  FlatList,
  ActivityIndicator,
  TouchableOpacity,Image
} from 'react-native';
import TrackPlayer, {
  useTrackPlayerEvents,
  usePlaybackState,
  useProgress,
  Event,
  State
} from 'react-native-track-player';
import Icon from 'react-native-vector-icons/FontAwesome';
import { setupPlayer, addTracks } from './trackPlayerServices'
Here, the code imports all the required components. It imports useEffect and useState from ‘react’; imports ScrollView, SafeAreaView, StyleSheet, View, Text, FlatList, Image, TouchableOpacity, and ActivityIndicator from ‘react-native’.
From the third-party library, ‘react-naative-track-player’, it imports import TrackPlayer, Event, State, useProgress, usePlaybackState, and useTrackPlayerEvents.
The code imports two built components setupPlayer and addTracks from a different folder ‘./trackPlayerServices’ of the same project.
1
2
3
4
5
6
7
8
9
10
11
function Header() {
  const [info, setInfo] = useState({});
  useEffect(() => {
    setTrackInfo();
  }, []);

  useTrackPlayerEvents([Event.PlaybackTrackChanged], (event) => {
    if(event.state == State.nextTrack) {
      setTrackInfo();
    }
  });
‘Header’ is the functional component used in this snippet. It will display the header segment of this track player app. PlaybackTrackChanged is an event. The ‘Header’ monitors the state of this event. As the state of the track changes, it updates the state of the ‘info’, which is a state variable.
1
2
3
4
5
6
7
8
9
10
11
12
13
 async function setTrackInfo() {
    const track = await TrackPlayer.getCurrentTrack();
    const info = await TrackPlayer.getTrack(track);
    setInfo(info);
  }

  return(
    <View>
        <Text style={styles.songTitle}>{info.title}</Text>
        <Text style={styles.artistName}>{info.artist}</Text>
    </View>
  );
}
async function setTrackInfo() { ... } is an async function used to get information about the active audio.
‘Await’ function is used to call TrackPlayer.getCurrentTrack(). It is executed by considering the ID of the active track. Later it retrieves the track details. The ‘await’ function is used to assign the obtained results to ‘info’ and track’ variables separately.
The ‘setInfo’ function is used to update the state of the ‘info’ variable as it changes the track audio.
return ( ... ) is used to return the ‘View’ component along with the ‘Text’ components.
styles.songTitle and styles.artistName are the styling used with the variable songTitle and artistName. These are defined later in the codebase.
info.title and info.artist is added in the Text component to display the title and artist name of the current playing audio.
1
2
3
4
5
6
7
8
9
10
11
12
13
14
15
16
17
function TrackProgress() {
  const { position, duration } = useProgress(200);

  function format(seconds) {
    let mins = (parseInt(seconds / 60)).toString().padStart(2, '0');
    let secs = (Math.trunc(seconds) % 60).toString().padStart(2, '0');
    return `${mins}:${secs}`;
  }

  return(
    <View>
      <Text style={styles.trackProgress}>
        { format(position) } / { format(duration) }
      </Text>
    </View>
  );
}
Here, it defines another functional component TrackProgress. It will display the status of the active audio (like how long the audio has been playing).
useProgress is the hook used to get the playback state and duration of the current track. It considers an argument specifying the track interval in milliseconds. Here, it is 200 milliseconds.
The ‘format’ is the helper function mentioned in the TrackProgress. It uses a parameter that represents the time of the ongoing track in seconds.
The ‘return’ statement is used to mention the time of the playing active in mm:ss. It does this by interpolating the ‘secs’ and ‘mins’ variables.
It uses a variable trackProgress to style the text of the progressing track.
Understanding the logic of App.js may seem complicated. You might have heard that “Practice makes a man perfect”. Yes, this will surely work in this context. Whatever your gender, rigorous practice will make you an expert in building your Track Player.
Check the linked repository for the complete segment of the App.js file.
To Execute the Program
This is the final step that will assure that you have successfully built the audio track player. To perform this, run the cmd from the build project folder and run the npm install. It will activate the npm on your system. Now, pass the command npx react-native run-android on the same terminal to present the app on your dev system.
Have a look at the below gif for the project output.
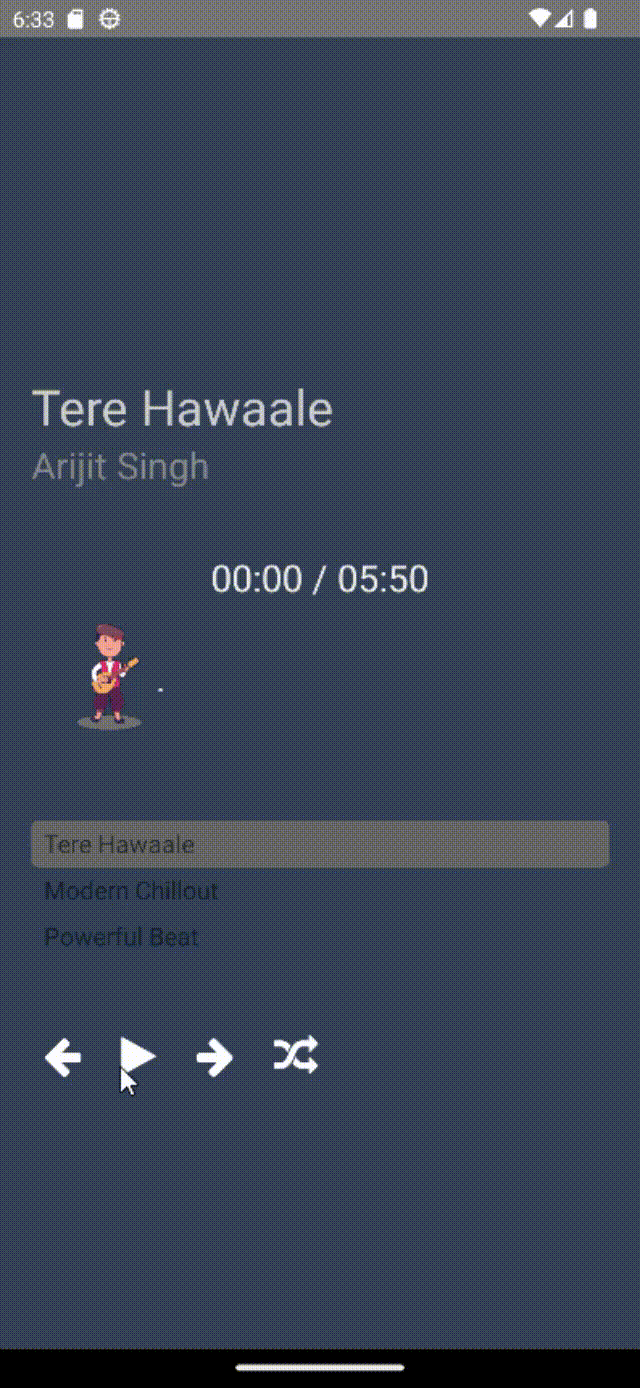
As you can notice, it has buttons to change the track, shuffle the sequence, and even stop/play any saved track.
Closing Thoughts
React Native is a popular open-source mobile app development framework. Building projects using this framework need to install the software. Once you are done with the step, you can head toward the coding segment.
Follow this blog and the provided code source to build your first project with React Native audio track player. Hope you would have fun building the project.

A science graduate who has a keen interest to lean about new technologies and research area. With an experience in the field of data analytics and content writing, she aims to share her knowledge among passionate tech readers.

