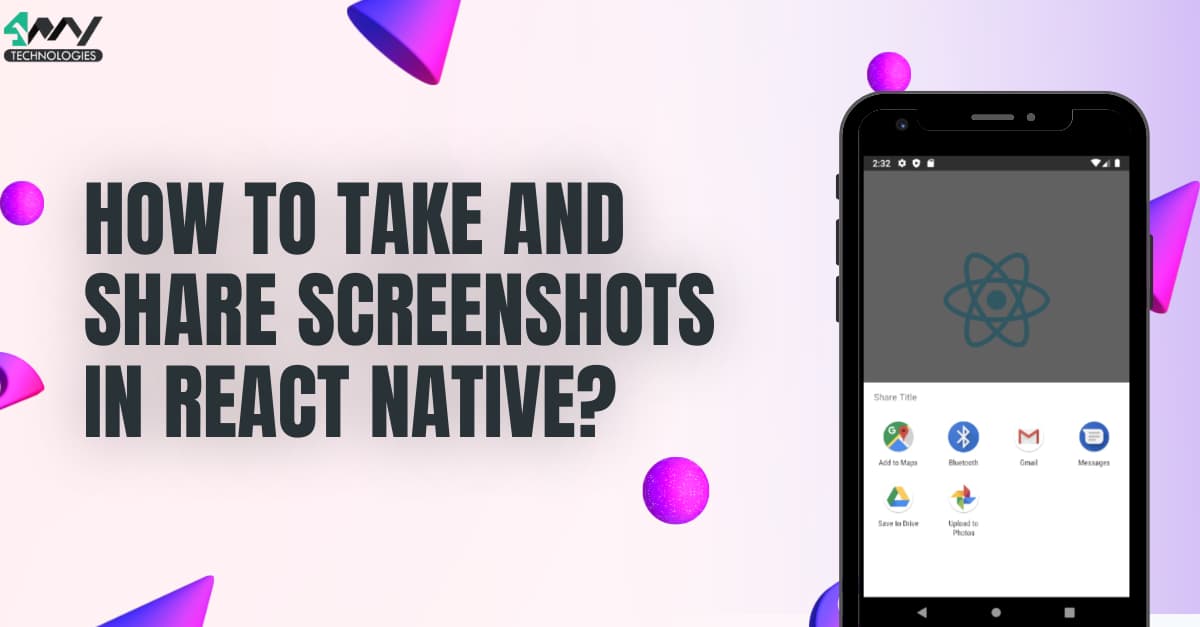
How to take and share screenshots in React Native?
For smartphone, tablet, and computer users, the utility of screenshots is undeniable. These are the digital images. You can use screenshots to share app-related content, troubleshoot, capture important information, record conversation, create visual content and perform other interesting tasks. In this blog, we will learn how to capture and share screenshots in React Native. There are several third-party libraries and APIs available that experts of React Native development company to simplify the project building process. Here, you will use two useful libraries- react-native-view-shot and react-native-share to simplify the procedure.
Without any more delay, let’s get started.
Setting up the environment
This is an important step if you have not performed it earlier. It provides the necessary tools and configurations to build, run, and test your React Native app. React Native is a framework for building native mobile applications using JavaScript and React. However, it requires a specific set of software dependencies, including a development environment, SDKs, libraries, and tools, to function properly.
Note that the environment setup requires the selection of a specific OS and React Native tool. Here, the current project will be based on React Native CLI, Windows, and Android.
So, we will need React Native CLI, Node, JDK, Android Studio, and Visual Code editor.
There is a complete article on the setup procedure. Access the article from the attached link.
Making a template folder for the project
For every React Native project, you need a template. This is like a container, where you have to add your project’s codebase. To build a template, follow the below-mentioned steps.
- Select a folder in your local system or you can build a new folder.
- Open a terminal from this folder.
- Now, run
npx react-nativeinitTakeScreenShot --version 0.71.3on this terminal. Click on the Enter key.
Your template folder is built. You can search for the template in your file explorer. Without this template, you neither can install a third-party library nor can build the codebase.
Installing the relevant third-party plugin
The option of importing components from third-party plugins is one of the reasons that developers prefer React Native framework. They dont have to build components from the beginning if it is not available in the list of built-in components.
For the current project, we need react-native-view-shot and react-native-share.
react-native-share is a simple plugin used to share files and messages. To install this plugin, you must open a terminal from your project folder and run npm i react-native-share --save. On the other hand, react-native-view-shot is a plugin, which provides an accessible API for capturing a particular view of your React Native app. This view is stored as an image. To get this plugin, you have to pass npm i react-native-view-shot on your project terminal.
Codebase for the project: The Approach
Get the source code from the linked GitHub repository.
To get familiar with the approach of the project’s codebase, let’s disintegrate it into segments.
1
2
3
4
import { StyleSheet, Text, View,TouchableOpacity, Image } from 'react-native'
import React,{useRef,useState} from 'react'
import ViewShot from "react-native-view-shot";
import Share from 'react-native-share';
First, use the import statements to import relevant components. Here, the code imports StyleSheet, Text, View, TouchableOpacity, Image, ViewShot, Share, useState, React and useRef.
1
2
3
4
5
6
7
8
9
10
const App = () => {
  const ref=useRef()
  const [image,setImage]=useState()
  const TakeScreenshot=()=>{
    ref.current.capture().then(uri => {
      console.log("do something with ", uri);
      setImage(uri)
      alert(uri)
    });
  }
Here, the App is the functional component. It creates a mutable reference using the useRef hook. The useRef is used to store a reference to a view in the component.
Later, with const [image,setImage]=useState(), it creates a state variable named image that is used to store the captured screenshot. The setImage function is used to update the state variable.
TakeScreenShot is a function defined in the codebase. It is called when the user activates a screenshot capture event.
1
2
3
4
5
6
7
 const ShareImage=()=>{
      const option={
        url:image,
        message:'products Details',
        }
    Share.open(option)
  }
ShareImage is the function that uses the Share API to share an image and text message with other apps installed on the user's device.
Option is the constant variable that contains an object with two properties: url and message.
The Share.open() method has the option object used as a parameter. This method opens a share dialog or prompt, allowing the user to choose an app to share the image.
1
2
3
4
5
6
7
8
9
10
11
12
13
14
15
16
17
18
return (
    <View style={{flex:1,justifyContent:'center',alignItems:'center'}}>
    <ViewShot style={{width:'70%',height:300,}} ref={ref}>
  <Image source=
     {{uri:'https://
     upload.wikimedia.org/wikipedia/commons/3/3b/Javascript_Logo.png'}} style={styles.image}/>

    </ViewShot>
    <TouchableOpacity onPress={()=>TakeScreenshot()} style={styles.TekeScreen}>
   <Text style={styles.Take_screen}>Teke ScreenShot</Text>
    </TouchableOpacity>

    <TouchableOpacity onPress={()=>ShareImage()} style={styles.TekeScreen}>
    <Text style={styles.Take_screen}> Share</Text>
    </TouchableOpacity>
    </View>
    )
}
Here, the code snippet renders a view containing an image, two buttons, and a ViewShot component.
The View component has a ‘flex’ value of 1. The ‘justifyContent’ and ‘alignItems’ properties are set to center Both properties center the child components both vertically and horizontally within the View.
The Image component used in the codebase has a source attribute set to the URL of an image. It is the image of a JavaScript logo.
There are two TouchableOpacity components below the ViewShot component. Each TouchableOpacity component has an onPress attribute set to corresponding functions that trigger the screenshot capture or sharing feature.
1
2
3
4
5
6
7
8
9
10
11
12
13
14
15
16
17
18
19
20
export default App

const styles = StyleSheet.create({
  image:{
    width:'100%',height:300,
  },
  TekeScreen:{
    width:150,
    height:35,
    backgroundColor:'#CD5808',
    borderRadius:10,
    justifyContent:'center',
    alignItems:'center',
    marginVertical:10
  },
  Take_screen:{
    color:'#fff',

  }
})
This is the last segment of the codebase, where the code exports the main functional component App and uses the StyleSheet.create () method to define the definite styles for the component.
Note that the screenshot capture and image processing may take some time. So, you can customize the app by displaying a loading indicator to the user while the operation is still in progress.
Steps to run the program on the Virtual device
To check the functionality of the program is also a crucial part of building a program. Here, we are to learn the steps of running the project or program on a device. Let’s check what the steps are.
- Open a terminal from your template folder.
- Run npm install.
- Run npx react-native run-android.
These two commands will activate the program on the emulator. Consider image 1 for the project output.
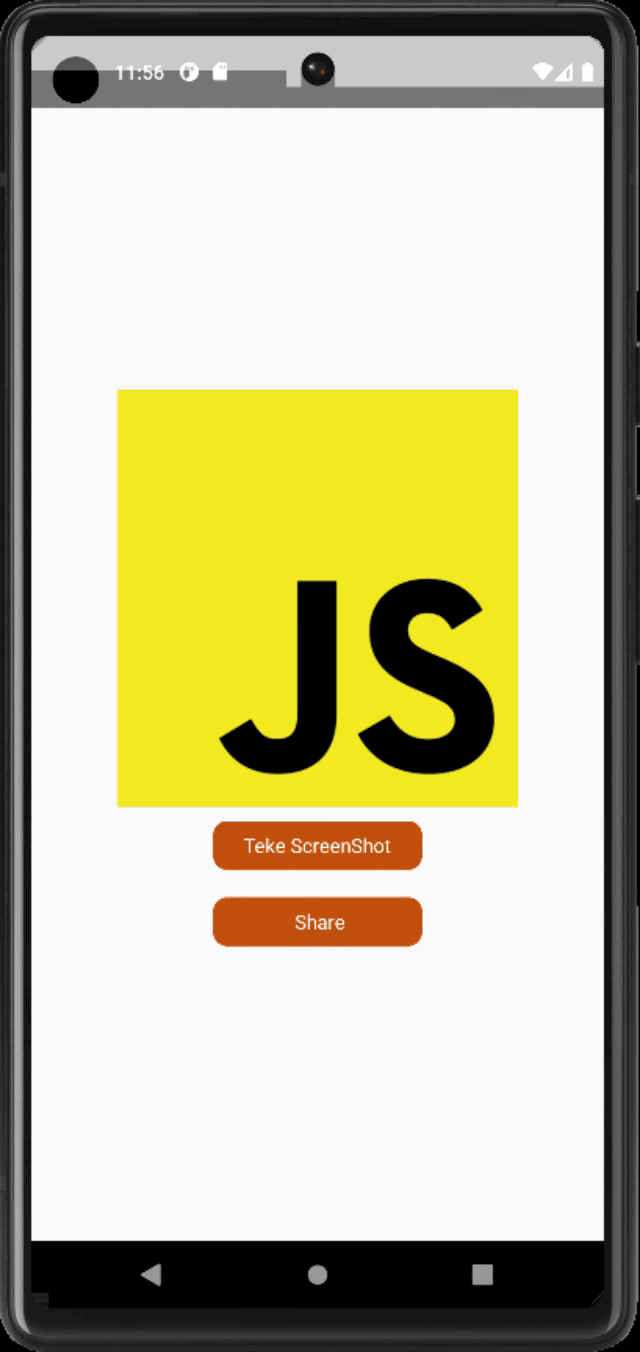
Image 1
The user can easily click on the button ‘Teke ScreenShot’ to capture the screenshot of the current view and then press the button ‘Share’ to share the captured screenshot with other applications.
Note that there is a typo-spell mistake intentionally done on the first button ‘Teke ScreenShot’. You can correct the typo in the source code. Access the same from the attached link. Practice customizing the project to learn how you can modify any changes in the source code.
To conclude
Creating a user interface for ‘capture and share screenshots’ does not take a huge effort. With the help of third-party libraries such as react-native-view-shot and react-native-share, you can easily implement this functionality in your React Native app. Whether it is for sharing a high score or a funny conversation, users can now easily capture and share their screen with others.

A science graduate who has a keen interest to lean about new technologies and research area. With an experience in the field of data analytics and content writing, she aims to share her knowledge among passionate tech readers.

