How to customise the top tab navigator in react-native?
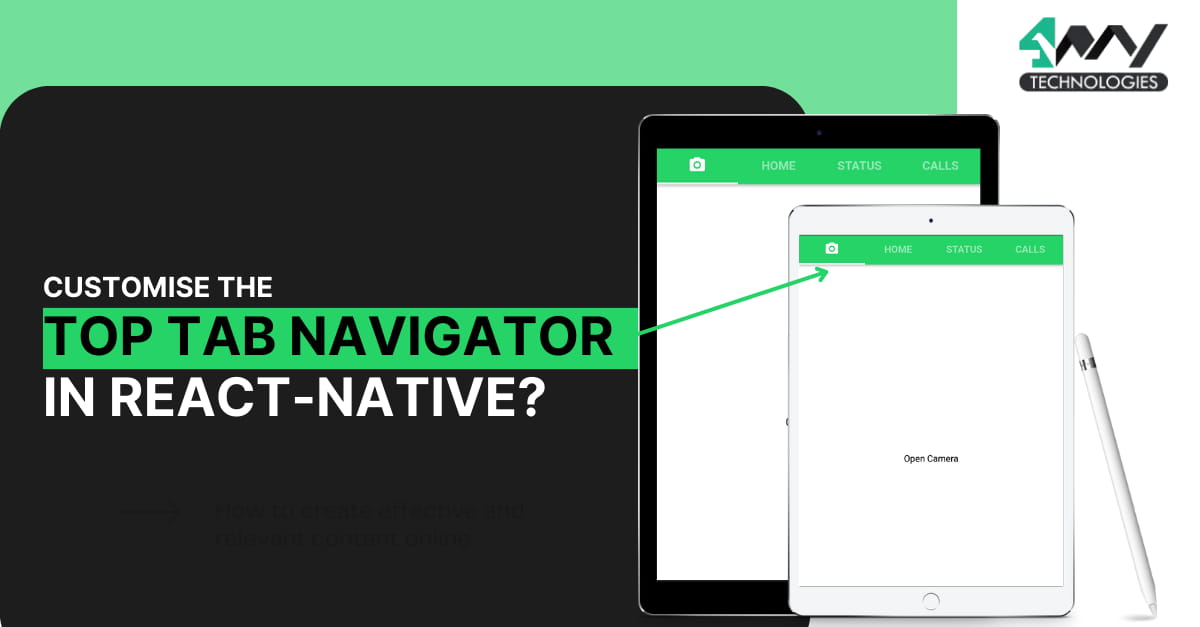
When it comes to customizing the top tab navigator in React-Native, there are numerous options available to enhance the user experience. From changing the colors, adding icons, and even creating custom animations, the possibilities are endless. Whether you're looking to build a modern, sleek mobile app or create something unique, the right tab navigator can make all the difference. In this blog, we will learn the procedure of customizing the top tab navigator and rendering an engaging UI to the app.
What does customization mean in app development?
App customization is the method of attaining a specific need of your app users. It is an additional criterion that you incorporate after adding components to your codebase. It provides a uniqueness to the app.
Adding a top tab navigator needs customization as not all apps have the same way to navigate through the interface.
Here, we will build our unique pattern of top tab navigation.
First, you have to get into the prerequisite aspects
Environment setup for the React Native framework
For any app development framework you choose, you need to set up the familiar environment in your dev system. A similar case applies to the React Native application development. Also, you have to undertake this step once. If you have already set up the environment, you don't need to repeat this task.
If not, you have to install software such as JDK (Java SE Development Kit), Android Studio, React Native CLI, Node, and an IDE. IDE can be any but I will suggest you to get the Visual code editor as it provides different types of extensions, which simplify the code editing process.
For the Android Dev Environment, you have to install Android SDK and download Android Studio separately.
For further information, check the linked article.
Creating a simple template folder in the dev system
This step is a must-need while you want to develop react Native app.
The steps to complete the task are given below.
- Consider a folder in your local drive. I would prefer to consider the folder in your C drive.
- Open cmd from that folder.
- Run
npx react-native init Topnavigator --version 0.68.1. Here, in this command line, you have specified the name of your template as ‘Topnavigtaor’ and the React Native version (0.68.1) you considered. - Click the Enter key and it will be created in your C drive.
Setup configuration for the project
In this section, we will learn about the installation process of third-party libraries required for the project.
You will need to install the following libraries.
@react-navigation/material-top-tabs-you can import the createMaterialTopTabNavigator component from this library and can easily create the tab navigator for the top panel. To install this library, open the code editor from your template folder (here, it is Topnavigator) and create a terminal. Run npm i @react-navigation/material-top-tabs on this terminal. It will install and automatically link to your project.@react-navigation/native-You can import NavigationContainer from this third-party package; thereby allowing you to manage the transitional pattern between different screens.For its installation, you have torun npm i @react-navigation/nativeon the same project terminal.
As we have completed discussing the prior-needed tasks, let's start with the code syntax creation.
The codebase for five different.js files
For the source code, check the linked GitHub repository.
For the project, you need to create three different screens (Setting, Home, and About) across which the users can transit using the top tab navigator. Besides, you have to build two .js files (Material.js and App.js).
Let's start with creating the screens. Also, note that for these three screens, you have to create a folder named ‘Component’ in your template (Topnavigator folder). Then, create three files with the name Home.js, About.js, and Setting.js under the Component folder.
Home screen
1
2
import { StyleSheet, Text, View ,Image} from 'react-native'
import React from 'react'
The components that the code imports are Text, View, Image, and StyleSheet from the react-native library.
Also, import React from the react library.
1
2
3
4
5
6
7
8
const Home = () => {
  return (
    <View>
     <Image source={{uri:'https://s-media-cache-ak0.pinimg.com/originals/40/4f/83/404f83e93175630e77bc29b3fe727cbe.jpg'}}
     style={{width:'100%',height:'100%'}}/>
    </View>
  )
}
This code builds a React component Home.
The component returns a View element with an Image element inside of it.
The Image element has a source attribute that is set to a URL of an image, and also a style attribute that sets the width and height of the image to 100%.
export default Home
const styles = StyleSheet.create({})
Now, the code exports the Home component from the current Home.js file.
It uses the StyleSheet.create() method to create a styles object. It will be used to style the component.
About Screen
1
2
import { StyleSheet, Text, View ,Image} from 'react-native'
import React from 'react'
You have to consider the same component for this About.js file as you have imported in the Home.js file.
1
2
3
4
5
6
7
8
9
10
11
const Home = () => {
  return (
    <View>
     <Image source={{uri:'https://s-media-cache-ak0.pinimg.com/originals/40/4f/83/404f83e93175630e77bc29b3fe727cbe.jpg'}}
     style={{width:'100%',height:'100%'}}/>
    </View>
  )
}

export default Home
const styles = StyleSheet.create({})
You can copy the codebase created in the Home.js file and add it to the About.js file. The only difference is that you have to change the image for the ‘About’ screen to give it a different look. Simply change the image source and add a different URL. Also, make sure that you replace the ‘About’ with the ‘Home’ in the export statement.
Setting screen
Create another file named Setting.js under the Component folder and copy the entire codebase from any of the About.js file or Home.js files. Moving forward, paste the codebase in your new Setting.js file.
It will be similar to as given below.
1
2
3
4
5
6
7
8
9
10
11
12
13
14
15
import { StyleSheet, Text, View,Image } from 'react-native'
import React from 'react'
const Setting = () => {
  return (
    <View>
    <Image source={{uri:'https://images.unsplash.com/photo-1614160859544-177611d11f6b?ixlib=rb-4.0.3&ixid=MnwxMjA3fDB8MHxwaG90by1wYWdlfHx8fGVufDB8fHx8&auto=format&fit=
    crop&w=686&q=80'}}
    style={{width:'100%',height:'100%'}}/>

    </View>
  )
}

export default Setting
const styles = StyleSheet.create({})
The only change that you have to make is to add a different image URL under the image source. Also, you have to make changes in the following lines
const Setting = ()
export default Setting
Since it will create the Setting screen, hence, is the name ‘Setting’. Apart from this, all the syntax will be the same.
Now, you have to move forward to make the Material.js file.
Code syntax in Material.js file
To add this below-given codebase, you need to create
1
2
3
4
5
6
import { StyleSheet, Text, View } from 'react-native';
import React from 'react';
import { createMaterialTopTabNavigator } from '@react-navigation/material-top-tabs';
import Home from './Component/Home';
import About from './Component/About';
import Setting from './Component/Setting';
Import all the components as mentioned.
Here, the code imports Home, About, and Setting components from the Component folder of the same project.
You may have remembered that you have exported all three Home, About, and Setting as components from the respective files. This allows you to import the component in the Material.js file and use it further.
Also, the createMaterialTopTabNavigator component is imported from the @react-navigation/material-top-tabs library and is used to create the navigator.
This type of navigator allows the user to switch between different screens by tapping on tabs at the top of the screen.
const Material = () => {
const Tab = createMaterialTopTabNavigator();
The first line introduces the main function of the Material.js file.
Next, the code creates a Tab navigator using the createMaterialTopTabNavigator(). The Tab variable will be used to store the navigator and can be used to access the navigator's methods and properties.
1
2
3
4
5
6
7
return (
    <Tab.Navigator
     screenOptions={{
        tabBarActiveTintColor:'#e91e63',
        tabBarStyle: { backgroundColor: 'powderblue',},
      }}
      >
This code renders a Tab.Navigator. It is a type of navigation component used to switch between different screens in a React Native app.
The screenOptions property is used to set the active color of the tab bar to '#e91e63' and the background color of the tab bar to 'powderblue'.
1
2
3
4
5
6
7
<Tab.Screen name="Home" component={Home} />
    <Tab.Screen name="About" component={About} />
    <Tab.Screen name="Setting" component={Setting} />
</Tab.Navigator>

  )
}
This code creates a tab navigation system.
A specific name attribute is given to each of the Tab.Screen. It is the name of the tab that will be displayed in the tab bar.
The Component attribute is the component that will be displayed when the tab is selected. In this example, the Home, About, and Setting tabs will be displayed in the tab bar, and when each tab is selected, the Home, About, and the Setting screen will be displayed.
1
2
export default Material
const styles = StyleSheet.create({})
With export default Material, the code exports the MaterialUIPickers object. It is a library of components used to create user interfaces with the Material-UI framework.
You may not use the CSS stylesheet method in your project unless you want to give a vibrant look to your app.
Code syntax in the App.js file
You don't have to create the app.js file, look for the same in your template folder itself. Open the file and start creating the codebase.
1
2
3
4
import { StyleSheet, Text, View } from 'react-native'
import React from 'react'
import { NavigationContainer } from '@react-navigation/native';
import Material from './Material';
Use the import statement to add all the relevant components in your App.js file. Apart from the native components (StyleSheet, View, Text, and React), you need to import NavigationContainer from the third-party library @react-navigation/native and the Material component from the ./Material file of the current project.
1
2
3
4
5
6
7
const App = () => {
  return (
 <NavigationContainer>
 <Material/>
 </NavigationContainer>
  )
}
Here, the code creates an App component.
This component returns a NavigationContainer component with a Material component embedded within it.
It will allow you to add the top tab navigation bar on the main screen of the app with three different tabs indicating three distinct screens.
export default App
const styles = StyleSheet.create({})
Complete the codebase of the App.js file with the export statement and Stylesheet object.
Well, it takes a long stride to build up the files. Isn’t it? Now that we have completed it, let's check its execution method.
Steps of program execution
This is the most crucial step in the app development process to check if there is any error or bugs in the code.
Simply follow the below-provided steps.
- Run the cmd from your project folder. (Here, the folder is Topnavigator). For your case, it will be different based on the name of your project or template.
- Pass
npm install and then npx react-native run-androidon the command prompt. Ensure to run the given commands one after the other.
It may take some time to display the app on the emulator. Wait till it bundles.
Refer to image 1 for the output of the current project.
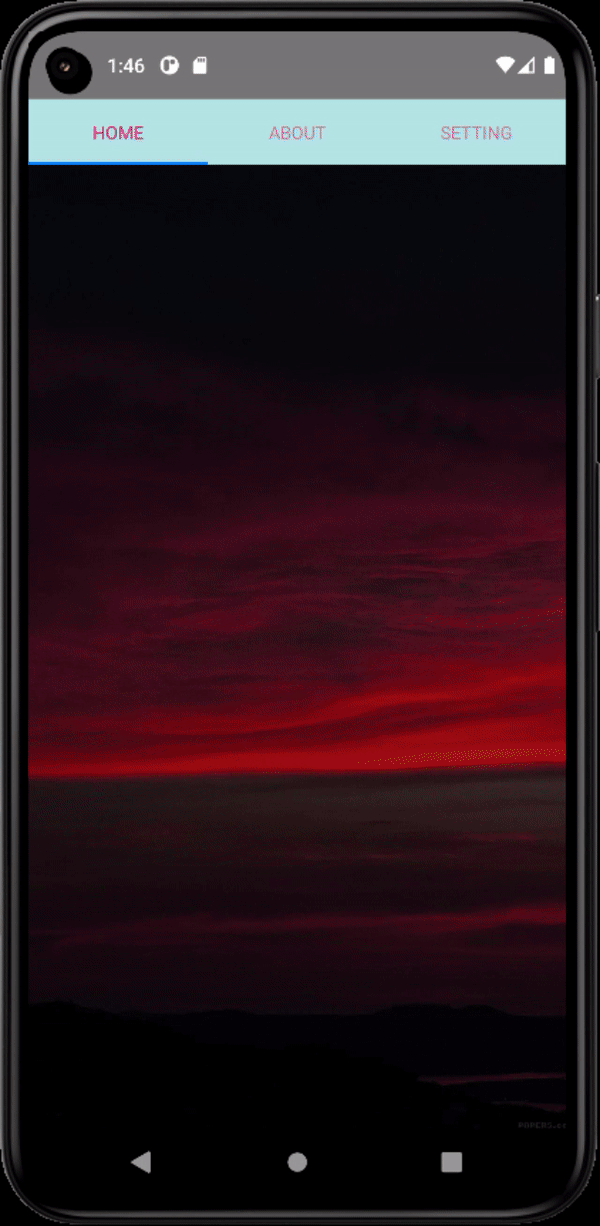
Image 1
Notice how the tab navigator is created in the top panel of the main screen. Users can easily switch between the screen either by swiping horizontally or clicking on the screen options added in the ab bar.
Summary
Adding a top tab navigator and customizing it is quite simple with the React Native framework. The feature of importing components and exporting files makes cuts off the code repetition. If you want to get your hands on this framework, firstly you need to learn how it works and then build projects.
So start your app development journey by customizing the top tab navigator.

A science graduate who has a keen interest to lean about new technologies and research area. With an experience in the field of data analytics and content writing, she aims to share her knowledge among passionate tech readers.

