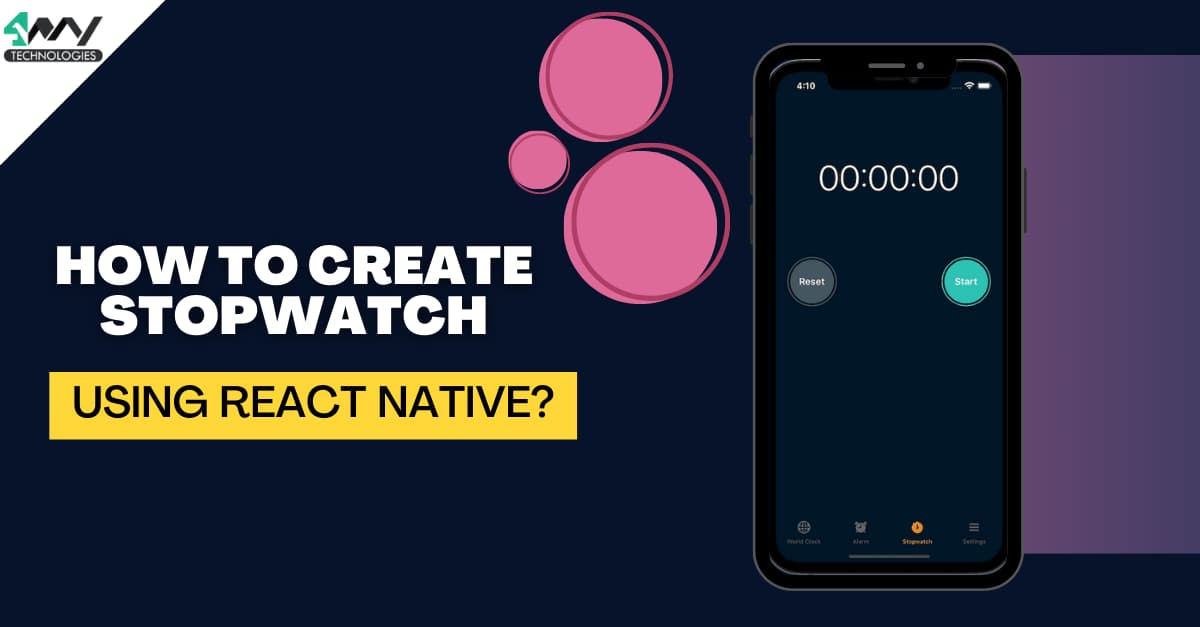
How to Create Stopwatch using React Native?
A stopwatch is a fundamental feature that can be found in every mobile device. It allows users to measure time accurately and precisely, which can be helpful in various scenarios. Creating a stopwatch component in a mobile application is not a complex task and with React Native framework it gets much easier. One of the reasons why React Native is so popular is its ability to integrate with third-party libraries. These libraries provide developers with ready-to-use components that save their effort and time. One such library is the react-native-stopwatch-timer, which allows developers to quickly create a stopwatch component in their mobile applications.
Guided by the developers of React Native development company, in this tutorial, we will guide you through the process of creating a stopwatch using React Native. We will start with the basics and gradually build our way up to a functional stopwatch component. So, let’s start this.
Environment setup for the React Native CLI
There are two React Native tools. They are Expo CLI and React Native CLI. As we will be creating the project with React Native CLI, we need to install the React Native CLI.
Firstly, you must install Node.js on your computer. You can download and install Node.js from the official website: https://nodejs.org/en/download/. After you install the Node.js, open the command prompt and pass the command npm install -g react-native-cli. This command will get the React Native CLI installed globally on your computer.
Apart from installing the React Native CLI and Node.js, you will need other software depending on the OS you choose. Here, we are considering Android and Windows. So, we will need Android Studio, JDK, and the Visual Code editor (IDE).
For additional information, visit the linked article.
Creating a basic template
The most important thing that you need to consider while making a project using React Native framework is to create a simple template. To build this template, follow the below-given steps.
- Create a new folder in your local system or you can consider any folder that already exists.
- Run a terminal or command prompt from this folder.
- Execute a command (npx react-native init StopWatch --version 0.71.3) on this terminal.
- Your template is created with the name ‘StopWatch’. You can search for the template ‘StopWatch’ in your local folder.
You may give it a different name if you like. This step is required for every React Native project.
Installing react-native-stopwatch-timer
In the current project, we need to install a react-native-stopwatch-timer. It is a third-party library that provides a stopwatch and countdown timer functionality for React Native app. It is built on top of React Native's built-in timer functions. It will provide you with a simple and easy-to-use interface for creating the stopwatch.
To install this library, you have to run npm install react-native-stopwatch-timer on your project terminal.
You can use different props like start, reset, msecs, getTime, and options for customizing the StopwatchTimer component. We will discuss its usage in detail later in the codebase.
Now, as we are done with the initial step, we will get into the main segment of the project, which is the coding section.
Designing the codebase in the App.js folder
Open the IDE from your project template. You will find an App.js folder and follow along as I guide you. Find the source code in the linked GitHub Repository.
Importing relevant components
1
2
3
import React, {useState} from 'react';
import {SafeAreaView, StyleSheet, Text, View, TouchableHighlight} from 'react-native';
import {Stopwatch} from 'react-native-stopwatch-timer';
The code imports the necessary components from the corresponding libraries and sets up some initial states using the useState hook.
The useState hook is a built-in React hook. It allows you to add a state to a functional component.
From the react-native libraries, it imports SafeAreaView, StyleSheet, View, Text, and TouchableHighlight. Lastly, it imports Stopwatch from the react-native-stopwatch-timer to build the stopwatch.
Note that, you have to specify the components before actually using it.
Creating state variables
1
2
3
4
5
6
7
8
9
10
11
12
13
14
15
16
17
const App = () => {
  const [stopwatchStart, setStopwatchStart] = useState(false);
  const [resetStopwatch, setResetStopwatch] = useState(false);
  const options = {
    container: {
      backgroundColor: '#566573',
      padding: 5,
      borderRadius: 5,
      width: 200,
      alignItems: 'center',
    },
    text: {
      fontSize: 25,
      color: '#fff',
      marginLeft: 7,
    },
  };
Here, the App is the functional component. It uses the useState hook to manage two state variables namely stopwatchStart and resetStopwatch. Using the useState hook, the code sets the initial value of these state variables as ‘false’.
The component also specifies an options object that contains styling elements for a stopwatch container and text associated with it. The styling elements are backgroundColor, padding, width, borderRadius, width, alignItems, color, marginLeft, and fontSize.
The container has a fixed width of 200 pixels and aligns its content to the center.
Adding Stop watch interface to the app
1
2
3
4
5
6
7
8
9
10
11
12
13
14
15
16
17
18
19
20
21
22
return (
    <SafeAreaView style={styles.container}>
      <View style={styles.container}>
        <Text style={styles.title}>
       React Native  Stopwatch
        </Text>
        <View style={styles.sectionStyle}>
          <Stopwatch
          laps
          msecs

            start={stopwatchStart}

            reset={resetStopwatch}

            options={options}


            getTime={(time) => {
              console.log(time);
            }}
          />
This code defines a user interface in React Native. It is for a stopwatch application. The SafeAreaView and View components are used to define the layout of the application, while the Text component displays the title of the Stop Watch interface. The text element is ‘React Native Stopwatch’. It is the heading of the stop watch app.
The Stopwatch component is used to display and manage the stopwatch functionality, and it has several props defined, including laps, msecs, start, reset, options, and getTime.
The laps prop specifies whether or not the stopwatch will display lap times. The msecs prop indicates whether the stopwatch will display milliseconds.
The start and reset props are used to start and reset the stopwatch, respectively. The options prop is used to define any other options for the stopwatch, like the format of the time.
Finally, the getTime prop is a callback function that is called every time the stopwatch updates. It has the current time as an argument.
In this code, the console.log function is used to log the current time to the console.
Adding the button START, STOP and RESET
1
2
3
4
5
6
7
8
9
10
11
12
13
14
15
16
17
18
19
20
21
22
23
  <TouchableHighlight
            onPress={() => {
              setStopwatchStart(!stopwatchStart);

              setResetStopwatch(false);
            }}>
            <Text style={styles.buttonText}>
              {!stopwatchStart ? 'START' : 'STOP'}
            </Text>
          </TouchableHighlight>
          <TouchableHighlight
            onPress={() => {
              setStopwatchStart(false);
              setResetStopwatch(true);
            }}>
            <Text style={styles.buttonText}>RESET</Text>
          </TouchableHighlight>
        </View>

      </View>
    </SafeAreaView>
  );
};
This code snippet renders two TouchableHighlight components in a View component.
The first TouchableHighlight component has an onPress event handler that enable the stopwatchStart state using the setStopwatchStart function. It also sets the resetStopwatch state to ‘false’. The text within the component is conditionally set based on the value of stopwatchStart state.
The second TouchableHighlight component has another onPress event. It sets the stopwatchStart state to ‘false’ and further sets the resetStopwatch state to ‘true’. Here, the text element reads "RESET".
These buttons allow the user to control the state of the stopwatch within the app. They can start and stop the stopwatch using the first button and reset the stopwatch to its initial state using the second button.
Defining a style sheet
1
2
3
4
5
6
7
8
9
10
11
12
13
14
15
16
17
18
19
20
21
22
23
24
25
26
export default App;

const styles = StyleSheet.create({
  container: {
    flex: 1,
    padding: 10,
    justifyContent: 'center',
    alignItems: 'center',
  },
  title: {
    textAlign: 'center',
    fontSize: 20,
    fontWeight: 'bold',
    padding: 20,
  },
  sectionStyle: {
    flex: 1,
    marginTop: 32,
    alignItems: 'center',
    justifyContent: 'center',
  },
  buttonText: {
    fontSize: 20,
    marginTop: 10,
  },
});
The code snippet exports the App component and specifies the styles for the component.
The StyleSheet.create() is used to define JS styling objects with different style properties for the different objects.
The style objects used in the code include container, title, sectionStyle, and buttonText.
These styles are applied to the App component using the style attribute. These are used throughout the app by importing the styles object and referencing the specific style properties mentioned within it.
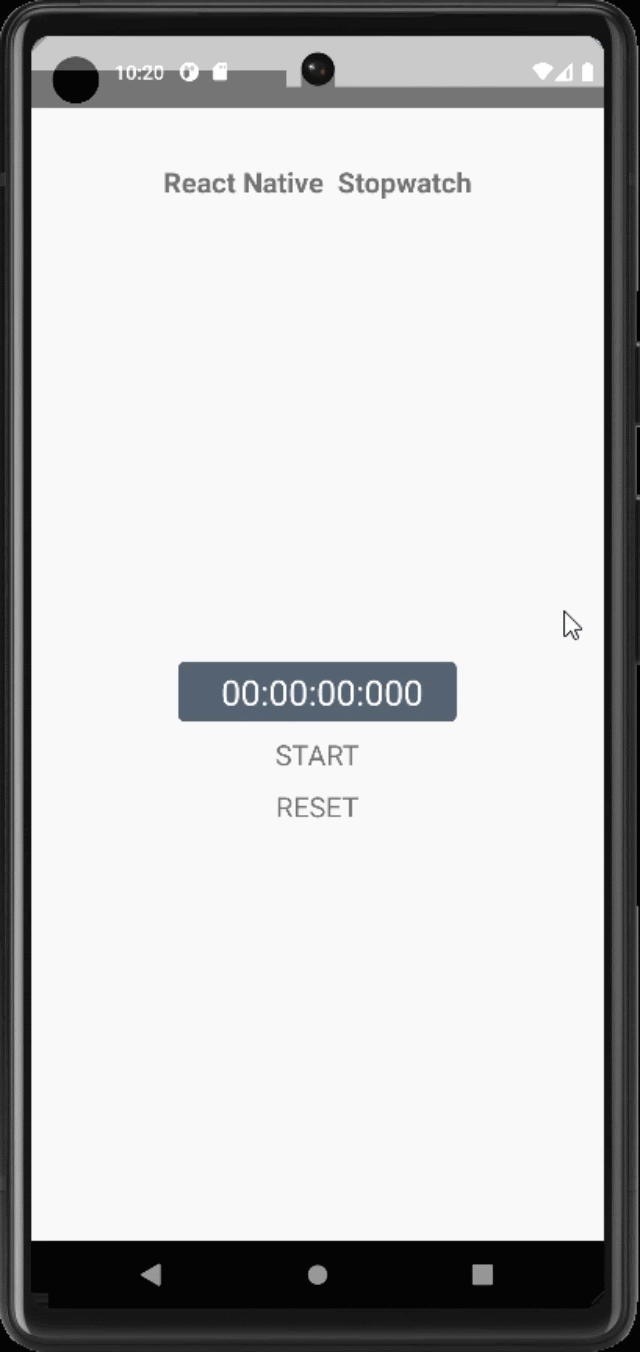
Now we have to check whether the codebase has been successfully framed.
How to execute the program?
This comprises simple steps where you have to run two commands on the project terminal.
These commands are as follows.
- npm install
- npx react-native run-android
Wait for some time until the output shown in image 1 appears on the emulator.
To wrap up
Building a stopwatch in React Native is an excellent exercise to start with and learn the fundamentals of the framework. Follow the steps defined in this article and create a fully operational stopwatch application. It is easy to use and visually appealing. Moreover, React Native's flexibility and ability to produce high-quality cross-platform apps make it a valuable tool for developers looking to build mobile applications efficiently.

A science graduate who has a keen interest to lean about new technologies and research area. With an experience in the field of data analytics and content writing, she aims to share her knowledge among passionate tech readers.

