How to Create a Bottom Sheet in React Native
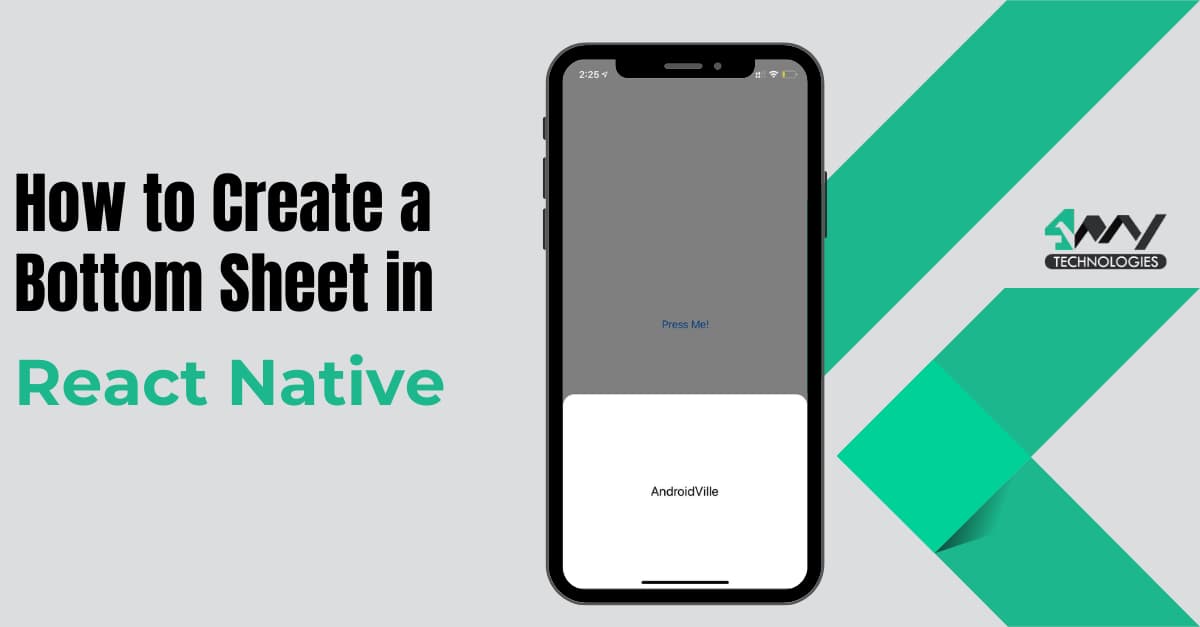
Bottom sheets are a popular user interface pattern that displays additional content or options from the bottom of the screen. It is also useful for displaying contextual information, navigational elements, or collecting user input. In React Native, creating a bottom sheet can be achieved by using different third-party libraries. You can also build the bottom sheet from scratch. In this blog, we will explore how to create a bottom sheet in React Native using the third-party library react-native-raw-bottom-sheet.
We all know adding a feature to an app requires coding but do you know the most important part of creating a project is performing the pre-requisite tasks? So, let’s start with the prerequisites parameters.
Set up the environment
If you are new to developing a React Native project, you should set up the environment and then proceed further. Assuming that you are new to React Native app development, you can either for Expo Go or can opt for React Native CLI. These are the two tools used to build a React Native project. React Native CLI gives you much more flexibility than Expo Go.
So, we will select React Native CLI for our project-building criteria. Following this, you have to select a specific Development OS and Target OS in which you want to build the project.
Note that the step-up process will be different depending on the OS you select.
Here, we will select ‘Windows’ as the desired Development OS and ‘Android’ as the Target OS.
For the selected OS, you will need the RN CLI, Android Studio, a JDK, an IDE (Visual code editor) and Node. For the detailed setup process, visit the linked article curated by one of the React Native experts.
Build a basic template
To build and execute a code, you need a template, where you can store your codebase. So, let’s build the template first.
Note that you have to build the template on your local system. Simply follow the below-mentioned steps.
- Select a folder in any drive in your local system. Run cmd or open a terminalfrom this folder.
- Run
npx react-native init BottomSheet --version 0.71.3from the terminal. - Wait for some time until the template BottomSheet is created in your local system.
- This template will comprise all the basic files required for React Native project.
Installing third-party plugin
To develop apps with react native development company, you may need third-party plugin. Here, we have to install "react-native-raw-bottom-sheet" and link this third-party plugin with our project.
My personal preference to choose React native framework to develop apps and integrate functionalities to it is because of the third-party library support. You, as a developer, when considering react native framework do not have to write long code for adding each and every component. You can simply look for the contributions made by other React Native experts and import components in your project through the third-party plugin.
Here, we will do the same. We will install "react-native-raw-bottom-sheet". It is a third-party library from which we can import a lightweight customizable component RBSheet.
To get this library, open a terminal from your template BottomSheet and run npm i react-native-raw-bottom-sheet. This will install react-native-raw-bottom-sheet and automatically link to your project. You can find it in the project’s package.json folder under the "dependencies" section. Refer to image 1.

Image 1
Now, we will initiate the coding part.
Building the App.js file
Note that we have to create the project’s codebase in the App.js file. Get the entire codebase in the attached GitHub repository.
Open your project from the VS Code editor. Search for the App.js file and start editing the codebase.
Import relevant codebase
1
2
3
import React, { useRef } from "react";
import { View, Button, Text,StyleSheet} from "react-native";
import RBSheet from "react-native-raw-bottom-sheet";
Get the basic components View, Button, Text, and StyleSheet. Apart from this, import RBSheet from the third-party plugin "react-native-raw-bottom-sheet".
Import a React Native hook useRef from the react library. useRef is commonly used to access or modify the properties of a child component or DOM element.
Storing a reference to a component
export default function App() {
const refRBSheet = useRef();
The first line defines a functional component App. in this component, a reference (ref) is created using the useRef() hook.
This reference is assigned to a constant called refRBSheet. The main purpose of this reference is to store a reference to a component that is built using the React Native library's RBSheet component.
Here, RBSheet is used to build the bottom sheet component. It is the same as a dialog box or modal that users can swipe up from the bottom of the app screen.
With ref, the App component can alter and access the RBSheet component such that closing or opening the sheet component.
Creating the main View element
1
2
3
4
5
6
7
8
9
return (
    <View
      style={{
        flex: 1,
        justifyContent: "center",
        alignItems: "center",
        backgroundColor: "#000"
      }}
    >
return is used to render the app’s UI. the code uses the View component to build the main container under which other elements will be embedded. It has some styling elements (flex, justifyContent, alignItems, and backgroundColor) added to it.
Adding the button and using the RBSheet component
1
2
3
4
5
6
7
8
9
10
11
12
13
14
<Button title="OPEN BOTTOM SHEET" onPress={() => refRBSheet.current.open()} />
      <RBSheet
        ref={refRBSheet}
        closeOnDragDown={true}
        closeOnPressMask={false}
        customStyles={{
          wrapper: {
            backgroundColor: "transparent"
          },
          draggableIcon: {
            backgroundColor: "#000"
          }
        }}
      >
First, it creates a button using the button component. It has the title "OPEN BOTTOM SHEET" on it. When the user presses the button, it will open and close the bottom sheet.
This operation is executed using the event handler onPress property with the Button component. What it does is that, when the user clicks on the button, it calls the callback function refRBSheet.current.open() and opens the bottom sheet.
In the latter part of the above codebase, RBSheet is used to frame the bottom sheet. Here, the code uses the ref property to assign a reference to the bottom sheet. It is used to control the sheet.
As it is mentioned using the closeOnDragDown property, you can close the sheet by dragging it in the downward direction. Also, setting the closeOnPressMask property as false will not let the user close the sheet by clicking anywhere else outside the sheet.
The customStyles property is used to customise the bottom sheet. Here, it set the background color of the wrapper and the draggable icon.
Adding different options to the bottom sheet
1
2
3
4
5
6
7
8
9
10
11
12
13
14
15
16
17
 <View>
            <Text style={styles.section_text}>Section</Text>
              <Text style={styles.textPrice}>Home</Text>
              <Text style={styles.textPrice}>About</Text>
              <Text style={styles.textPrice}>Contact</Text>

              <Text style={styles.textPrice}>Setting</Text>

              <Text style={styles.textPrice}>Network</Text>


            </View>
      </RBSheet>
    </View>
  );
}
Here, the code creates a View component with several child Text components. Each of the Text components is styled with a different style mentioned in the styles object.
It has the main title ‘Section’ under which five headings ‘Home’, ‘About’, ‘Contact’, ‘Setting’, and ‘Network’ are added. You can find this section in the Bottom sheet.
Designing the styling object
1
2
3
4
5
6
7
8
9
10
11
12
13
14
const styles = StyleSheet.create({
section_text:{
  fontSize:20,
  alignSelf:'center',
  color:'#000000',
  textDecorationLine:'underline'
},textPrice:{
  color:'#000000',
  fontSize:16,
  marginHorizontal:20,
  marginVertical:3
}

})
Here, as you can see, I have considered two different styling objects namely section_text and textPrice. section_text is linked with the ‘Section’ heading and textPrice is associated with the other sub-headings under the ‘Section’.
You can change the value of the properties and also can add other properties to customise the look of your bottom sheet.
Now as we are done with the coding section, we have to execute the program and check.
To execute the code on a device
This is a crucial step in the project development process. Let’s see how can we execute this task.
- Open a new terminal from your project in the VS Code editor and run npm install.
- Then pass the command npx react-native run-android on the same terminal.
- It will start budling. Wait for the time it takes to complete the bundling process.
- As the app runs on the emulator, you will get the output as shown in image 2.
Image 2
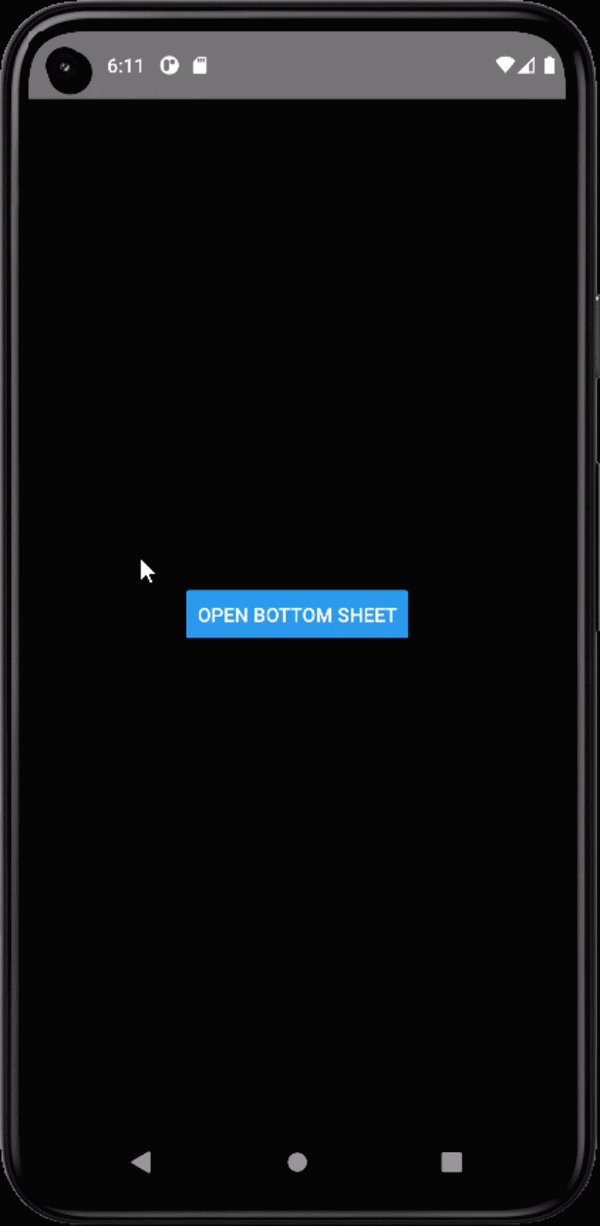
Image 2
As you can notice in image 2, the bottom sheet can be dragged up by clicking the button “OPEN BOTTOM SHEET”.
To conclude
Creating a bottom sheet in React Native app is much easier with the use of the react-native-raw-bottom-sheet library. This library provides a flexible and customizable way to create bottom sheets that can be used in a wide variety of use.
Following the steps outlined in this guide, you can easily implement a bottom sheet in your next React Native application, customize it according to your needs, and also add functionality such as animation, scrolling, and drag gestures.
So, play around with the codebase and explore new user interfaces for your next app.

A science graduate who has a keen interest to lean about new technologies and research area. With an experience in the field of data analytics and content writing, she aims to share her knowledge among passionate tech readers.

