How to build a QR code scanner using React Native

React Native experts rely on the framework for its vast utility. Its low coding formula makes it useful and much easier to build apps. This is another tutorial blog of the React Native series where I will explain how to make a QR Code scanner with React Native.
Why do you need a QR scanner?
QR codes are used to retrieve information about products. For this, the product should have its unique QR code. Nowadays, you need to use a QR code scanner for the restaurant menu. Given the increased use of QR codes, a React Native development company should know how to build a QR code scanning app.
Third-party plugin dependencies
For this project, I integrated a third-party plugin react-native-qrcode-scanner. This operates as a general barcode scanner. However, the component of the QR code scanner encapsulates the react-native camera component. Hence, I added react-native-camera to my project.
To do this, run two commands in the project terminal.
npm install react-native-camera --savereact-native link react-native-camera
For installing the react-native-qrcode-scanner, run the following commands in the app terminal.
npm install react-native-qrcode-scanner --savereact-native link react-native-qrcode-scanner
The other third-party dependencies that you will find in the package.json folder of this project are as follows.
React-native-document-pickerReact-native-image-crop-pickerReact-native-mapsReact-native-pager-viewReact-native-permissionsReact-native-safe-area-contextReact-native-screensreact-native-tab-view
Among these dependencies, I used react-native-qrcode-scanner and react-native-camera for accessing the QRCodeScanner and RNCamera respectively. Refer to image 1.
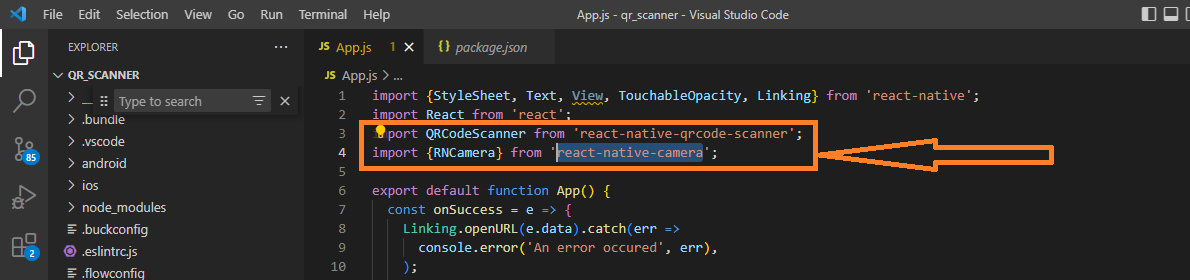
Image 1
Find the entire codebase in the Github repository.
Pre-acquired knowledge
You must have a basic knowledge of React Native as a cross-platform framework. Check my article to get an in-depth understanding of the reasons to use React Native for mobile app development.
Besides, you should also know how to build a basic app with React Native. This is necessary to make you familiar with the vast utility of React Native components, hooks, props, and states. If you are a beginner, visit this article to understand the steps of building a React Native app.
Now, let’s start with the explanation of codes.
Code snippets and interpretation
1
2
3
4
import {StyleSheet, Text, View,TouchableOpacity, Linking } from 'react-native'
import React from 'react'
import QRCodeScanner  from 'react-native-qrcode-scanner';
import { RNCamera } from 'react-native-camera';- I started the codelines by importing all the components and packages.
- I imported StyleSheet, Text, View, TouchableOpacity, and Linking from ‘react-native’.
- You have to import QRCodeScanner from react-native-qrcode-scanner
- To integrate the camera option, you need to import RNCamera from ‘react-native-camera’.
1
2
3
4
5
6
7
8
export default function App() {
  const onSuccess = e => {
    Linking.openURL(e.data)
    .catch(err =>
      console.error('An error occured', err)
    );
    console.log(e.data)
};- The code opens a link to the URL provided in the data parameter.
- With this code snippet, you can open a link in the web browser when users scan the QR code with the cam scanner.
- Console.error() function is used to display the text ‘An error occurred. You can use the console.error() function in two forms. Either use it as a manual way of logging error messages or can be used as a self-generated form of logging errors.
- On the other hand, I used the console.log() function to log the data from the data parameter. If you are thinking why I have not used console.log for logging both error messages and the actual data from the web, it is only to maintain the clarity of what kind of output I want to log.
1
2
3
4
5
  return (
    <QRCodeScanner
    onRead={onSuccess}
    showMarker={true}
reactivate={true}- It defines a component that scans QR codes. You need to import the component
QRCodeScannerfrom thereact-native-qrcode-scannerlibrary. - It takes in props and returns JSX. you can also consider it as a function to pass properties to it. Here, the properties used are
onRead, showMarker, reactivate, flashMode and QRCodeScanner. - The property onRead is passed as an argument to the
QRCodeScannerfunction when it gets called. - The property
showMarkerexplains whether or not the app will display a marker over any detected QR code while scanning. It is set to true to show a red square around the detected QR codes. - For the property
reactivate, the argument is set as true. It means that the app can continue scanning for new QR codes after scanning one successfully. This would not need users' input before continuing to scan for more QR codes.
flashMode={RNCamera.Constants.FlashMode.auto}
- You can consider the property flashMode as a prop. It is passed to the RNCamera component. Here, I have set the FlasMode as auto to automatically turn on the flash mode if required and off if not required.
QRCodeScanner={true}
- It is a prop that can be passed to the QRCodeScanner component. It is set to true to enable the scanner to scan the QR codes and render them in the viewfinder.
topContent={
<Text style={styles.centerText}>
- Here, the prop takes in a component <Text/>. It will render the Text component on top of the QR scanner. Refer to the encircled section in image 1.

Image 1
The styles are defined at the bottom of our code in the form of const styles = StyleSheet.create({...}). Refer to image 2.
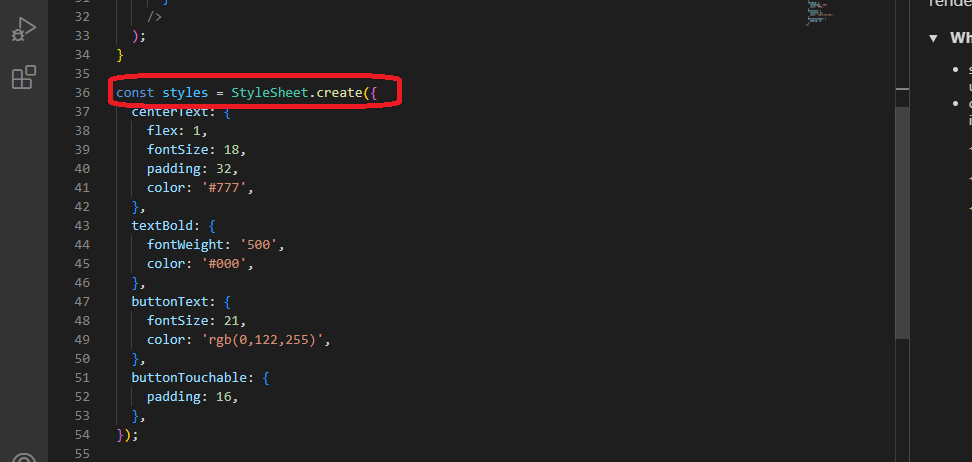
Image 2
1
2
3
4
 Go to <Text style={styles.textBold}>wikipedia.org/wiki/QR_code</Text>{' '}
          on your computer and scan the QR code.
        </Text>
}- Here, the <Text> component is used to render the text “wikipedia.org/wiki/QR_codeon your computer and scan the QR code.” here, the text “wikipedia.org/wiki/QR_code is styled in bold. Refer to image 1.
1
2
3
4
5
6
7
8
   bottomContent={
      <TouchableOpacity style={styles.buttonTouchable}>
        <Text style={styles.buttonText}>OK. Got it!</Text>
      </TouchableOpacity>
    }
  />
  )
}- Here, the code snippet defines the functioning of the content at the bottom.
- It designs a pressable button, which displays the text “Ok. Got it!”. Nothing will happen on pressing the button
1
2
3
4
5
6
7
8
9
10
11
12
13
14
15
16
17
18
19
const styles = StyleSheet.create({
  centerText: {
    flex: 1,
    fontSize: 18,
    padding: 32,
    color: '#777'
  },
  textBold: {
    fontWeight: '500',
    color: '#000'
  },
  buttonText: {
    fontSize: 21,
    color: 'rgb(0,122,255)'
  },
  buttonTouchable: {
    padding: 16
  }
});- Here, the code snippets specify how the StyleSheet has been incorporated to style the text at the centerText.
- It has fontsize of 18 pixels, padding of 32 pixels, and is colored with the code of #777.
- The font size of the text on the button is 21 pixels and is colored in rgb(0,122,255).
- The Touchable button has a padding of 16 pixels.
Running the QR code scanner on the emulator
- Open the command prompt from your project terminal. Run npm install to get all the needed dependencies. Once it is done, run the command npx react-native run-android. Since this is an android emulator and the project is also based on Android OS, the run-android is used.
- Wait for some time until it shows a green text of ‘BUILD SUCCESSFUL’. You will see the emulator start running. In your system. It will take some time to bundle.
- Then you will see a screen on the emulator similar to image 3.
- On clicking on the ‘Allow’ button (encircled section in image 3), a screen as shown in image 4 will open on the emulator. Click on ‘Got it’.
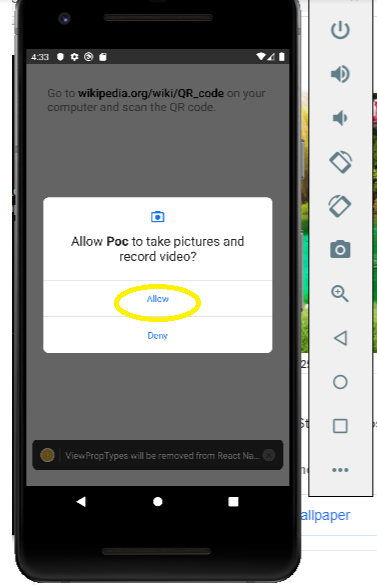
Image 3
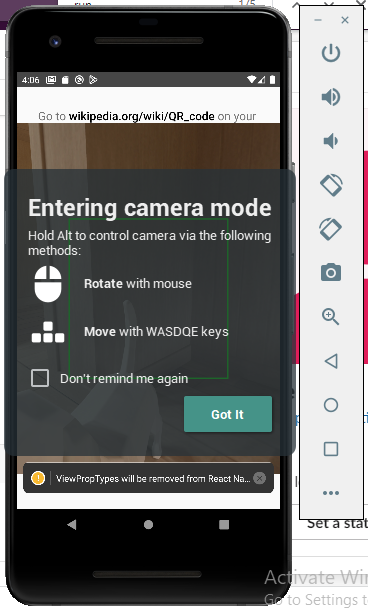
Image 4
- You can see the QR code scanning screen on your emulator. Refer to image 5.
- You need to press the Alt key to move the camera. Move your mouse and simultaneously type any of the keys W, A, S, D, Q, and E to navigate the app.
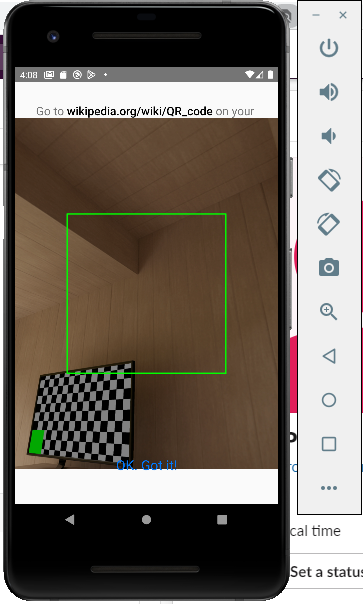
Image 5
Conclusion
Building a QR code scanner may be a difficult task but with React Native framework and its third-party library support, it becomes easier. From this article, you will get an insight about the process to navigate the Code scanning app. Moreover, I have defined the use of different props and arguments to enhance your learning process. Happy coding!!

A science graduate who has a keen interest to lean about new technologies and research area. With an experience in the field of data analytics and content writing, she aims to share her knowledge among passionate tech readers.

