Crafting a React Native Popup Menu with a Step-by-Step Approach
Whether for sorting products in an online store or selecting text formatting in a note-taking app, a well-built popup menu is essential for a modern mobile interface. Searching for a reliable reference on how a React Native Popup Menu can be crafted with ease? Then, you're in the right place! Engage your users with a visually appealing React Native Popup Menu. Also, if you need professional assistance, consider reaching out to a React native development company. In case your in-house team lacks the expertise, seek guidance and unlock a world of possibilities with React Native.
What is the Learning Objective By The End of this Blog?
Let’s keep the objectives clear so that you can decide if you want to read further.
- Be equipped with the knowledge to set up the environment for creating a React native popup menu.
- Gain insights into building user-friendly interfaces effectively, ensuring the menu responds smoothly to touch gestures.
- Learn the techniques to introduce animations and transitions.
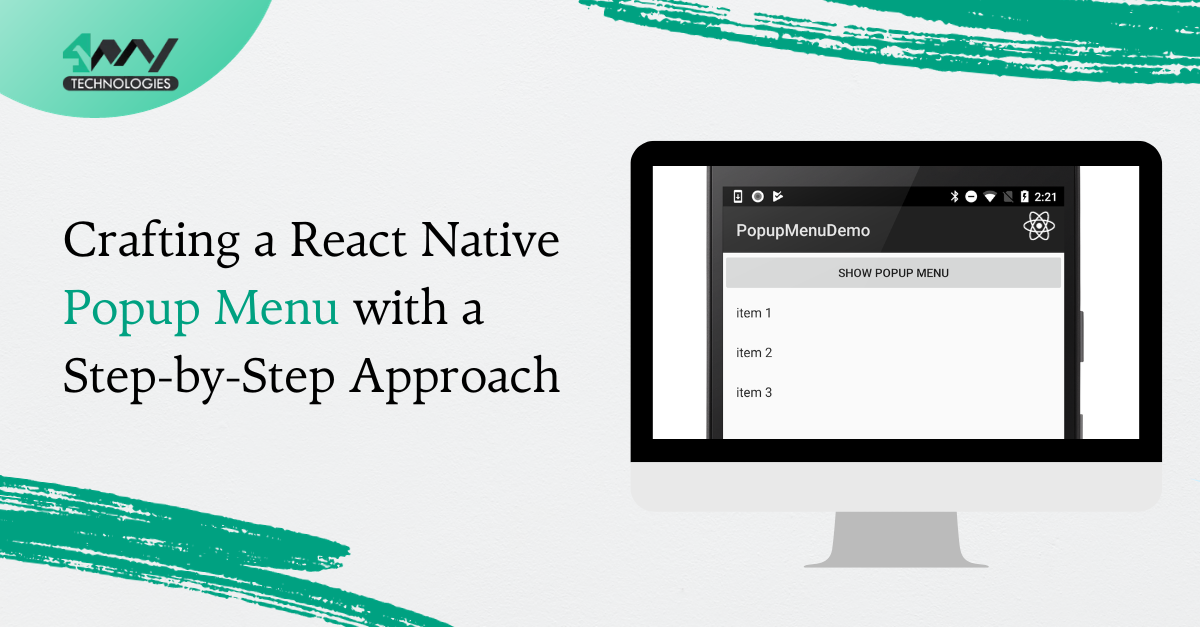
Here is a preview of the project you can build by the end of this blog.
Condition applied: You need to know the basis of coding, atleast to edit code in code editors

What are the Prior Needed Learning?
Let’s clarify that you don’t have to be an expert programmer. Just a basic understanding of React Native will suffice to build this react native popup menu.
However, there are some tasks you should consider before moving forward with the project.
Environment Setup
Creating a React Native project is a journey; you can complete the finishing line only with the right setup.
For this, install node.js, npm, Android Studio, and VS code editor. Also, note when you working on a React Native project, you have to choose a CLI: either Expo CLI or React Native CLI. Here, we have considered React Native CLI. So, install React Native CLI globally in your system.
For further reference, check the blog article on ‘How to set up the React Native Development Environment’. This setup procedure is for Android devices. However, the process may vary if you want to set up the environment for iOS devices.
A Folder for the Project
You need to save the codebase and other required assets in a container. Isn’t it? So, you need a folder specifically meant for your project. How can you build one?
- Create a folder in a simple way like you usually do—just like you would when saving pictures of those cute cats or your favorite recipes.
- Go to the terminal from this created folder.
- Pass a command
npx react-native init POP --version 0.69.5.
‘POP’ is the folder in which all the codebase and assets of your project will be saved. If you want to give it a different name. Replace ‘POP’ with a preferable name—be it 'MAGIC_CASTLE' or 'MY_AWESOME_APP'.
Get Third-Party Library
This is an additional step, but installing third-party libraries or modules beforehand will save you time. How?
You don’t have to build components from scratch. Simply import the relevant components from the respective libraries. Here, we need ‘Entypo’ from ‘@expo/vector-icons’ and ‘react-native-popup-menu’ libraries.
The Entypo icon set in @expo/vector-icons is a high-quality icon meant for use in mobile apps and other digital products.
Although it’s a library from the expo package, you can use @expo/vector-icons in a React Native CLI project. However, it requires a bit of additional setup. Open the command prompt from the project and run npm install @expo/vector-icons. While to install the react-native-popup-menu, pass a command npm i react-native-popup-menu on your project terminal.
And you have successfully installed and linked @expo/vector-icons and react-native-popup-menu to your project.
Step-by-Step Guide: Coding Section For the React Native Popup Menu
Here comes the most integral part. You have to consider three different files: data.js, ScrollViewMenu.js and App.js.
So, let’s check how to build these three files and what are they meant for.
Data.js
This file contains an array of objects defining different actions. Each has a unique icon from the Entypo icon set. You can use this in your app for a menu, a list of actions, or any other UI component.
Want a quality user experience for your apps? Then, don’t miss out icons. When designing user interfaces for mobile apps, a common pattern is to use icons alongside text. This will help you to convey your purpose and functionality clearly.
The Right Set Up
So, to do this, you need to create the Data.js file and import components.
import { Entypo } from "@expo/vector-icons";
Here, you have to import the ‘Entypo’.
Create the Data Array
Now, let’s move ahead with making space for the data array.
export const data = [
//... (add your data here)
];
Here, you need three types of data, mentioned as follows.
- ‘id’: A specific identifier.
- ‘name’: The name or description of the item.
- ‘icon’: A JSX component indicating the icon from the Entypo set.
Here is the data array for the current project (React Native popup menu).
1
2
3
4
5
6
7
8
9
10
11
12
13
14
15
16
17
18
19
20
21
22
23
24
25
26
27
28
29
30
31
32
33
34
35
36
37
38
39
40
41
42
43
44
45
46
47
48
49
50
51
52
53
54
55
56
57
58
59
60
61
62
63
64
65
66
67
68
69
70
71
72
73
74
75
76
77
78
79
80
81
{

id: 1,

name: "Mute",

icon: <Entypo name="sound-mute" size={24} color="black" />,

},

{

id: 2,

name: "Block",

icon: <Entypo name="block" size={24} color="black" />,

},

{

id: 3,

name: "Attachment",

icon: <Entypo name="attachment" size={24} color="black" />,

},

{

id: 4,

name: "Battery",

icon: <Entypo name="battery" size={24} color="black" />,

},

{

id: 5,

name: "Behance",

icon: <Entypo name="behance" size={24} color="black" />,

},

{

id: 6,

name: "Bookmark",

icon: <Entypo name="bookmark" size={24} color="black" />,

},

{

id: 7,

name: "Chat",

icon: <Entypo name="chat" size={24} color="black" />,

},

{

id: 8,

name: "Camera",

icon: <Entypo name="camera" size={24} color="black" />,

},

];
Explaining the Action Items in the Data Array
So, what are the items added to the defined data array?
- Mute: The "sound-mute" icon specifies the muting of volume.
- Block: The "block" icon signifies the action of blocking (may be the content or something else).
- Attachment: This icon visualizes an option for documents or files attachment.
- Battery: Signifies battery status.
- Behance: The "behance" icon represents a link or action related to the Behance platform.
- Bookmark: The icon is universally recognized to mark a favorite item.
- Chat: Indicates communication functionalities, like initiating or opening a chat window.
- Camera: Typically indicates a photo capture option, allowing users to take photos or access camera settings.
Using the Data Further in Components
Map the structured data (or data array) into components and create lists or popup menus.
Considering icon sets like Entypo in structured data arrays, as mentioned in this project, is an excellent way to enhance UI in React Native apps.
ScrollViewMenu.js
Wondering what is the use case of a scrollable popup menu? Building a menu in your app will let you easily access options or action items
However, if you are building for your audience, it will help you develop a user-friendly and easy-to-navigate interface. Not confident enough? Get a consultation from a professional React Native app development company.
Let’s create such a react native popup menu.
Setup or Importing Components
Before starting with an integral part, set up the relevant imports.
The syntax below does the same thing. For the complete codebase, check the project repository.
1
2
3
4
5
6
7
8
9
10
11
12
13
14
15
16
17
18
19
20
21
import { StyleSheet, Text, View, FlatList, ScrollView } from "react-native";

import React from "react";

import {

Menu,

MenuProvider,

MenuOptions,

MenuOption,

MenuTrigger,

} from "react-native-popup-menu";

import { Entypo } from "@expo/vector-icons";

import { data } from "../data";
Integral Task- Creating the ScrollView Menu Component
What you will learn in this segment is to design the codebase for the popup menu, which contains a scrollable list of items.
When users tap the three-dot icon vertically placed on the screen, a menu with the items list pops up. These items are taken from the data array (or Data.js file), and each menu item displays a name and an icon.
So, let’s introduce the main ScrollViewMenu component.
1
2
3
4
5
6
7
8
9
const ScrollViewMenu = () => {
  return (
    <MenuProvider style={styles.container}>
      <Menu>
        ...
      </Menu>
    </MenuProvider>
  );
};
In the given snippet, the ‘MenuProvider’ is the container. Within this container, define the ‘Menu’. It holds the trigger and the scrollable menu list options.
Now, style the ‘MenuTrigger’ component and adjust the position of the pop-up menu.
1
2
3
4
5
6
7
8
9
<MenuTrigger
  customStyles={{
    triggerWrapper: {
      top: -40,
    },
  }}
>
  <Entypo name="dots-three-vertical" size={24} color="black" />
</MenuTrigger>
The ‘Entypo’ component (used here) displays the three vertical dots as a menu trigger icon. Moreover, the snippet ensures that the trigger icon (three vertical dots) is placed per your requirement.
Now, you need to manage the menu options list. But how would you do it? It is as simple as it seems. Integrate the ‘ScrollView’.
1
2
3
4
5
6
7
8
9
10
11
12
13
14
15
16
17
18
19
20
21
<ScrollView style={{ height: 200 }}>

{data.map((item) => (

<MenuOption

key={item.key}

...

>

<Text>{item.name}</Text>

<Text>{item.icon}</Text>

</MenuOption>

))}

</ScrollView>
Here, the code adds each item of the data array to individual MenuOption components. Also, you need to work on styling to ensure that each item's icons and name are placed side by side (as shown in the snippet above).
Styling the Popup Menu
Make sure that the menu is positioned properly. To do this, tweak the StyleSheet segment as per your preference.
1
2
3
4
5
6
7
8
9
10
11
12
13
14
15
16
17
18
19
20
21
22
23
const styles = StyleSheet.create({

container: {

flex: 1,

marginVertical: 200,

marginHorizontal: 100,

},

scroll: {

flexDirection: "row",

alignItems: "center",

justifyContent: "space-between",

},

});
Here, the scroll style ensures that each menu item (icons and respective text) is centered in a row.
App.js
In this final segment, you will learn to incorporate the ScrollViewMenu into the key app component.
Set up the Imports
1
2
3
4
5
6
7
import { StyleSheet, Text, View } from "react-native";

import CustomMenu from "./components/CustomMenu";

import ScrollViewMenu from "./components/ScrollViewMenu";

import SimpleMenu from "./components/SimpleMenu";
With this snippet, you ensure that all relevant imports are considered. Here, the main import is the ‘ScrollViewMenu’ from "./components/ScrollViewMenu". The imported components: SimpleMenu and CustomMenu, are other variants you may want to experiment with.
Organize the Main App Component
This component is the display interface of your app.
1
2
3
4
5
6
7
8
9
10
11
12
13
14
15
16
17
export default function App() {

return (

<View style={styles.container}>

{/* <SimpleMenu /> */}

{/* <CustomMenu /> */}

<ScrollViewMenu />

</View>

);

}
Although SimpleMenu and CustomMenu are mentioned in the snippet, the ScrollViewMenu However, if you want to display those menus (CustomMenu and SimpleMenu), uncomment these lines.
As we are done with the coding section, let's move forward with the project testing process.
Testing Phase
How can you be sure that you have successfully built what you were planning? For this, you need to test the project and run it on any device- be it a smartphone or an emulator.
- Let’s run it on an emulator. But what is the way out? Follow these simple steps.
- Run the terminal from your built project
- Pass the command npm install.
- Also, run the command npx react-native run-android on the same command prompt.
This will execute your program on the emulator. Check if it is designed and built as per your preference. You can also customize it further.
Final Thoughts
Building a mobile app and want to improve user experience? You should definitely consider the flexible popup menu. You can build it even if you don't have expertise in programming. This article would provide guidance to your learning journey.
As the article mentions, you can also tailor it to your needs. Most importantly, React Native offers several built-in libraries and components, considerably reducing your effort and saving time.
So, without wasting time, practice building a React Native popup menu.

A science graduate who has a keen interest to lean about new technologies and research area. With an experience in the field of data analytics and content writing, she aims to share her knowledge among passionate tech readers.

