Building a Timer App with React Native: A Beginner's Tutorial

You may have used a timer app to track the timing of activities. Have you wondered what it takes to create a timer app? If not, then consider this article as the learning guide to building a timer app using React Native.
Also, building a fully operational software app may not require detailed knowledge of JavaScript, HTML, CSS, and React Native. A basic understanding will suffice. If you are already familiar with the React Native framework, then you can skip the steps mentioned in this article and find the source in the linked GitHub repository.
So, let's start with the steps.
What are the Pre-Requisites for the project?
Before structuring the codebase, you have to undertake pre-requisite activities, commonly followed by experts of React Native App Development company. Here are those.
Set up the React Native Environment
To create React Native project, you have two tools to choose from: React Native CLI or Expo CLI. For the current project, we will be using the React Native CLI. So, if you are following the same, you must set the environment first.
This setup is for Windows users. Mac users may have a different approach to the React Native environment setup. Proceed with the setup process by installing git on your dev system. So for the project, you have to install the following software.
- Node.js
- NPM Package Manager
- React Native CLI. You have to install this CLI globally using NPM.
- Android Studio. Configure the software by installing the Android SDK and set up the virtual device for your future projects.
- A code editor or IDE such as Visual Studio Code.
For a detailed setup process, you can check the article structured by React Native experts.
Create a Folder Locally
You need a folder to store your codebase. So, here is the step mentioned below.
- Create a folder in your system.
- Open cmd from this folder.
- Now, run the command npx react-native init Timer --version 0.71.3 and click on the Enter key.
- The Timer is the name of the project we will be creating and 0.71.3 is the version of React Native using which we will build the current project.
As we have created a local folder for the project, we will install the third-party library in the next step.
Install the Required Third-Party Library
For this project, we require a react-native-stopwatch-timer. One of the most advantageous reasons to build an app using React Native is that the open-source JS framework supports third-party libraries. So, here will take the Timer component from this library.
This library is useful for adding both the timer and stopwatch functionality. You can also add customizable features like reset, lap, and start/stop buttons. It is created on top of React Native and offers a basic API for building the timer software.
To install this library, open the terminal from the Timer folder and pass npm install react-native-stopwatch-timer on the terminal.
You can locate the library in the package-lock.json folder of the project.
Creating the Project Codebase
Now, we will start with the codebase. Open the Timer folder from the installed IDE (I am considering VS Code) and open the App.js folder for structuring project code.
Follow the code snippet and the explanation associated with it.
Importing Components
1
2
3
import React, {useState} from 'react';
import {SafeAreaView, StyleSheet, Text, View, TouchableHighlight} from 'react-native';
import {Timer} from 'react-native-stopwatch-timer';
Here, the code imports React and useState from the react library; StyleSheet, View, Text, SafeAreaView, and TouchableHighlight from the react-native library; and Timer from the react-native-stopwatch-timer library.
useState is to define state and perform state management. The standard React Native components: TouchableHighlight, View, Text, and StyleSheet are used for rendering and layout.
Defining Different States of the App
1
2
3
4
const App = () => {
  const [isTimerStart, setIsTimerStart] = useState(false);
  const [timerDuration, setTimerDuration] = useState(90000);
  const [resetTimer, setResetTimer] = useState(false);
The code introduces a functional component App with the keyword const. The App further uses the React Native hook useState to define three states: isTimerStart, timerDuration, and resetTimer.
The initial value of the isTimerStart is set as ‘false’. It indicates if the timer is active. Initially, timerDuration is put to 90000. TimerDuration indicates the timer’s total duration in milliseconds.
Similarly, the initial value of the resetTimer is kept ‘false’. It specifies whether the timer is reset.
The useState accepts a parameter and returns arrays with the current value of each state variable. A function with the keyword ‘set’, used before the name of each state variable is used to update the state of the variable.
Introducing an Object with Two Properties: Text and Container
1
2
3
4
5
6
7
8
9
10
11
12
13
14
  const options = {
    container: {
      backgroundColor: '#566573',
      padding: 5,
      borderRadius: 5,
      width: 200,
      alignItems: 'center',
    },
    text: {
      fontSize: 25,
      color: '#fff',
      marginLeft: 7,
    },
  };
The defines an object ‘options’with two properties namely text and the container. For the container, it uses a specific backgroundColor, padding, borderRadius, width, and alignItems. While for the text, the fontSize is 25 pixels, the text color is white, and the left margin of 7 pixels.
Creating the Layout using ‘View’ and ‘SafeAreaView’
1
2
3
4
5
6
 return (
    <SafeAreaView style={styles.container}>
      <View style={styles.container}>
        <Text style={styles.title}>
       React Native  Timer
        </Text>
The View component is used to create a space for the Timer app. The Text component displays the heading ‘React Native Timer’. ‘styles’ objects are used with the Text, View, and SafeAreaView components. It applies different styling to the component.
Displaying and Managing the Timer
1
2
3
4
5
6
7
8
9
10
11
12
13
14
15
16
17
18
19
 <View style={styles.sectionStyle}>
      <Timer
        totalDuration={timerDuration}
        msecs

        start={isTimerStart}

        reset={resetTimer}

        options={options}

        handleFinish={() => {
          alert('Completion Function');
        }}

        getTime={(time) => {
          console.log(time);
        }}
      />
The code snippet uses the Timer and the View components in which the latter component is used to make a container for the Timer component. The object sectionStyle is used to design the container’s layout.
The Timer has different props: totalDuration, start, reset, options, handleFinish, and getTime. They are used to customize the behavior of the timer.
The totalDuration indicates the timer’s length in milliseconds. The ‘msecs’ indicates the timing unit in which the timer will operate. The reset is for resetting the timer. The options is to customise the timer’s appearance.
The handleFinish is called when the timer completes the counting. It will display an alert message ‘Complete Function’.
The getTime is called when the timer updates the display. console.log() is used to log the current timing to the console.
Rendering TouchableHighlight Components and Updating the State
1
2
3
4
5
6
7
8
9
10
11
12
13
14
15
16
17
18
19
20
21
<TouchableHighlight
        onPress={() => {
          setIsTimerStart(!isTimerStart);
          setResetTimer(false);
        }}>
        <Text style={styles.buttonText}>
          {!isTimerStart ? 'START' : 'STOP'}
        </Text>
      </TouchableHighlight>
      <TouchableHighlight
        onPress={() => {
          setIsTimerStart(false);
          setResetTimer(true);
        }}>
        <Text style={styles.buttonText}>RESET</Text>
      </TouchableHighlight>
    </View>
    </View>
    </SafeAreaView>
  );
};
The code snippet uses two TouchableHighlight components. One onPress event handler is linked with each TouchableHighlight component.
The code executes an arrow function when the first TouchableHigllight is clicked. It then calls the setResetTimer and setIsTimerStart to update the variable’s state. The setIsTimerStart function is used to update the state of isTimerState. The exclamation mark(!) used is to negate the current value of isTimerStart. On the other hand, setResetTimer is used to indicate the value of resetTimer.
The Text component is used to add the text of the button. It will show ‘START’ and ‘STOP’ on the same button depending on the state of the isTimerState variable.
Another onPress event handler is used with the second TouchableHighlight component. The event handler will be activated when users will press the button.
Here, the onPress is used to set the setIsTimerStart as false and setResetTimer as true. This action will stop the timer and rest the timer again to the initial value. A text ‘RESET’ is added to the button with a styling object styles.buttonText.
Structuring the Styling Section for the Project
1
2
3
4
5
6
7
8
9
10
11
12
13
14
15
16
17
18
19
20
21
22
23
24
25
26
export default App;

const styles = StyleSheet.create({
  container: {
    flex: 1,
    padding: 10,
    justifyContent: 'center',
    alignItems: 'center',
  },
  title: {
    textAlign: 'center',
    fontSize: 20,
    fontWeight: 'bold',
    padding: 20,
  },
  sectionStyle: {
    flex: 1,
    marginTop: 32,
    alignItems: 'center',
    justifyContent: 'center',
  },
  buttonText: {
    fontSize: 20,
    marginTop: 10,
  },
});
It is the CSS part of the project. As you can notice, four styling objects (container, title, sectionStyle, and buttonText) are added to it.
Executing the Codebase
As you have completed framing the codebase, you have to check whether it is running or not. So, to check this, consider the following steps.
- Open the terminal from your project folder.
- Run npm install and then run npx react-native run-android on the terminal.
Wait for some time till the project bundles and eventually run the project on a virtual device or the emulator.
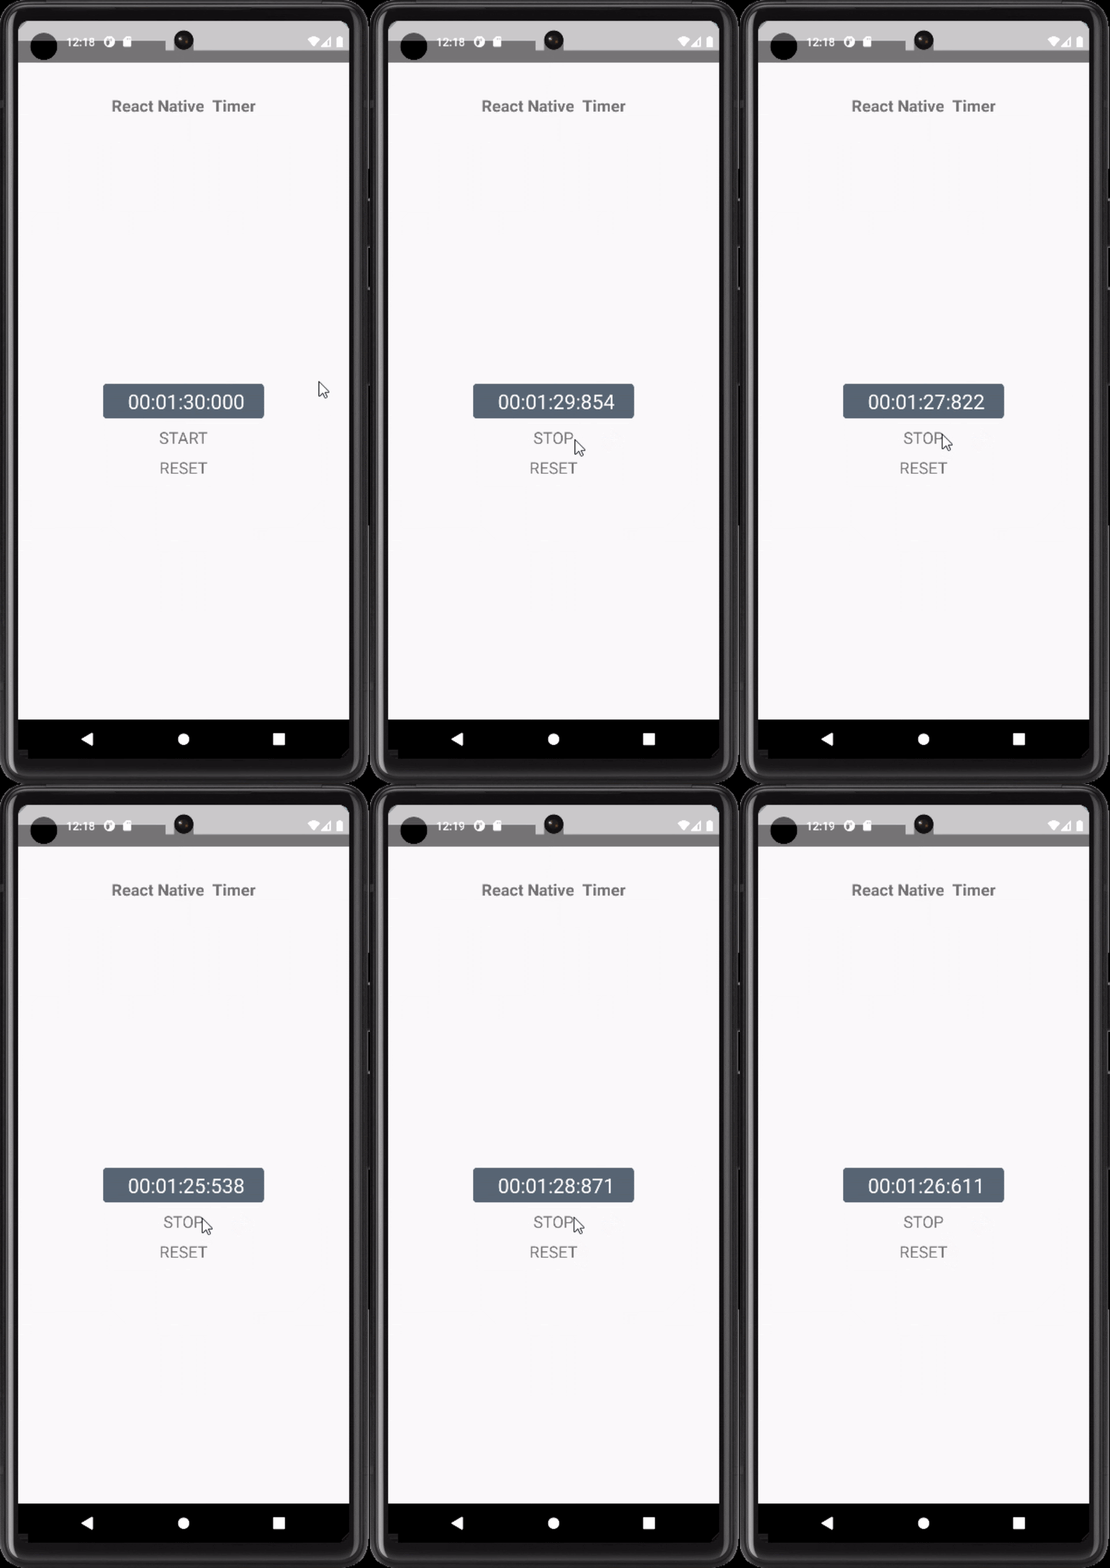
Here, is the output of the project.

Summary
Hope you have a clear understanding of the steps involved in building the Timer app.
Building a Timer using React Native is not that difficult. You need a basic understanding of the framework and you are good to go. Start with the prerequisites if you are new to using the framework and then start building the code. Once you are done with the codebase and the overall styling of the project, run the program on an actual or virtual device.

A science graduate who has a keen interest to lean about new technologies and research area. With an experience in the field of data analytics and content writing, she aims to share her knowledge among passionate tech readers.