Beginners Guide to Native iOS and Android Mobile App Development

Native app development is the production of coded programs that work on particular gadgets and operating systems. You can construct native applications for systems, smart TVs, and a wide range of contraptions, the most prominent and in-demand target gadgets for native app development are smartphones.
Nowadays, the most demanded mobile applications are android apps and iOS apps. These two had completely overtaken the market from the other native mobile apps in the past decade.
What are the Native Apps?
Native applications are mobile applications (as matter of fact applications for every smart electronic device with an operating system ) for the specific operating system based mobile devices (well in this article we are going to stick to the native mobile app development) and are installed on the device through the dedicated app store ( for android Google Play Store and for iOS App Store) without any hustle-bustle of downloading the applications through a browser and then installing them.
What is the Native Mobile App Development?
Native mobile app development is creating a mobile application solely for the targeted operating system. Mobile app development will only be possible with dedicated programming languages and tools that are meant for the particular platform. For example, for Android app development Kotlin and Java are your go-to languages, and Android Studio is your tool. And likewise, for iPhone app development, you can use either Swift or Objective-C and the best tool will be Xcode.
Benefits of Native App Development
- Native app development provides broad functionalities.
- It is faster and provides more responsive software performance.
- Better for providing push notifications.
- Provides better User Interface with great UE (user experience) because Native app development is operating system specified.
- Provides more security in comparison to other types of applications because it’s particularly built for one type of platform.
- It definitely provides better store support for the applications and faster and better updates.
- Native apps have top-notch functionality and better access to hardware and other operating system-specified tools.
Drawbacks of Native App Development
- Costly, no matter how amazing native apps are they are definitely not cost-effective.
- Time-consuming. Nowadays, every person, every business doesn’t only want one type of mobile application. So obviously, building both Android and iOS applications it’s pretty time-consuming.
- No one codes. As a developer, you have to write code for both operating systems.
How to Develop Native Mobile App
I wrote this one for beginners who are not well-aware of the tools but do know a little bit of Java, Objective-C, or swift but want to try their hand at android app development or iPhone app development. If you’re looking for easier ways to learn native mobile app development, this article is for you all.
How to Develop an Android App
This one is for the beginners level who are not well-aware of the android studio but do know a little bit of Java. but want to try their hand at android app development. If you’re looking for simpler techniques to learn native mobile app development, you are at the right place.
First Step
- Download and install Android Studio.
- Launch the Android Studio on your system.

- At the very first page of the Android Studio, select and click on ‘Start a New Android Studio Project’.

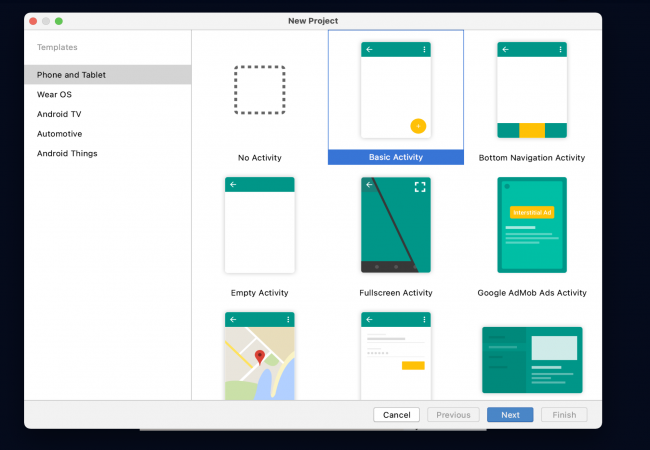
- Then, it’ll direct you to an ‘Activity’ page, here select ‘Basic Activity’ and click Next.
- This will take you to the ‘Configure Your Project’ page, which contains basic information about your first Android app. On this page, you can rename your first application as per your choice.

- Make a note of the ‘Save location’ just in a case scenario when you need to locate it.
- The language chosen should be ‘Java’, but if you’re aware of Kotlin that will be fine as well.
- Click on Finish.
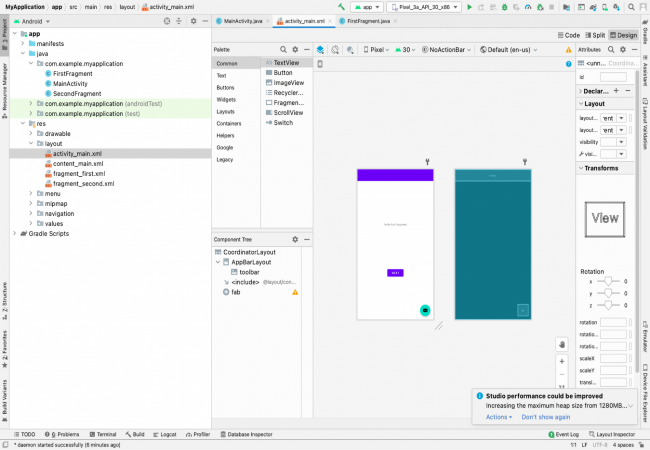
After the background processing, it’ll take you to the main window of your Android project. There will be two tabs available on the right-hand side –
1 Activity_main.xml – this is the visual representation of how your application’s main screen will look like. Here, you can drag and drop the buttons, text-box, text-view (the text that’ll be visible on screen), password-bar whatsoever you need without being worried about the coding.
2. MainActivity.java – is purely about the coding. Here, you’ll punch the code lines about the functions of the tools that you have dragged and dropped and what exactly your main screen of the application will do.
Second Step
Examine the project structure and the layouts available. Make yourself aware of the things and features that are available at your fingertips.
Third Step
The utmost important step for executing and testing your application is you have the device to test-run the application. There are two ways –
- Run it on the real device
1. Connect your smartphone to your system with a USB cable. There are chances that the required USB driver won’t be available on your device. Make sure you check it.
2. Start USB debugging into Developer Mode window :
- Open Settings on your smartphone.
- Scroll to the end or either search About Phone.
- Go to Build Number and tap seven times.
- After that, come back to the main settings and scroll down to find Developer Options.
- In the Developer Options screen look for USB Debugging and enable it.
3. Select the android app developed by you, that you want to test-run.
4. In the toolbar, select the desired device you want to run your application on.
5. Then click on the Run button, on the right-hand side of the toolbar.

- Run it on Emulator
- Firstly, you need to create an Android Virtual Device (AVD) that can be later on used by the emulator for the execution of the android app.
- Open the android app developed by you that you wanted to test run.
- On the toolbar, from the drop-down box for the targeted device choose the Virtual Device you want to execute the application on.
- Then click on the Run button, on the right-hand side of the toolbar.

Fourth Step
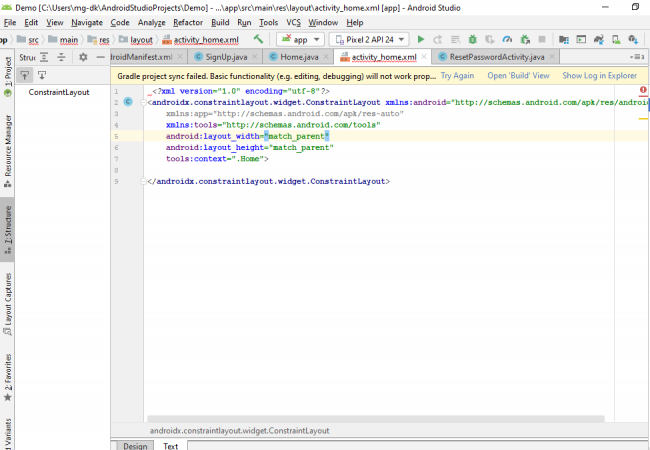
This one is about using the .xml file. Working on the layout of your application, how it’ll look like and what features you want to use. All you have to do is drag and drop the snippets you want in your application. You can use TextView – to show a fixed Text on your application like “Welcome”. After choosing the snippets arrange them and resize them as per your need. After completing this, click on Run to have a virtual representation of how it’s going to look.
Fifth Step
Your snippets still don’t work, to make them function you have to open the .java tab and start punching in the code. Write the code for what you want your TextView to show and how you want your button to work. To show the progress of your application when you click the button, add a new Activity. This new Activity will show the progress, you can keep it simple with only a welcome message or can display the name of the Native mobile app developed by you. Click on Run, for the test run.

Following these steps, your first android application is up and running. In case of further assistance, feel free to drop a comment.
How to Develop an iOS App
This one is for the beginners who are not well-aware of the Xcode but do know a little bit of Swift or Objective-C but want to try their hand at iPhone app development. This article walks you through the basic steps to develop a simple iOS application.
Step One
Download and install Xcode on your Mac and if you’re a Windows user you can use Flutter for the iPhone app development.
Step Two
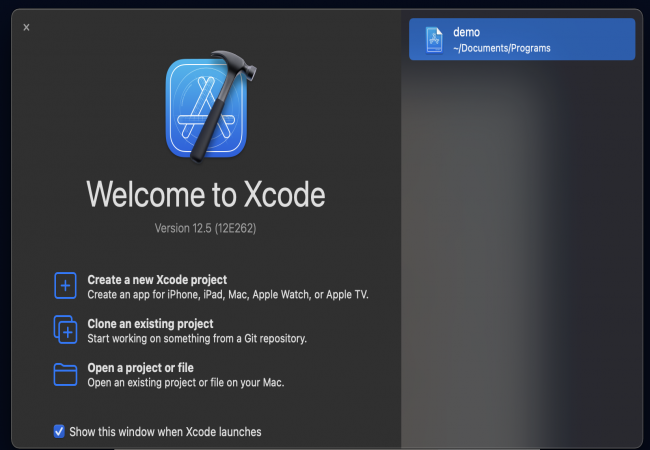
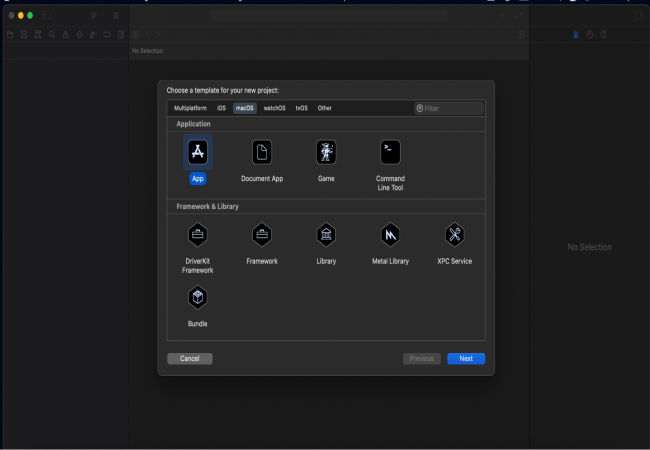
- Launch Xcode. And select ‘Create a New Xcode Project’.
- Select App and click Next.
- The next step will be naming your iOS application.

- To select the language, choose the one you’re well-versed with.
- Make a note of the ‘Save location’ just in a case scenario when you need to locate it.
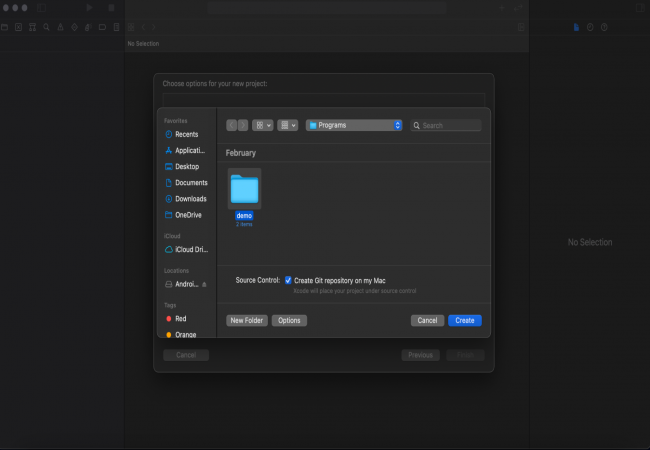
Step Three
Choose the folder you want to save your project in.
Step Four
Examine the project structure and the layouts available. Make yourself aware of the things and features that are available at your fingertips.

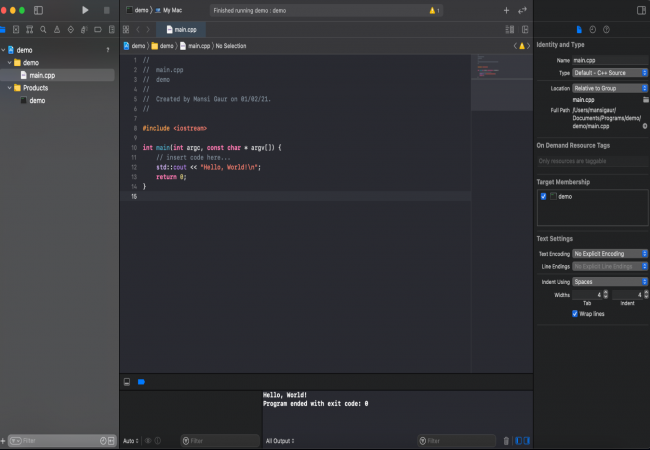
Step Five
After selecting the folder, and exploring the software. You can punch in the code, the basic code maybe something like “Hello World” and try to execute, just to make sure your Gradle is built successfully and giving you the desired output.
Step Six
After running the basic program and getting the satisfactory output you can start writing the code for your desired application. And if you are stuck anywhere, you can always refer to the in-built Xcode guide that will explain the working and usage of the functions. You can always test run your applications to see how the output will.
Step Seven
You can always have a visual representation of how your iOS application will look. During the 2.3 steps mentioned early right below the language option, there’s another drop-down for selecting User Interface. If you go ahead and select the Storyboard, it’ll give you the virtual stimulation of how an iPhone app developed by you will look like. Storyboards have drag and drop options where you can drag and drop the snippets, text boxes, buttons whatever you want to use on the screen of your virtual phone. On the right-side panel, you can change the size and the text on the snippets as per your wish.

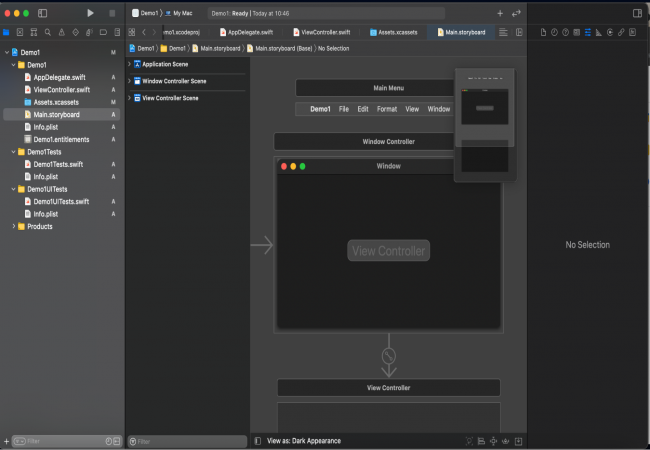
This is how the storyboard demonstration will look. You can drag and drop whatever snippet you want.
This raises an important question –
What to choose between Storyboard and SwiftUI?
As a beginner, I personally recommend you to go for Storyboard because it gives you a virtual representation and definitely simpler and easy to use because of the drag and drop facility. But if you’re well-versed with the Swift coding and won’t mind resolving a few errors then you can definitely go for SwiftUI.
Wrap Up
This article gives you an insight into native app development and native applications as well. Through this one, I tried to give you basic knowledge about native mobile app development and how to build basic, beginners’ level Android and iOS applications.

A freelancing blogs and e-books writer who keeps you up with the trending technologies and user guides. A blogger who is currently a post-graduate living in United Kingdom and trying to make her niche as a Data Scientist. Before taking a deep dive into the "Data-World", she got a Bachelor's Technology degree in Computer Science and has always dreamed of writing as a kid which inspired her to write wonderful content with the right amount of technical terms to make it easy for the beginners and as well full-fledged developers to grasp a hold onto the computer technologies.

